Signamax Connectivity System 065-9066
www.signamax-us.com
www.signamax-eu.com
Configuring the TCP/IP Protocol
Configuring the TCP/IP Protocol
Configuring the TCP/IP Protocol
Configuring the TCP/IP Protocol
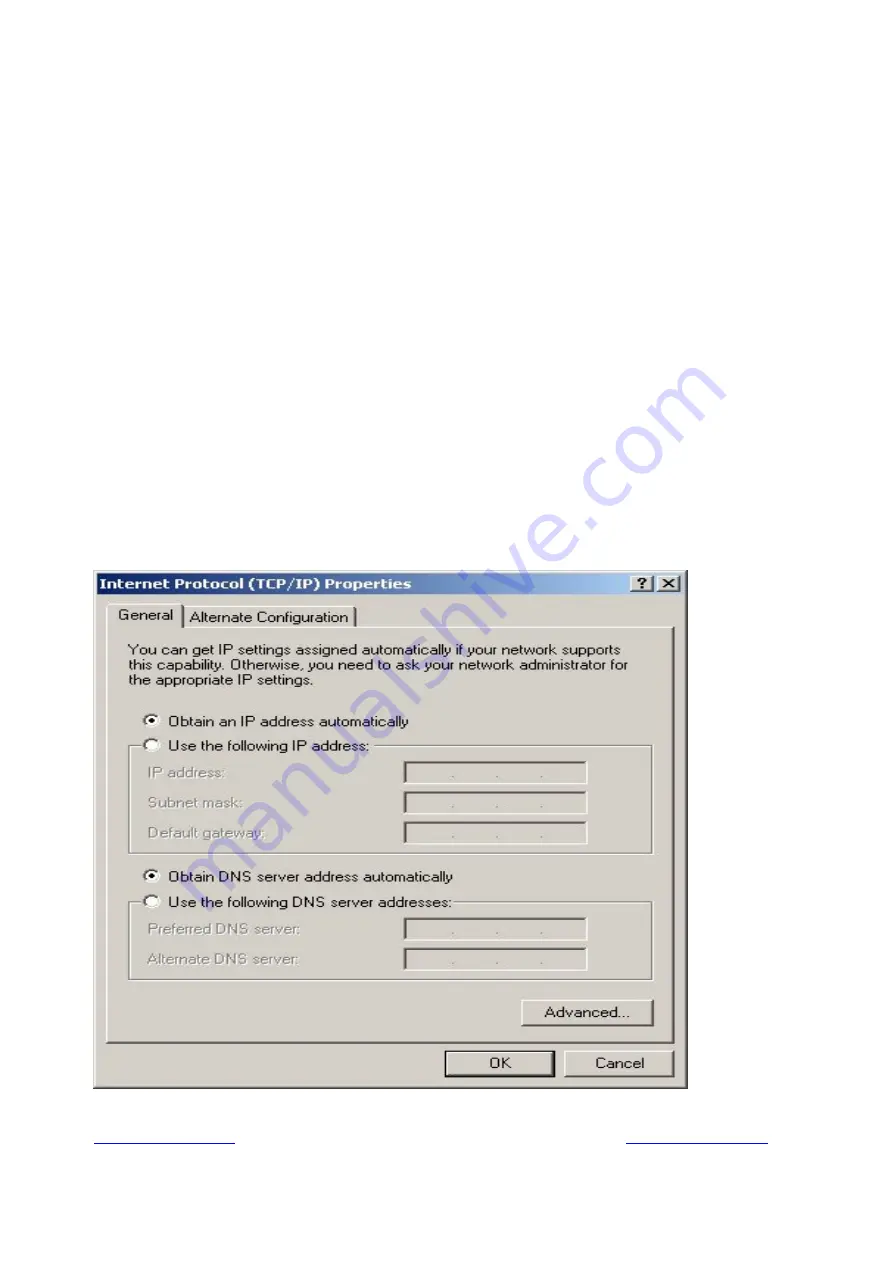
1. On the Network dialog box Configuration card, select TCP/IP and then click Properties.” The
TCP/IP Properties dialog box will open.
2. On the IP Address tab, Change the IP address to 192.168.
192.168.
192.168.
192.168.1
1
1
1....2
2
2
2(2~254 is ok)
the subnet mask to 255.255.255.0
255.255.255.0
255.255.255.0
255.255.255.0, the gateway and the preferred DNS server to 192.168.
192.168.
192.168.
192.168.1
1
1
1.1
.1
.1
.1
5. click OK. A dialog box will pop up asking you to restart the PC. Click Yes”.
Checking TCP/IP settings
Checking TCP/IP settings
Checking TCP/IP settings
Checking TCP/IP settings
1. After completing the previous steps, click Start -> Run -> and type ipconfig /all. The IP
Configuration window will open. If the PC does not show an IP address in the 192.168.1.2 to
192.168.1.254 range, click the ipconfig /release button to release the current configuration.
Wait a few seconds and click “ipconfig/renew” to get a new IP configuration from the router.
2.
If the IP configuration is correct, you will be able to use the PING diagnostic utility built into
Microsoft Windows to ping the router. Click Start -> Programs -> MS-DOS Prompt. A
command mode window will open.Type “ping 192.168.1.1” (default IP of the router) to check
the network connectivity. If both hardware and software are correct, your computer will
receive a response from the router as shown on the next page. If not, verify that the Ethernet
cable is connected to the router properly and the Ethernet port LED on the front panel is lit.


