3
OPERATING INSTRUCTIONS
Wear safety glasses which conform to ANSI Standard
Z87.1 or EN 166.
Always position yourself to one side of the strap
while tensioning and sealing. Make sure all
bystanders are clear before proceeding. Maintain
proper footing and balance.
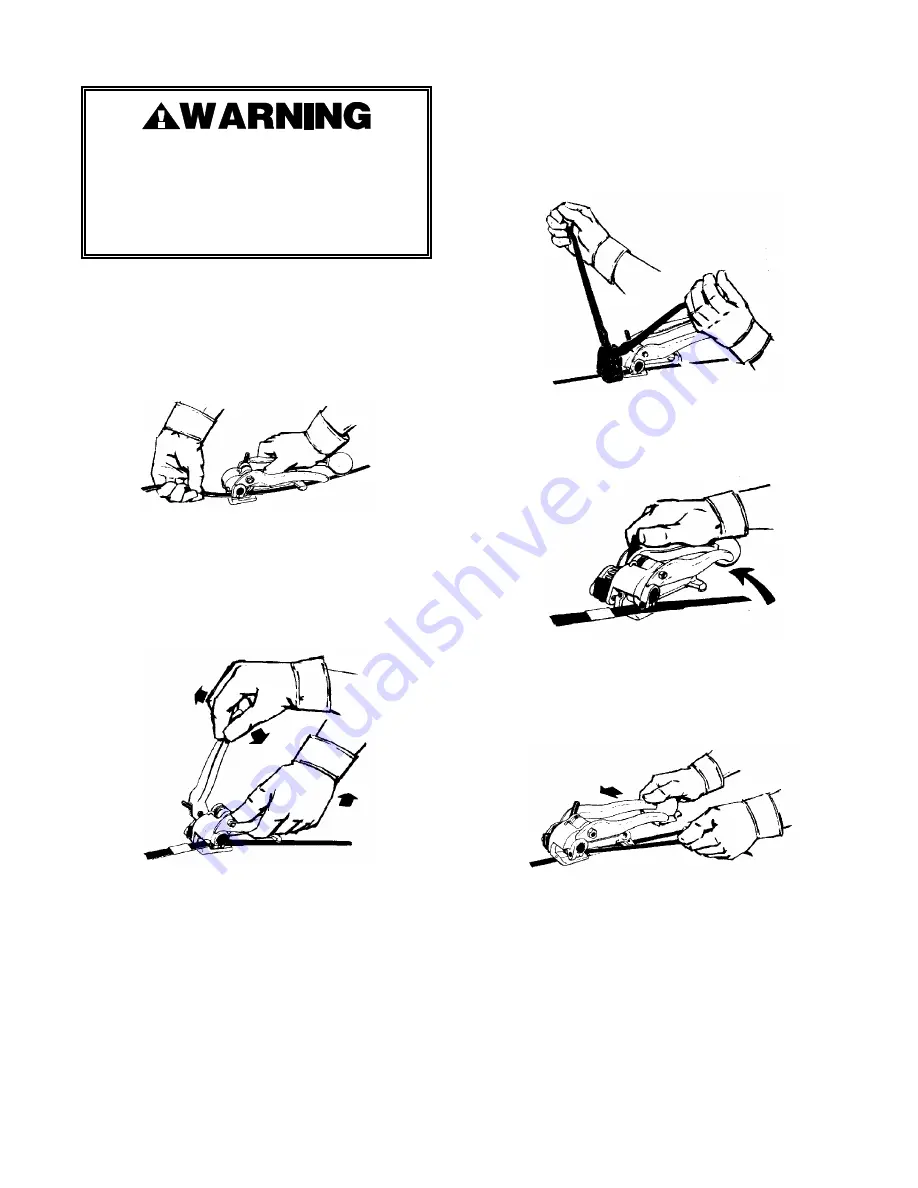
1.
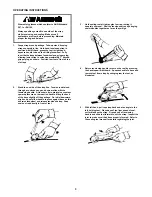
Drape strap around package. Take-up slack, keeping
straps squarely in line. Hold hand tensioned strap in
position with left hand, grasp the tool in right hand,
squeeze handle to base, thus lifting feedwheel. Fully
insert both straps between feedwheel and gripper plug,
allowing lower strap to extend approximately 1" beyond
gripper plug, as shown. Position rear foot of tool on top
of straps.
2.
Stand to one side of the strap line. Tension is obtained
through a continuous up and down motion with the
tensioning handle. At the same time, maintain a constant
upward pressure on the reaction handle, lifting the back
of the base slightly off the package. On initial downward
strokes, do not allow handle to press against base as this
will raise feedwheel and release tensioned strap. Snap
seal on strap directly in front of tool.
3.
Hold sealing tool at right angles to strap, resting it
squarely over seal. Seal the tensioned strap by bringing
sealer handles together as far as they will go.
4.
Return tensioning handle to rest on the tool by pressing
the handle pawl with thumb. Squeeze handle to base and
remove tool from strap by swinging rear foot out, as
illustrated.
5.
With left hand, pull top strap back and at an angle to the
left, holding taut. Place base of tool just ahead of seal,
cutter blade on the strap. Grasp knob of tensioning
handle and slide tool forward to cut the strap. Inspect the
joint to make sure it had been properly formed. Refer to
the sealing tool manual for details regarding the joint.


