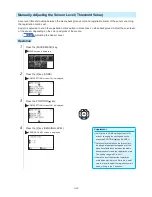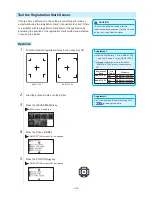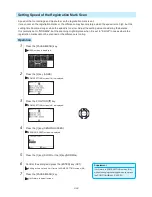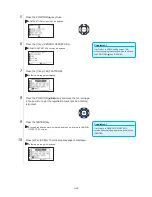
5-25
Supplement
It will return to ARMS SETTING screen (4/4)
without changing the settings when you press
the [3] key (CANCEL).
6
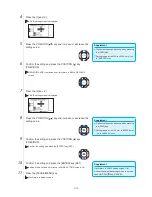
Press the [3] key (TEST ARMS SENSOR).
TEST ARMS SENSOR screen is displayed.
Supplement
It will return to TEST ARMS SENSOR screen
without changing the settings when you press
the [4] key (CANCEL).
7
Press either the [1] key (TYPE 1) or the [2] key (TYPE 2)
depending on the type of the registration mark to be used.
Following message is displayed.
8
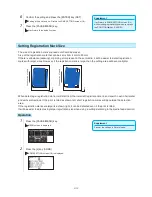
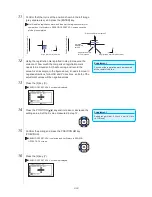
Move the tool to the position to start scanning of the
registration mark by pressing the POSITION (
) key.
Registration mark scan area
Fe
ed d
ire
ct
io
n o
f m
ed
ia
MARK TYPE 1
MARK TYPE 2
Fe
ed d
ire
ct
io
n o
f m
ed
ia
Move the tool inside this area
Move the tool inside this area
Supplement
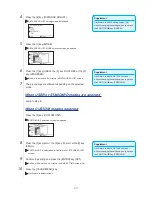
Following error is displayed when the
registration mark was not scanned properly.
Press the [1] key (SCAN AGAIN) to scan again,
or the [2] key (CANCEL) to exit.
9
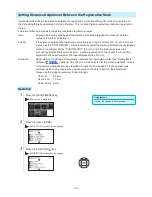
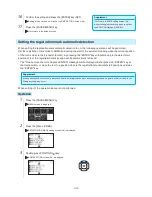
Confirm the position of the tool and press the [ENTER] key.
The plotter will automatically detect the registration mark and cut the
peak of each registration marks.
10
Confirm the cutting result.
See "Adjusting for the Registration Mark Scan Position"
P.5-27
and
adjust if the cutting position is shifted. See "Adjusting the Sensor Level"
P.5-20
and adjust if the registration mark cannot be scanned.
Summary of Contents for Vinyl Express Qe6000
Page 1: ...CUTTING PLOTTER USER S MANUAL MANUAL NO VEXQe60 UM 151...
Page 2: ......
Page 24: ......
Page 86: ......
Page 146: ......
Page 152: ......
Page 168: ......
Page 194: ......
Page 208: ......
Page 232: ...A 4 Qe6000 900 1046 593 Unit mm Dimensional accuracy 5mm A 3 External Dimensions...
Page 244: ......
Page 246: ......


