Instruction Manual VisGuard 2
Servicing
90
14162E/2
WORKSTEP
ADDITIONAL INFO / IMAGES
5.
Insert the checking unit into the sample inlet
as follows:
1. Remove the protective casing from the
checking unit.
2. Insert the checking unit into the sample in-
let.
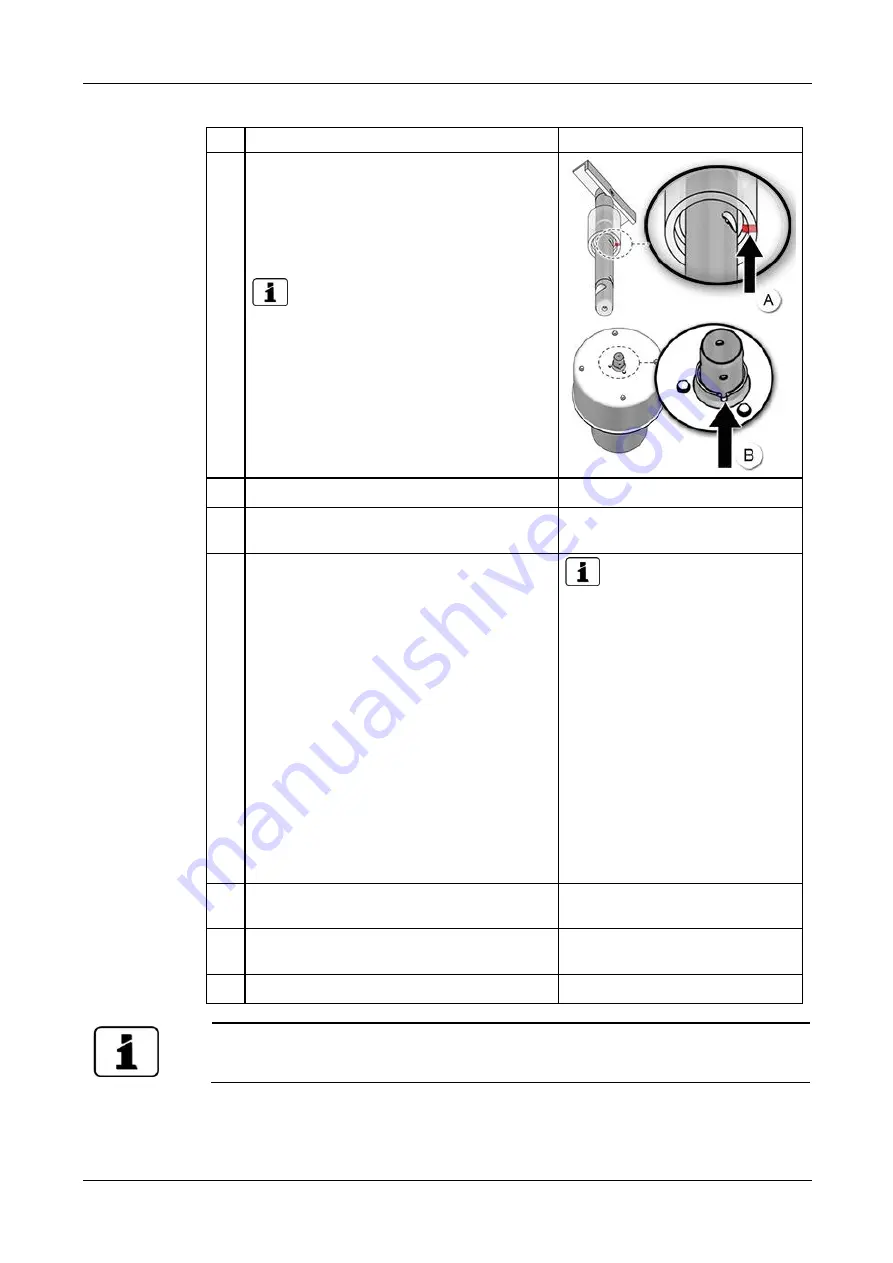
Ensure that the pin (A) is aligned to the
groove (B) on the sample inlet.
3. Rotate the checking unit clockwise up to
the stop to eliminate any play.
6.
Switch to the
Recalibration\C1
menu.
7.
Check whether the saved nominal value mat-
ches the information on the checking unit.
8.
Carry out the adjustment as follows:
Press the
initiate...
button and wait. The LED
on the photometer also starts to flash.
If the adjustment was successful, this is con-
firmed with
Adjustment OK
. This completes
the adjustment.
If the adjustment was
not
successful, it is in-
dicated with
Adjust. fault
. In this case, check
the points in the following list one after the
other:
Cleanliness of the checking unit?
Correct checking unit used?
Does the nominal value match the value
on the checking unit?
Soiled optics in the instrument? In this
case, contact the service technician.
If the check could not be
successfully completed, contact
your country representative.Section
11
9.
Remove the checking unit and reattach the
protective casing.
10. Reattach the protection cover, heater or hose
to the sample inlet.
11. The instrument can now be operated again.
A new recalibration factor is determined if adjustment is successful. The deviation from the
original state is displayed under
Curr. corr.
.


