43
ENGLISH
Waste ink bottle installation and replacement
Note
-
Replace the waste ink bottle carefully not to bump your head on
the printer upper part.
1
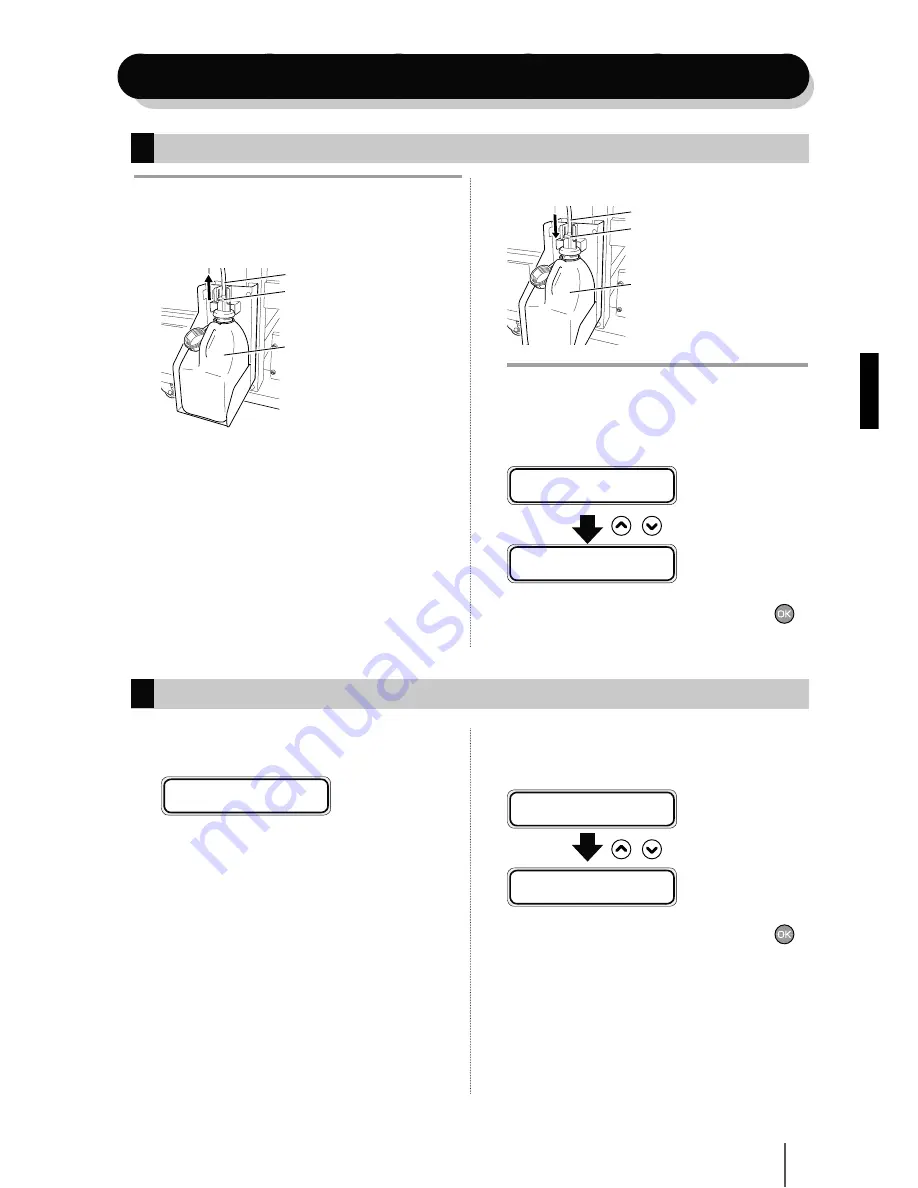
Slide the lever up and lift the whole cap.
Tube
Lever
Waste ink bottle
2
The ink drips from the tube. Leave it for a while.
3
Remove the full waste ink bottle from the unit
paying attention not to spill the waste ink. Then
cap it and replace it with a new one.
4
Wipe off the spilt ink in the waste ink bottle unit.
5
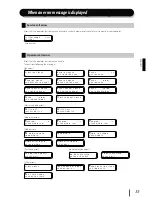
Slide the lever up and install a new waste ink
bottle.
6
Lower the lever.
Tube
Lever
Waste ink bottle
Note
-
Do not hit the external cover's upper part, or the waste ink
may spill.
7
The message to select the waste ink counter
reset (clear) is displayed.
# B O T T L E E M P T Y ?
* N O
,
# B O T T L E E M P T Y ?
* Y E S
8
Select "BOTTLE EMPTY? *YES" and press the
key.
Procedure when the waste ink bottle becomes full
Procedure when no waste ink bottle is installed
1
Confirm that the printer recognizes no waste ink
bottle with the guidance message is displayed.
B O T T L E O U T
I N S T A L L B O T T L E
2
Install a new waste ink bottle.
Refer to
[Procedure when the waste ink bottle
becomes full]
.
3
Confirm the message to select the waste ink
counter reset (clear) is displayed.
# B O T T L E E M P T Y ?
* N O
,
# B O T T L E E M P T Y ?
* Y E S
4
Select "BOTTLE EMPTY? *YES" and press the
key.


