


3
Hardware Installation
The
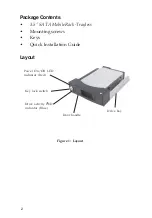
3.5" SATA MobileRack - Trayless
fits into the
5.25" drive bay. General instructions for installing the
mobile rack are provided below. Since the design of
computer cases and motherboards vary, refer to your
computer
’
s reference manual for further information, if
needed.
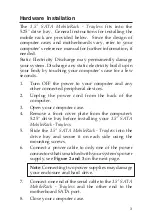
Static Electricity Discharge may permanently damage
your system. Discharge any static electricity build up in
your body by touching your computer
’
s case for a few
seconds.
1.
Turn OFF the power to your computer and any
other connected peripheral devices.
2.
Unplug the power cord from the back of the
computer.
3.
Open your computer case.
4.
Remove a front cover plate from the computer's
5.25" drive bay before installing your
3.5" SATA
MobileRack - Trayless.
5.
Slide the
3.5" SATA MobileRack - Trayless
into the
drive bay and secure it on each side using the
mounting screws.
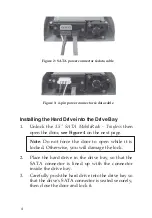
6.
Connect a power cable to only one of the power
connectors that is matched with your system's power
supply, see
Figure 2 and 3
on the next page.
Note
: Connecting two power supplies may damage
your enclosure and hard drive.
7.
Connect one end of the serial cable to the
3.5" SATA
MobileRack - Trayless
and the other end to the
motherboard SATA port.
8.
Close your computer case.


