background image

16

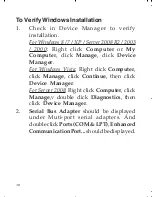
To Verify Windows Installation

1.

Check in Device Manager to verify

installation.

For Windows 8 / 7 / XP / Server 2008 R2 / 2003

/ 2000

: Right click 

Computer

 or 

My

Computer

, click 

Manage

, click 

Device

Manager

.

For Windows Vista

: Right click 

Computer

,

click 

Manage

, click 

Continue

, then click

Device Manager

.

For Server 2008

: Right click 

Computer

, click

Manage

,v double click 

Diagnostics

, then

click 

Device Manager

.

2.

Serial Bus Adapter 

should be displayed

under Muti-port serial adapters. And

double click 

Ports (COM & LPT)

Enhanced

Communication Port...

 should be displayed.

Summary of Contents for PCI Express Serial

Page 1: ...ovides additional serial ports to your system Key Features and Benefits Provides serial ports to PCI Express enabled system Supports serial port data transfer rate up to 921 6Kb s Built in 15KVDC ESD serial interface protection Built in 128 byte FIFO buffer for ID E80011 S1 ID E80111 S1 built in 256 byte FIFO buffer for ID E20211 S1 Built in H W S W data direction flow control ...

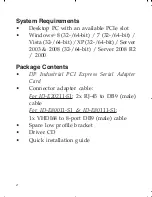
Page 2: ...32 64 bit Server 2003 2008 32 64 bit Server 2008 R2 2000 Package Contents DP Industrial PCI Express Serial Adapter Card Connector adapter cable For ID E20211 S1 2x RJ 45 to DB9 male cable For ID E80011 S1 ID E80111 S1 1x VHDI68 to 8 port DB9 male cable Spare low profile bracket Driver CD Quick installation guide ...

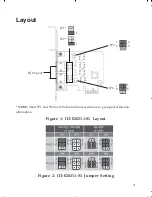
Page 3: ...ut Figure 1 ID E20211 S1 Layout NOTE Short JP1 and JP2 for 120 ohm terminal resistance to get signal reflection elimination Figure 2 ID E20211 S1 Jumper Setting RJ 45 port JP6 JP3 1 2 6 5 1 2 6 5 JP1 JP2 1 1 ...

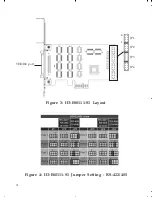
Page 4: ...4 Figure 3 ID E80111 S1 Layout Figure 4 ID E80111 S1 Jumper Setting RS 422 485 VHDI68 port JP1 JP2 JP3 JP4 1 4 ...

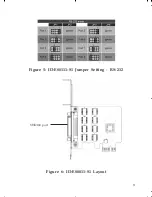
Page 5: ...5 Figure 5 ID E80111 S1 Jumper Setting RS 232 Figure 6 ID E80011 S1 Layout VHDI68 port ...

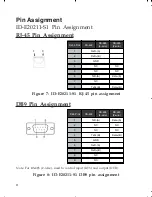
Page 6: ...in assignment 1 8 Note For RS 485 2 wire need to control input RTS and output DTR RJ45 Pin RS 422 RS 485 4 wire RS 485 2 wire 1 RxD A 2 RxD B 3 GND 4 NC NC 5 NC NC 6 TxD A Data A 7 NC 8 TxD B Data B DB9 Pin RS 422 RS 485 4 wire RS 485 2 wire 1 TxD A Data A 2 NC NC 3 NC NC 4 TxD B Data B 5 GND 6 RxD A 7 RxD B 8 NC 9 NC DB9 Pin Assignment ...

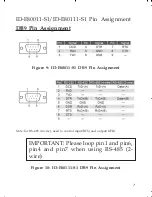
Page 7: ...t ID E80011 S1 ID E80111 S1 Pin Assignment DB9 Pin Assignment Note for RS 485 2 wire need to control input RTS and output DTR Figure 10 ID E80111 S1 DB9 Pin Assignment IMPORTANT Please loop pin 1 and pin6 pin4 and pin7 when using RS 485 2 wire ...

Page 8: ...8 Figure 11 ID E80011 S1 ID E80111 S1 VHDI68 Pin Assignment RS 232 Mode VHDI68 Pin Assignment 34 68 35 1 ...

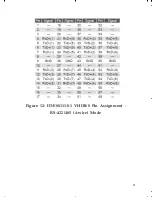
Page 9: ...9 Figure 12 ID E80111 S1 VHDI68 Pin Assignment RS 422 485 4 wire Mode ...

Page 10: ...e any static electricity build up in your body by touching your computer s case for a few seconds Avoid any contact with internal parts and handle cards only by their external edges Note For low profile chassis remove the standard height bracket and install the enhanced low profile bracket now 1 Turn OFF the power to your computer and any other connected peripheral devices 2 Unplug the power cord ...

Page 11: ...ard s bus connector with the selected PCIe slot on the motherboard Push the board down firmly but gently until it is well seated 5 Replace the slot bracket s holding screw to secure the card 6 Replace the computer cover and reconnect the power cord ...

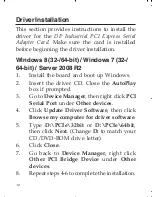
Page 12: ...d and boot up Windows 2 Insert the driver CD Close the AutoPlay box if prompted 3 Go to Device Manager then right click PCI Serial Port under Other devices 4 Click Update Driver Software then click Browse my computer for driver software 5 Type D PCIe 32bit or D PCIe 64bit then click Next Change D to match your CD DVD ROM drive letter 6 Click Close 7 Go back to Device Manager right click Other PCI ...

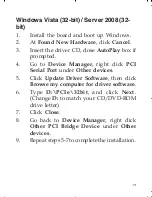
Page 13: ...Go to Device Manager right click PCI Serial Port under Other devices 5 Click Update Driver Software then click Browse my computer for driver software 6 Type D PCIe 32bit and click Next Change D to match your CD DVD ROM drive letter 7 Click Close 8 Go back to Device Manager right click Other PCI Bridge Device under Other devices 9 Repeat steps 5 7 to complete the installation ...

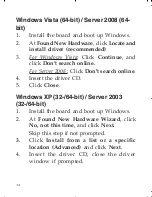
Page 14: ...rch online For Server 2008 Click Don t search online 4 Insert the driver CD 5 Click Close Windows XP 32 64 bit Server 2003 32 64 bit 1 Install the board and boot up Windows 2 At Found New Hardware Wizard click No not this time and click Next Skip this step if not prompted 3 Click Install from a list or a specific location Advanced and click Next 4 Insert the driver CD close the driver window if pr...

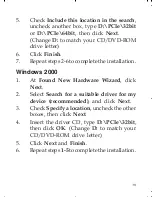
Page 15: ... complete the installation Windows 2000 1 At Found New Hardware Wizard click Next 2 Select Search for a suitable driver for my device recommended and click Next 3 Check Specify a location uncheck the other boxes then click Next 4 Insert the driver CD type D PCIe 32bit then click OK Change D to match your CD DVD ROM drive letter 5 Click Next and Finish 6 Repeat steps 1 5 to complete the installatio...

Page 16: ...anage click Device Manager For Windows Vista Right click Computer click Manage click Continue then click Device Manager For Server 2008 Right click Computer click Manage v double click Diagnostics then click Device Manager 2 Serial Bus Adapter should be displayed under Muti port serial adapters And double click Ports COM LPT Enhanced CommunicationPort shouldbedisplayed ...

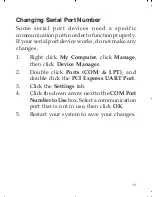
Page 17: ...s do not make any changes 1 Right click My Computer click Manage then click Device Manager 2 Double click Ports COM LPT and double click the PCI Express UART Port 3 Click the Settings tab 4 Click the down arrow next to the COM Port NumbertoUsebox Selectacommunication port that is not in use then click OK 5 Restart your system to save your changes ...

Page 18: ...18 Blank Page ...

Page 19: ... If it is within the store s return policy period please return the product to the store where you purchased from B If your purchase has passed the store s return policy period please follow the steps below to have the product repaired or replaced Step 1 Submit your RMA request Gotowww siig com click Support thenREQUESTAPRODUCTREPLACEMENT to submit a request to SIIG RMA or fax a request to 510 657...

Page 20: ...ween Desktop Notebooksystemsandexternalperipherals SIIGcontinuestogrowbyadding A V and Digital Signage connectivity solutions to our extensive portfolio SIIGproductsoffercomprehensiveusermanuals manyuser friendlyfeatures andarebackedbyanextensivemanufacturerwarranty Highqualitycontrol standards are evident by the overall ease of installation and compatibility of ourproducts aswellasoneofthelowestd...

Reviews: