background image

Default Setting 

Here you can restore all the settings to the factory default settings. 
Default setting in Menu, options: NO / YES 

Version 

Here you can 

fi

nd the current version of the 

fi

rmware and batch number of your camera. 

You may need this information when you are trying to upgrade the camera to a later 

fi

rmware.  

Firmware Updating 

Firmware update process: 
Important do not remove power during updating of 

fi

rmware 

Format the micro SD card. Ideally with SD Formatter from www.SDcard.org 

Extract 

fi

rmware DVR (BIN 

fi

le) or MCU (IAP 

fi

le) and place it to the root folder of the micro SD card. 

Insert micro SD card into camera and then turn on the power, please make sure camera is connected with 
the power during whole update process. 

The camera will update automatically, no need any action. Screen words shown as below:

Read File

Write Firmware

Write Done 

The complete process will takes about several minutes. 

Firmware will be deleted and camera will reboot after update successful. 

It  is  recommended  to  format  the  SD  card  in  the  camera  after  a 

fi

rmware  update  and  also  check  all  the 

settings you requite as the camera will go back to a factory default setting 

Software 

How to use the software. 

The software link is located on the SD card, under ‘SOFTWARE’, open the ‘ReadMe’ 

fi

le and copy the link to your 

browser. Then download the software. Save it to your desktop or a suitable folder. Open the folder and double 
click on GVP.exe 

Hover over icons to see what they do.  
Use the folder “Open Files” to browse to the camera or SD card on your PC. Select Location and then select 
folder and click okay. 
To change from KMPH to MPH double click on speed icon at top. 

Page  14

Summary of Contents for SW010.1

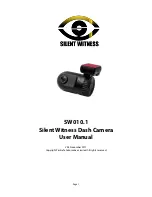
Page 1: ...SW010 1 Silent Witness Dash Camera User Manual V2 4 November 2017 Copyright Parksafe Automotive Limited All rights reserved Page 1...

Page 2: ...it can be the cause product failure and abnormal operation Please feel free to contact Parksafe Automotive Limited customer support centre for product failure repair and other matters regarding the us...

Page 3: ...ag or accident Keep the power socket clean of dust A poor connection will result in malfunction Install with the power o After installation connect DC jack It may cause electric shock or malfunction D...

Page 4: ...ehicle so it can be swapped in the event of an accident WARNING NEVER remove the SD card from the camera whilst it is powered on Always remove the power supply from the camera and wait for the camera...

Page 5: ...arranty does NOT cover recovery from any software updates installation and removal of the application software or any loss of data storage 12 Parksafe Automotive Limited reserves the right to add dele...

Page 6: ...al and there is no need for concern 6 Do not expose the camera to high temperatures The normal operating temperature of the camera is 0 to 40 32F to 104F High temperatures can shorten the life span of...

Page 7: ...receive power from the car battery and camera will be turned o automatically Parking Guard function will not work at the same time to ensure the car engine will start normally For additional operating...

Page 8: ...GPS logger is inside the bracket 2 Micro USB port 1 3 AV port 4 Up Menu Mute button 5 OK button 6 Down Playback SOS button 7 LED light indicator 8 Lens 9 Micro USB port 2 10 Power Button 11 HDMI port...

Page 9: ...o circuits to pick up power failure to do so may cause interference or strange behaviour of vehicle circuits or camera s POWER SOURCE The camera can be powered by the cigar power lead from the lighter...

Page 10: ...move the bracket it is easy just remove the static sticker from windscreen 6 Power on the camera and check the camera display again When you want to demount the camera just slide the camera out from t...

Page 11: ...any buttons again to turn on the screen Or you can set it in the MENU Video and photo playback Playback on camera When camera is in standby long press DOWN button to enter photo mode long press DOWN b...

Page 12: ...1080 30fps HDR 1280 720 30fps 1280 720 60fps Photo Size Here you can set the photo size Options 14M 12M 8M 5M 3M 2M Quality Here you can adjust the video quality the quality will a ect video grain sh...

Page 13: ...ing lamps Options 60hz 50hz Power OFF Screen If there is no button actions when the camera is on standby or recording the screen will auto power o to save power here you can define the power o screen...

Page 14: ...The camera will update automatically no need any action Screen words shown as below Read File Write Firmware Write Done The complete process will takes about several minutes Firmware will be deleted...

Page 15: ...not auto start recording when Movie Clip Time is OFF if the card is full The camera continues automatic recording and won t stop Maybe the camera is working on Motion Detect mode you can check whether...

Page 16: ...nual and camera please accept the camera standard as correct We reserve the right to change content or technical regulations without informing you prior to making any changes In addition the manufactu...

Reviews: