background image

12 


System Controllers  
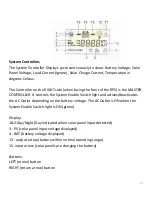
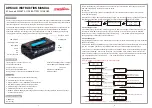
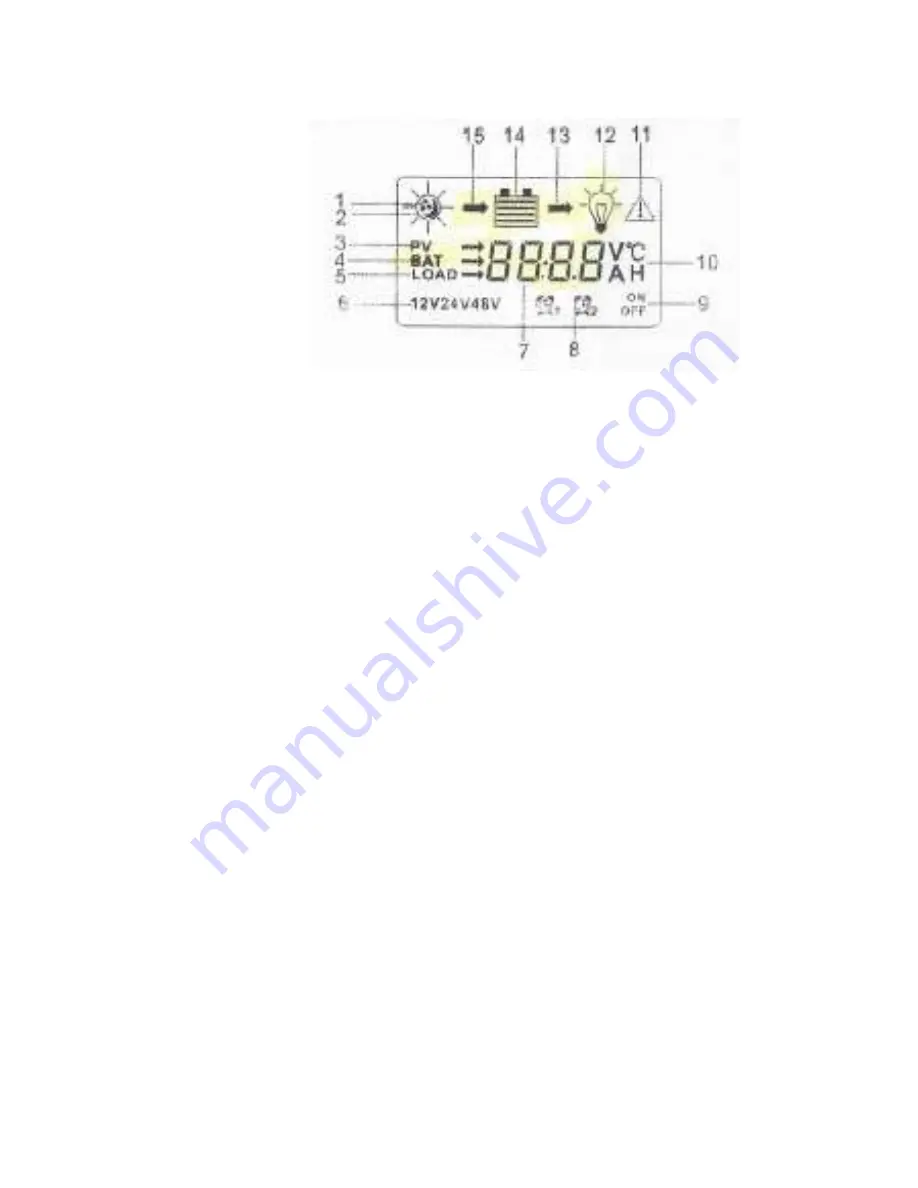
The System Controller Displays cycle continuously to show: Battery Voltage, Solar 
Panel Voltage, Load Current (ignore), Solar Charge Current, Temperature in 
degrees Celsius.  
 
The Controller on the RIGHT side (when facing the front of the RPS) is the MASTER 
CONTROLLER. It controls the System Enable Switch light and actives/deactivates 
the AC Outlet depending on the battery voltage. The AC Outlet is ON when the 
System Enable Switch light is ON (green). 
 
Display:  
1&2-Day/Night (Day indicated when solar panel input detected) 
3 - PV (solar panel input voltage displayed)  
4 - BAT (battery voltage displayed) 
13 - output arrow (battery within normal operating range) 
15- input arrow (solar panels are charging the battery) 
 
Buttons: 
LEFT (menu) button  
RIGHT (return arrow) button 

Summary of Contents for RPS

Page 1: ...roduct Manual To reduce the risk of injury users must read and understand this instructional manual which contains important information regarding the operation and warranty of this product Please retain this manual for future reference ...

Page 2: ...lines as well as information about operating maintaining and troubleshooting the RPS Audience This Product Manual is intended for users and operators of the RSG Conventions Used in this Manual WARNING Warnings identify conditions or practices that could result in personal injury or loss of life CAUTION Cautions identify conditions or practices that could result in damage to the product or other eq...

Page 3: ...3 TABLE OF CONTENTS IMPORTANT SAFETY INSTRUCTIONS INTRODUCTION FEATURES SET UP OPERATION MAINTENANCE TROUBLESHOOTING SPECIFICATIONS WARRANTY ...

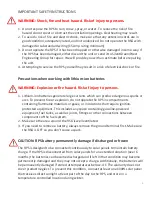
Page 4: ...s or arcs To prevent fire or explosion do not operate the RPS in compartments containing flammable materials or gases or in locations that require ignition protected equipment This includes any space containing gasoline powered equipment fuel tanks as well as joints fittings or other connections between components of the fuel system 2 Make sure the area around the RSG is well ventilated 3 If you n...

Page 5: ... fuels The RPS maximizes the use of COTS commercial off the shelf components to simplify field repairs many years into the future The RPS is a fully automatic self regulating high efficiency power system Once connected to solar panels and loads power consuming devices the RPS will optimize its charge cycle preventing over charging and over discharging the battery It will also automatically re enab...

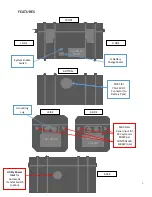
Page 6: ... input for 24V system is 800W per CONTROLLER 1600W total AC POWER OUTLET Battery Charge Meter Utility Power Inlet for Automatic Transfer Switch option BACK AC IN BOTTOM PORT for 75A 24V DC Connector to Battery Pack System Enable Switch R SIDE L SIDE L SIDE Grounding Lug ...

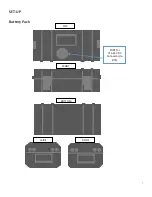
Page 7: ...7 SET UP Battery Pack TOP FRONT BACK PORT for 75A 24V DC Connector to RPS L SIDE R SIDE L SIDE BOTTOM ...

Page 8: ...ttery Pack 3 Tilt the RPS backwards so that the bottom is lifted away from the Battery Pack top this will expose the Case Plug and allow easy connection 4 Remove the Case Plug from the RPS bottom to expose the High Current Connector A flat blade screw driver can be used to aid removal of the Plug Note The Battery Pack cable has a longer reach by design and also more space inside the case for cable...

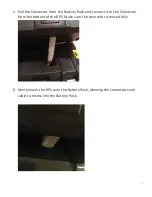
Page 9: ...m the Battery Pack and connect it to the Connector from the bottom of the RPS Make sure the connector is mated fully 6 Gently lower the RPS onto the Battery Pack allowing the connectors and cable to recess into the Battery Pack ...

Page 10: ...olar panels 2 Only connect the solar panel cables to the RPS when the panels are not in direct sunlight Connecting before dawn or after sunrise is preferable Connecting the solar panels to the RPS while they are in sunlight will damage the Controllers due to a high current pulse 1 Identify a suitable indoor flat location for the RPS that is dry and well ventilated Only operate the RPS while it is ...

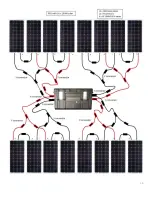
Page 11: ...r and pests 5 Connect the solar panels up to 800 W per Controller 6 Enable the RPS by depressing the System Enable Switch If the battery charge is within the safe charge limits the switch will light indicating renewable power is available System Enable Switch 7 Connect equipment devices 2000 W max to the RPS 8 Monitor the Battery Charge over time to determine if the amount of power you are using i...

Page 12: ...It controls the System Enable Switch light and actives deactivates the AC Outlet depending on the battery voltage The AC Outlet is ON when the System Enable Switch light is ON green Display 1 2 Day Night Day indicated when solar panel input detected 3 PV solar panel input voltage displayed 4 BAT battery voltage displayed 13 output arrow battery within normal operating range 15 input arrow solar pa...

Page 13: ...13 Press the LEFT button on the CONTROLLER to show the accumulated Charge Current in Ah Sum both CONTROLLER displays for total solar input ...

Page 14: ...14 ...

Page 15: ...15 ...

Page 16: ...16 ...

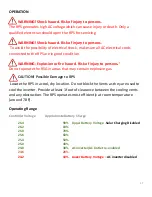
Page 17: ...to persons Do not operate the RSG in areas that may contain explosive gas CAUTION Possible Damage to RPS Locate the RPS in a cool dry location Do not block the Vents as they are used to cool the inverter Provide at least 1 foot of clearance between the cooling vents and any obstruction The RPS operates most efficiently at room temperature around 78 F Operating Range Controller Voltage Approximate ...

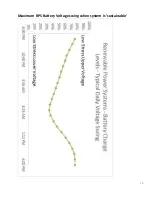
Page 18: ...18 Maximum RPS Battery Voltage swing when system is sustainable ...

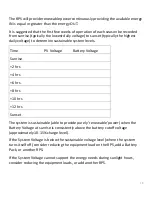
Page 19: ...attery Voltage Sunrise 2 hrs 4 hrs 6 hrs 8 hrs 10 hrs 12 hrs Sunset The system is sustainable able to provide purely renewable power when the Battery Voltage at sunrise is consistently above the battery cutoff voltage approximately 10 15 charge level If the System Voltage is below the sustainable voltage level where the system turns itself off consider reducing the equipment load on the RPS add a ...

Page 20: ...ed as soon as possible to prevent permanent damage MAINTENANCE Controller terminals bottom of each Controller occasionally check for tightness careful not to overtighten Cooling vents top sides of Case occasionally check that vents are clear to allow proper cooling System Test System Enable switch should be ON depressed On the Master Controller right side of RPS when looking at the front press the...

Page 21: ...left of inverter outlet see LED Status below 300A Fuse Blown Check fuse block at positive inverter terminal inside case Inverter Overloaded or overheated If operating the RPS at high loads or at high temperatures wait several minutes to allow the inverter to cool off Reduce load once inverter resets GFI circuit tripped Reset GFI circuit on inverter on inverter outlet inside case Battery Not Chargi...

Page 22: ...rating Temperature RPS Storage Temperature RPS Efficiency 1850 Watt hours Aluminum vented casing UN 38 3 certified Connectors pre installed for Battery Pack 1850 Wh Displays Battery V Solar Panel V Ambient Temperature 25 3 1 1 Volts actively maintained voltage range 2 x 30 Amps max 800 Watts maximum solar input Automatically regulates and optimizes battery charging Disables and re enables the AC P...

Page 23: ...ontinuously under the system s BLiX control module HOW TO RECEIVE SERVICE To obtain warranty service you must contact our customer service team via a request via Contact Us at www silentgreen co If our customer service team determines that further assistance is required they will give you a Return Material Authorization RMA number and will provide you with prepaid return shipping label that you ca...

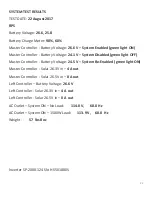
Page 24: ... green light OFF Master Controller Battery Voltage 24 5 V System Re Enabled green light ON Master Controller Solar 26 3V in 4 A out Master Controller Solar 26 5V in 0 A out Left Controller Battery Voltage 26 6 V Left Controller Solar 26 3V in 4 A out Left Controller Solar 26 5V in 0 A out AC Outlet System ON No Load 114 0 V 60 0 Hz AC Outlet System ON 1500W Load 113 9 V 60 0 Hz Weight 57 lbs 8 oz ...

Page 25: ...ndependence SilentGreen Renewable Power Systems A division of West Engineering Group LLC Established 2005 Offices Mailing Shipping Address West Engineering Group LLC 841 Prudential Drive 12th Floor Jacksonville FL 32207 www SilentGreen co Printed on Recycled Paper ...

Reviews: