User Guide - Silex ClickShow R101
13.2- Wireless bridging configuration
The ClickShow can connect to an access point on the Local Area Network (LAN),
creating a wireless bridge between the ClickShow and the LAN. This allows the
users who are connected to the ClickShow Base unit, to access the LAN (Network
peripherals, internet…) and the users on the LAN, to connect to the ClickShow device
via the LAN to share content.
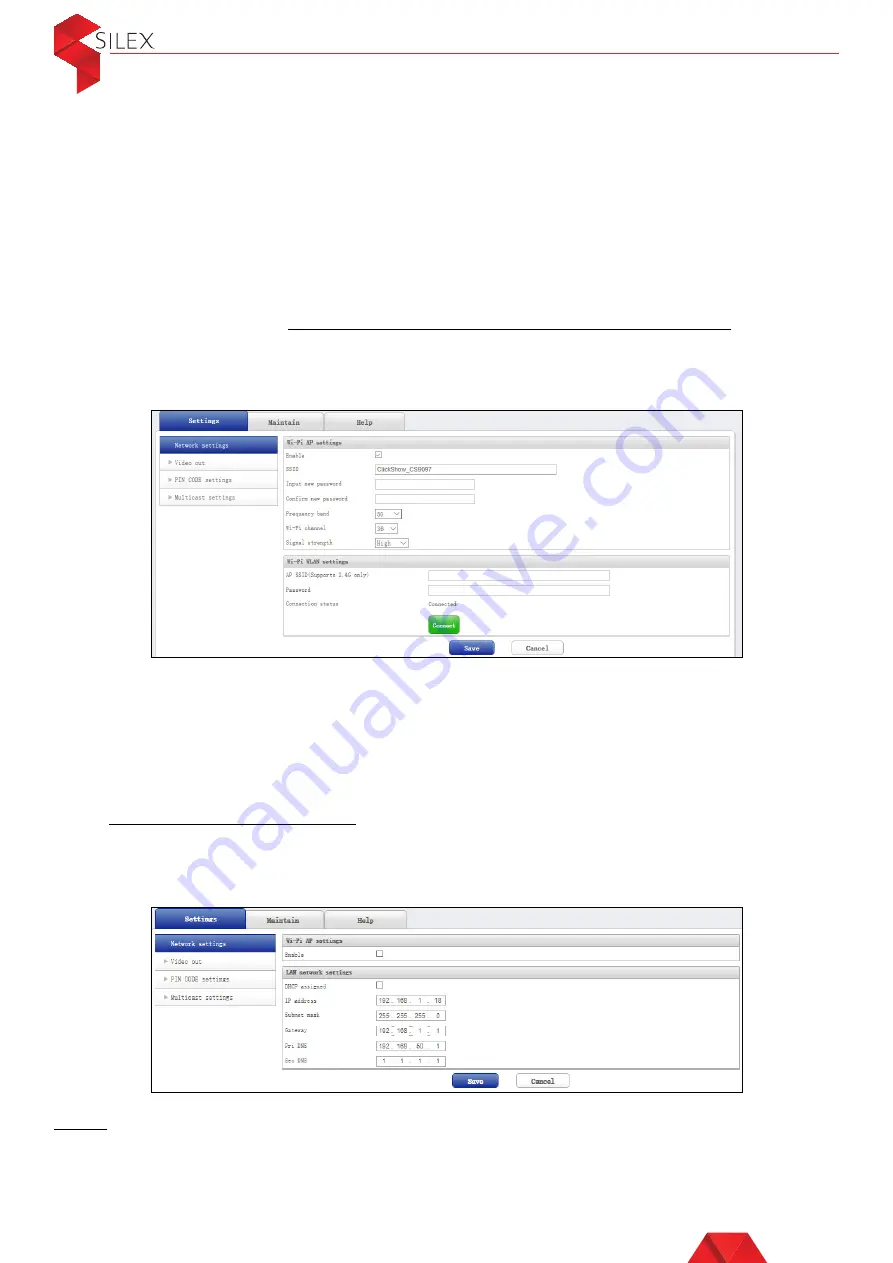
To configure the wireless bridging on you ClickShow Base unit, login to the configurator
) and go to Settings – Network settings – Wifi WLAN settings. Enter the
Name and password of your network access point, then click on ‘connect’. Once the
connection status mentions ‘connected’ click on ‘save’. The ClickShow base unit will
automatically restart.
14. Network configuration
The LAN is set to DHCP by default on the ClickShow base unit. However, it is possible to
configure an IP address from the Configurator (See how to connect to the Configurator
Go to Settings – Network settings and disable the option ‘DHCP assigned’ then
configure your IP address and click on ‘Save’. The ClickShow Base unit will
automatically restart and the configured LAN IP address will appear on the top left
corner of the wallpaper on the meeting room main display (see
Note:
When the ClickShow device is connected to the LAN, it creates a network bridge
allowing users who are connected to the ClickShow Base unit, to access the LAN
(Network peripherals, internet…) and the users on the LAN, to connect to the ClickShow
device via the LAN to share content.
10


