1
TECHNICAL MANUAL
SILVER KING FRONT BREATHING FREEZER
MODEL SKF27AG/CFID
Thank you for purchasing Silver King food service equipment. Our goal is to provide our customers with the most reliable
equipment in the industry today. Please read this manual and the accompanying warranty information before operating your
new Silver King unit. Be sure to complete and mail the warranty card within 10 days of purchase to validate your warranty.
INSPECT FOR DAMAGE AND UNCRATE
Upon delivery of your new Silver King unit, uncrate at once to examine and test for possible damage following the instructions
printed on the exterior of the container. Report any damages to the carrier responsible for transportation and promptly
present a claim for any evidence of mishandling. Save all packaging materials if a claim must be filed.
INSTALLATION
The stainless steel exterior of the cabinet has been protected by a plastic covering during manufacturing and shipping. This
covering can be readily stripped before installation. After removing this covering, wash the interior and exterior surfaces using
a warm, mild soapy water solution and a sponge or soft cloth. Rinse afterward with clean water and wipe dry. Do not use
chlorinated cleaners.
Location:
When locating your new Silver King unit, convenience and accessibility are important considerations, but the following
installation guidelines must be observed;
•
Always avoid locating the unit adjacent to an oven, heating element or hot air source which could adversely affect the
performance of the unit.
•
The unit must be level.
•
For proper ventilation, the bottom front of the unit must not be obstructed.
Legs/Casters:
Models without a base come with Legs or Casters. To install them, tilt the unit and thread the Legs or Casters into the four
Rivnuts in the bottom of the cabinet. Make sure that they are installed tightly to prevent future thread wear.
Shelves:
Inside the unit you will find Shelves and a plastic bag containing Shelf Supports. The Shelf Supports with the “tang” go on the
rear Pilasters. This shelf system allows for easy adjustment to suit your needs.
Door Adjustment and Swing:
Should the door ever require straightening, loosen the screws on the hinges, square the door with the cabinet and retighten
the screws.
The mounting of the door is easily reversible on single door units should space or convenience require that you do so. Simply
remove the screws holding the hinges, rotate the door 180 degrees and relocate the hinges on the side opposite their original
location.
Drawers:
To remove the Drawers on the drawer models for cleaning, simply open them fully, push the stop levers out of the way on the
Cabinet Drawer Tracks while pulling the Drawer out. To reinstall the Drawer, line up the Drawer Tracks on the cabinet and the
Drawer and push the Drawer into the cabinet. The Drawer Pan can be removed by lifting it out with the Drawer extended.
Summary of Contents for SKF27AG/CFID
Page 10: ...9...
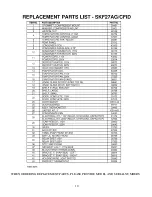
Page 11: ...10 WHEN ORDERING REPLACEMENT PARTS PLEASE PROVIDE MODEL AND SERIAL NUMBERS...
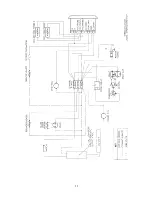
Page 12: ...11...
Page 13: ...12...


