background image

- 23 -

Safety instructions

There is a risk of burns!

• When it is hot, hold the steam iron only by the handle.
• Children should be supervised to ensure that they do not play with the appliance.
• Never hold your hand over the steam spray and do not touch hot metal parts.
• Do not open the water reservoir filler opening while the iron is in use. Allow

the steam iron to cool down first and remove the plug from the power socket.

• While the appliance is heating up or cooling down, the iron and its connecting 

cable must be kept out of reach of children younger than 8 years old.

CAUTION: hot surfaces!

Risk of injury! Risk of fire!

• Never leave a hot steam iron unattended if it is switched on or connected to

the mains power supply.

• Only put the steam iron into storage when it has cooled down completely. 
• This steam iron may only be used and set down on a stable surface.
• When ironing, use only the temperatures detailed in the garment care instructions,

or those suitable for the material. Otherwise, you could damage the 
textiles. Should care instructions not be given or known, start with the lowest
temperature setting.

• NEVER allow children to use the steam iron.
• Place the station on a level and heat-resistant surface. The station must be 

stable when you place the steam iron on it.

• If you want to put the steam iron down, place it only on the cable base or 

connect it to the station.

• Place the iron only on a level and heat-resistant surface. 

The iron must be stable.

• The iron may only be used with the supplied dock (i.e. cable base).

IB_102540_SDBK2200C3_LB2  31.07.2014  14:59 Uhr  Seite 23

DIN A5 148 mm x 210 mm

Summary of Contents for 102540

Page 1: ...IAN 102540 FER À REPASSER VAPEUR SDBK 2200 C3 FER À REPASSER VAPEUR Mode d emploi DAMPFBÜGELEISEN Bedienungsanleitung STEAM IRON Operating instructions ...

Page 2: ...ontenant les illustrations et familiarisez vous ensuite avec toutes les fonctions de l appareil Klappen Sie vor dem Lesen die Seite mit den Abbildungen aus und machen Sie sich anschließend mit allen Funktionen des Gerätes vertraut Before reading unfold the page containing the illustrations and familiarise yourself with all functions of the device ...

Page 3: ......

Page 4: ...provisoirement le fer à repasser à vapeur 7 Eteindre le fer à repasser 8 Fonction stop goutte 8 Nettoyage 8 Fonction d autonettoyage 8 Boîtier 8 Eléments en métal 8 Réparer les dysfonctionnements 9 Mise au rebut 9 Garantie et service après vente 9 Importateur 10 Lisez attentivement le mode d emploi avant la première utilisation et conservez ce dernier pour une utilisation ultérieure Lors du transf...

Page 5: ... repassage de vêtements Vous devez l utiliser uni quement dans des pièces fermées et dans le cadre d un usage privé Toutes les autres applications ne sont pas conformes à l usage prévu de l appareil Accessoires fournis Fer à repasser vapeur Station Socle à cordon Verre mesureur Mode d emploi Eléments de réglage 1 Buse eau 2 Orifice de remplissage du réservoir à eau 3 Régulateur de vapeur 4 Touche ...

Page 6: ... fer à repasser à vapeur que lorsqu il a complètement refroidi Le fer à repasser à vapeur doit être utilisé et déposé sur une surface stable Repassez uniquement avec les réglages de température indiqués sur l étiquette de consignes de repassage et adaptés au matériau Dans le cas contraire vous pourriez abîmer les textiles Si vous ne disposez pas de consignes de repassage commencez par le réglage d...

Page 7: ... secteur avec des mains mouillées N utilisez en aucun cas le fer à repasser à vapeur à proximité d eau contenue par exemple dans des baignoires douches lavabos ou autres récipients La proximité d eau représente un danger même si l appareil est éteint Vous ne devez en aucun cas immerger le fer à repasser à vapeur dans un liquide et aucun liquide ne doit pénétrer à l intérieur de l appareil Vous ne ...

Page 8: ...en plastique hors de portée des bébés et jeunes enfants Remplissez d eau le réservoir à eau voir le chapitre Remplir le réservoir d eau Raccordez le fer à repasser à vapeur avec le socle à cordon 8 et avec la station q cf le chapitre Conseils d utilisation Enfichez la fiche secteur dans une prise secteur qui correspond à la tension indiquée sur la plaque signalétique Mettez le régulateur de tempér...

Page 9: ...rmais plus être retiré de la station q Remplir le réservoir d eau Placez le fer à repasser à vapeur à l état refroidi en position horizontale sur la semelle de repas sage e ou placez le fer à repasser à vapeur sur la station q Ouvrez le couvercle de l orifice de remplissage du réservoir à eau 2 Remplissez le verre mesureur jusqu au marquage Max avec de l eau du robinet et versez cette eau dans le ...

Page 10: ...ez jusqu à ce que le témoin de contrôle pour la température 6 s éteigne Pour humidifier le linge appuyez sur la touche qui commande le pulvérisateur 4 Cette fonction est appropriée pour du linge très sec fortement froissé Repassage à la vapeur Définissez la puissance de vapeur souhaitée à l aide du régulateur à vapeur 3 Le régulateur de température 7 doit être tourné au moins jusqu à la plage de r...

Page 11: ...u à ce que le témoin de contrôle 6 s éteigne et s allume à nouveau Maintenez le fer à repasser à vapeur à l horizontale au dessus d une bassine Réglez le régulateur de vapeur 3 au degré de vapeur maximal Appuyez sur la touche Selfclean r et maintenez la enfoncée Pendant ce temps de la vapeur et de l eau bouillante s échappent des orifices de sortie de la vapeur dans la semelle de repassage e Les s...

Page 12: ...tte condition doit être respectée pour assurer l expédition gratuite de votre marchandise La prestation de garantie s applique uniquement pour les erreurs de matériaux et de fabrication pas pour les dommages de transport les pièces d usure ou les dommages subis par les pièces fragiles com me par ex les interrupteurs ou les batteries Le pro duit est exclusivement destiné à un usage privé et non com...

Page 13: ... 10 Importateur KOMPERNASS HANDELS GMBH BURGSTRASSE 21 44867 BOCHUM GERMANY www kompernass com IB_102540_SDBK2200C3_LB2 31 07 2014 14 59 Uhr Seite 10 DIN A5 148 mm x 210 mm ...
Page 14: ...rübergehend abstellen 17 Dampfbügeleisen außer Betrieb nehmen 18 Anti Tropf Funktion 18 Reinigen 18 Selbstreinigungs Funktion 18 Gehäuse 18 Metallteile 18 Fehlfunktionen beseitigen 19 Entsorgen 19 Garantie und Service 19 Importeur 19 Lesen Sie die Bedienungsanleitung vor der ersten Verwendung aufmerksam durch und heben Sie diese für den späteren Gebrauch auf Händigen Sie bei Weitergabe des Gerätes...

Page 15: ...h Das Dampfbügeleisen ist ausschließlich zum Bügeln von Kleidung bestimmt Sie dürfen es nur innerhalb geschlossener Räume und in privaten Haushalten verwenden Alle anderen Verwendungen gelten als nicht bestimmungsgemäß Lieferumfang Dampfbügeleisen Station Kabelsockel Messbecher Bedienungsanleitung Bedienelemente 1 Wasserdüse 2 Einfüllöffnung für den Wassertank 3 Dampfregler 4 Taste für Sprühfunkti...

Page 16: ...en nur im abgekühlten Zustand Das Dampfbügeleisen muss auf einer stabilen Oberfläche benutzt und abge stellt werden Bügeln Sie nur mit den auf den Pflegehinweisen angegebenen und für das Ma terial geeigneten Temperatureinstellungen Sie können die Wäsche andernfalls beschädigen Falls keine Pflegehinweise vorhanden sind beginnen Sie mit der niedrigsten Temperatureinstellung Lassen Sie niemals Kinder...

Page 17: ...nden an Benutzen Sie das Dampfbügeleisen keinesfalls in der Nähe von Wasser das in Badewannen Duschen Waschbecken oder anderen Gefäßen enthalten ist Die Nähe von Wasser stellt eine Gefahr dar auch wenn das Gerät ausge schaltet ist Sie dürfen das Dampfbügeleisen keinesfalls in eine Flüssigkeit tauchen und keine Flüssigkeiten in das Gerätegehäuse des Dampfbügeleisens gelangen lassen Sie dürfen das G...

Page 18: ...ßerhalb der Reichweite von Babies und Kleinkindern auf Füllen Sie Wasser in den Wassertank siehe Kapi tel Wassertank befüllen Verbinden Sie das Dampfbügeleisen mit dem Kabelsockel 8 und mit der Station q siehe Ka pitel Hinweise zum Gebrauch Stecken Sie den Netzstecker in eine Netz steckdose die der auf dem Typenschild angegebenen Spannung entspricht Stellen Sie den Temperaturregler 7 in die Positi...

Page 19: ...leisen kann nun nicht mehr von der Station q herunter genommen werden Wassertank befüllen Stellen Sie das Dampfbügeleisen im abgekühlten Zustand waagerecht auf die Bügelsohle e oder setzen Sie das Dampfbügeleisen auf die Station q Öffnen Sie den Deckel der Einfüllöffnung für den Wassertank 2 auf Füllen Sie den Messbecher bis zur Max Markie rung mit Leitungswasser und schütten Sie dieses Wasser in ...

Page 20: ... MAX Baumwolle Leinen Warten Sie bis die Kontrollleuchte für die Temperatur 6 erlischt Zum Befeuchten der Wäsche drücken Sie auf die Taste für die Sprühfunktion 4 Diese Funktion ist für sehr trockene stark knittrige Wäsche geeignet Dampfbügeln Stellen Sie mit dem Dampfregler 3 die gewünschte Dampfstärke ein Der Temperaturregler 7 muss mindestens bis in den schwarz markierten Einstellbereich gedreh...

Page 21: ...eisen aufheizen bis die Kontrollleuchte 6 erlischt und erneut aufleuchtet Halten Sie das Dampfbügeleisen waagerecht über eine Auffangschüssel Stellen Sie den Dampfregler 3 auf die maximale Dampfstufe Drücken Sie die Taste Selfclean r und halten Sie diese gedrückt Dabei tritt Dampf und kochendes Wasser aus den Dampfaustrittslöchern in der Bügelsohle e aus Eventuell vorhandene Verunreinigungen werde...

Page 22: ...erbindung Nur so kann eine kostenlose Einsendung Ihrer Ware gewährleistet werden Die Garantieleistung gilt nur für Material oder Fabrikationsfehler nicht aber für Transportschäden Verschleißteile oder für Beschädigungen an zer brechlichen Teilen z B Schalter oder Akkus Das Produkt ist lediglich für den privaten und nicht für den gewerblichen Gebrauch bestimmt Bei missbräuchlicher und unsachgemäßer...

Page 23: ... 20 IB_102540_SDBK2200C3_LB2 31 07 2014 14 59 Uhr Seite 20 DIN A5 148 mm x 210 mm ...
Page 24: ...the steam iron aside 27 Taking the steam iron out of service 28 Anti drip function 28 Cleaning 28 Self cleaning function 28 Housing 28 Metal parts 28 Troubleshooting 29 Disposal 29 Warranty and Service 29 Importer 29 Read the operating instructions carefully before using the device for the first time and preserve this booklet for later reference Pass this manual on to whoever might acquire the dev...

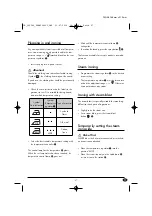
Page 25: ...wner Intended Use The steam iron is intended exclusively for the ironing of textiles The iron may only be used indoors and in private households All other use is deemed improper use Items supplied Steam iron Station Cable base Measuring beaker Operating instructions Operating Elements 1 Water jet 2 Filler opening for the water tank 3 Steam regulator 4 Button for fine water spray 5 Button for steam...

Page 26: ...e mains power supply Only put the steam iron into storage when it has cooled down completely This steam iron may only be used and set down on a stable surface When ironing use only the temperatures detailed in the garment care instructions or those suitable for the material Otherwise you could damage the textiles Should care instructions not be given or known start with the lowest temperature sett...

Page 27: ...e an extension cable Never touch the power cable or the power plug with wet hands Never use the steam iron adjacent to water contained in a bath shower wash basin or other containers The proximity of water is hazardous even if the ap pliance is switched off Under no circumstances should you submerge the steam iron in any liquid or allow liquids to penetrate into the housing of the steam iron Do no...

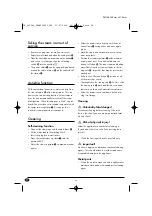
Page 28: ...nd small children Pour water into the water tank see chapter Filling the water tank Connect the steam iron with the cable base 8 and with the station q see chapter Tips for utilisation Insert the plug into a wall power socket supplying an electrical current as detailed on the rating plate Place the temperature regulator 7 into the posi tion MAX To set the temperature turn the outer ring of the tem...

Page 29: ... now no longer be removed from the station q Filling the water tank Once it has cooled down place the steam iron horizontally on the soleplate e or place the steam iron on the station q Slide off the filler opening cover for the water tank 2 Fill the measuring cup up to the Max marking with tap water and tip this water into the water tank Slide the cover of the filler opening for the water tank 2 ...

Page 30: ...ature regulator 7 Type of material Synthetic fibres Silk wool MAX Cotton linen Wait until the temperature control lamp 6 extinguishes To moisten the laundry press the spray button 4 This function is suitable for very dry and very crumpled garments Steam ironing Programme the steam regulator 3 to the desired steam setting The temperature regulator 7 must be turned into at least the adjustment range...

Page 31: ...amp 6 extinguishes and once again glows Hold the steam iron horizontally over a catch ment receptacle Position the steam regulator 3 at the maximal steam power level Press and hold down the button Self clean r Thereby steam and boiling water flows from the steam exit holes in the iro ning sole e Impurities that may be present are washed out Release the Self clean button r as soon as all of the wat...

Page 32: ...proof of purchase In the event of a warranty claim please make contact by telephone with our Service Depart ment Only in this way can a post free despatch for your goods be assured The warranty covers only claims for material and manufacturing defects but not for transport dama ge for wearing parts or for damage to fragile com ponents e g buttons or batteries This product is for private use only a...

Page 33: ...102540 KOMPERNASS HANDELS GMBH BURGSTRASSE 21 44867 BOCHUM DEUTSCHLAND GERMANY www kompernass com Version des informations Stand der Informationen Last Information Update 07 2014 Ident No SDBK2200C3 062014 1 ...

Reviews: