SilverCrest SWDR 500 B1
English - 63
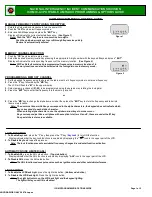
While powered off, press and hold the "SET/STORE" button (9) until the
display (6) reads "US" or "EU". Then press the "SET/STORE" button (9)
briefly to go to the time zone setting. The currently set city abbreviation and
the corresponding local time are shown in the upper part to the display (6).
The default setting is "UTC".
Press the "VOL-" (12) or "VOL+" (4) button to set the city abbreviation for
your current time zone, e.g. BER for Berlin. You can find the city abbreviation
in the table above. With each city abbreviation, the displayed time is
changed.
When finished, set the correct time as described in the following section.
9.4 Setting the date and time
9.4.1 Automatic synchronisation via RDS
Upon factory delivery time synchronisation via RDS is enabled. If the device
receives an RDS signal after powering on, the date and time are synchronised
and shown correctly after a few moments.
The multi-band radio is only set automatically if the selected station
transmits an RDS signal and the reception quality is strong enough
to receive the RDS signal. If an RDS signal is received, the RDS
indicator (28) appears on the display.
Time synchronisation and the correct time setting also depend on the set time
zone. Therefore it is mandatory to set the correct time zone first. To do so, see
the "Setting the time zone" section above.
9.4.2 Manual setting
First disable automatic time synchronisation via RDS. To do so, while powered
off, press the "MODE" button (15) four times until "TS ON" (Time
Synchronisation ON) appears in the upper part of the display (6). Press the


