GB/IE/NI/CY/MT
13
5. Starting-up
Please find a suitable location for the device before
starting it up.
For safe and trouble-free running of the device,
choose an installation location which meets the
following requirements:
– The floor should be firm, flat and horizontal.
– The device should be set up at least one metre
away from furniture, curtains and other easily
flammable objects.
– Do not place the device in a hot, wet or very hu-
mid environment.
– A grounded socket protected by a residual-current
device with overload protection should be availa-
ble in the vicinity of the device.
– The power socket should be easily accessible so
that the mains connection cable can be easily di-
sconnected, if necessary.
– Extension cords are prohibited.
Plug the device cable into the grounded power
socket.
IMPORTANT!
The cable must remain on the rear-
side of the device and must not come into contact
with any hot elements.
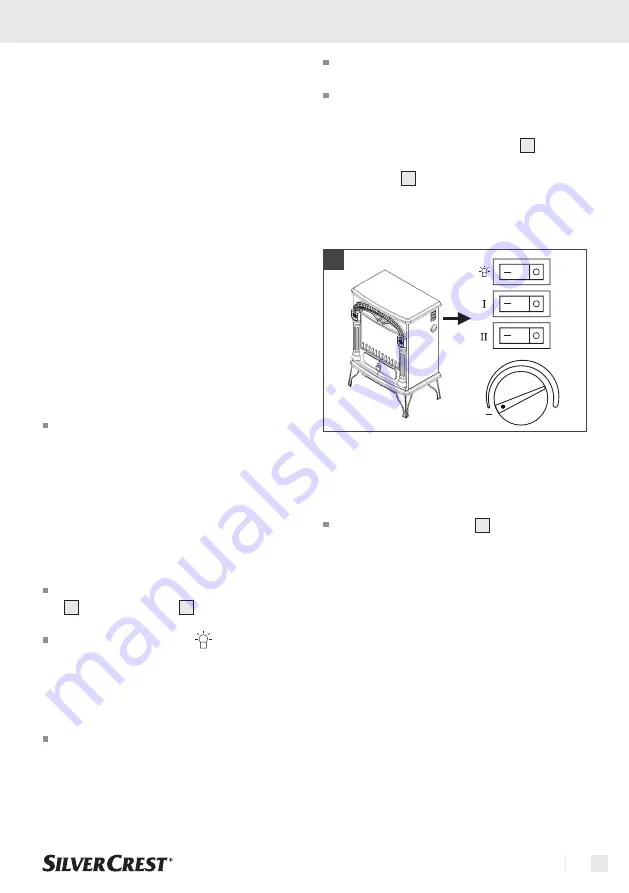
5.1 Device operation
The device is operated via the operation panel
2 and the thermostat 3 on the right-hand side
(Fig. 5).
The first switch with the [ ] symbol switches
the flame effect on and off. The flame effect can
be used with or without the heating function. If
the switch is set to the [ O ] symbol, the flame
effect is switched off. If you press the switch to
the left [‒], you will activate the device.
For a low amount of heating, switch the first hea-
ting level with the [
I
] symbol to the [‒] symbol
to turn it on and to the [ O ] symbol to turn it
off. The heating function can be used with or
without the flame effect.
For full heating power, switch on both heating
levels [
I
] and [
II
] using the on/off switches.
Heating level [
II
] only functions if the switch for
heating level [
I
] is also set to the [‒] symbol.
The temperature of the two heating stages can
be controlled using the thermostat 3 by setting
it between the [‒] and [+] settings. Turning the
thermostat 3 clockwise until you hear an audi-
ble click will switch on the device. [‒] represents
the lowest temperature (left) and [+] (right) the
highest temperature.
+
5
PLEASE NOTE!
Thanks to automatic operation,
the hot-air control (thermostat) maintains the pre-
programmed temperature at a constant level.
First, turn the thermostat 3 to the right in the
direction of the maximum value. Leave the
switch in this position until the air in the room
has reached your desired temperature.
PLEASE NOTE!
When you use the device for the
first time, a slight odour may occur.
5.2 Overheat protection
For your safety, this device features overheating pro-
tection. If the temperature inside the device becomes
too high, it will switch off automatically. In this case,
proceed as follows:
Summary of Contents for 365183 2101
Page 3: ...2 1 3 5 4 6 ...
Page 4: ......
Page 16: ...GB IE NI CY MT 16 ...
Page 42: ...FR BE CH 42 ...
Page 66: ...CZ 66 ...
Page 80: ...PL 80 ...
Page 116: ...116 ...
Page 117: ......


