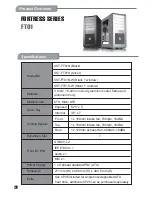
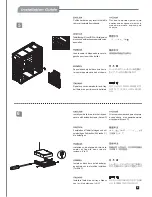
background image

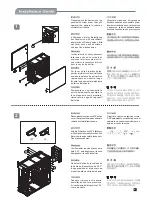
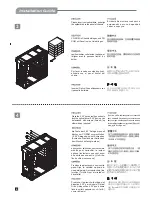
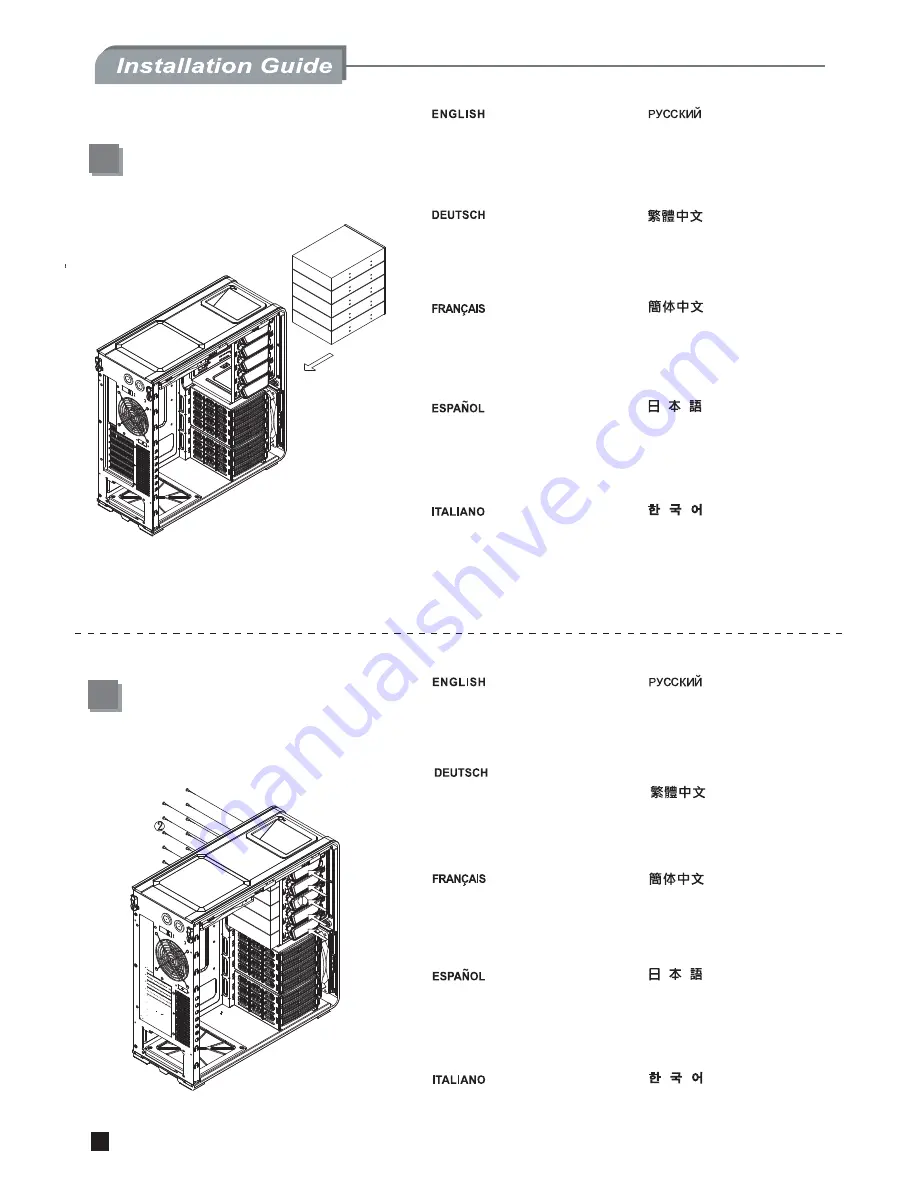
Please insert your optical drive, and align 
the optical drive to the panel of chassis.

Вставьте


Ваш


оптический


диск


и


выровняйте


его


по


передней


панели


корпуса

.

將光碟機放進機箱,並將面板對齊機箱
面板的位置。

光学ドライブを入れてケースのフロント
パネルの面と合わせます。

광드라이브를 삽입한 후, 케이스의 
전면 패널과 맞춥니다.

CD-ROM in Chassis einlegen,und CD-
ROM mit Panel in eine Linie bringen.

veuillez insérer votre lecteur optique, et 
l'aligner  avec  le  panneau  frontal    du 
boîtier.

Por favor, inserte su unidad óptica y 
alinéela  con  el   panel  frontal  del 
chasis.

Inserire l’Optical Drive allineandolo con 
il pannello del telaio.

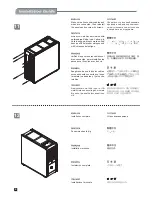
Press the 5.25” device toolfree button to 
lock the optical drive.( 5.25” device  can 
be fastened  with  screws. (Screw A) on 
other side as required )

Для


того

чтобы


зафиксировать


оптический


диск

нажмите


на


защелку

как


показано


на


рисунке

.(

при


необходимости


диски


можно


также


зафиксировать


шурупами

 (

Шуруп

 A) 

на


другой


стороне

)

按下光碟機側邊鎖扣以鎖固光碟機。
(使用者可依需求在另一側鎖上螺絲
(SCREW A)加強固定)

按下光驱侧边锁扣以锁固光驱。(使
用者可依需求在另一侧锁上螺丝(SCREW 
A)加强固定)

図のようにツール不要スイッチを押して、
光学ドライブを固定します。

(ドライブは

必要であれば反対側にネジ(ネジA)で固
定することもできます。)

그림에서과 같이 툴프리 스위치를 눌러 
광드라이브를 고정시킵니다. 드라이브는 
나사 (ScrewA)로 반대편에 고정시킬 수도 
있습니다.

die Taste der 5.25” Anlage manuell 
drücken,um CD-ROM zu verschließen.
( 5.25” Anlage kann mit Schrauben 
(Schraube A)auf anderer Seite nach 
dem Wunsch befestigt werden)

appuyez sur switch sans outils comme 
montré  pour  verrouiller  le  lecteur 
optique.(les lecteurs  peuvent  aussi 
être serrés avec des vis .(Vis A) de 
l'autre côté si necessaire)

Presione la palanca como se muestra 
para  fijar  la  unidad  óptica  sin 
necesidad de herramientas.(los 
tornillos (Tornillo A) por el otro lado si 
hace falta)

Premere il pulsante toolfree del 
dispotivo 5.25’’ per chiudere l’Optical 
Drive.(il dispositivo 5.25’’ puo’ essere 
fissato sul lato opposto con viti (viti A) 
come richiesto)

将光驱放进机箱,并将面板对齐机箱面
板的位置。

Summary of Contents for SST-FT01B

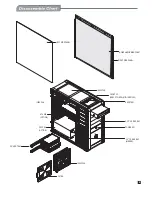
Page 1: ...MANUAL FORTRESS SERIES FT01...

Page 2: ...2 IEEE1394 x 1 audio x 1 MIC x 1 Power Supply 1 x Optional standard PS2 ATX Dimension 211 mm W x 486 mm H x 494 5 mm D One CP05 included for single hot swappable SATA hard drive additional CP05 can b...

Page 3: ...TER 3 5 HDD TRAY PS2 PSU OPTION ATX MB OPTION 12025 FAN 18032 FAN FRONT I O USB2 0 2 SPK MIC IEEE 1394 RESET SW 5 25 5 DRIVE BAY POWER SW 3 5 7 DRIVE BAY HIDDEN LEFT SIDE PANEL RIGHT SIDE PANEL NOISE...

Page 4: ...REW C MOTHERBOARD STANDOFF USB 5V LP LP GND NC USB 5V LP LP GND Pin Pin Pin AGNU NC NC PIN Pin Pin AUD GND PRESENCE SENSE1_RETURN SENSE2_RETURN NO PIN PORTIL PORTIR PORTZR SENSE_SEND PORT2L NC MIC2 MI...

Page 5: ...rales para quitarlos del chasis Rimuovere con un cacciavite le sei viti dai pannelli e spostare la leva di apertura come mostrato rimuovere in seguito i pannelli dal telaio Please release the screws o...

Page 6: ...ew A on other side as required A SCREW A SCREW A A ScrewA die Taste der 5 25 Anlage manuell dr cken um CD ROM zu verschlie en 5 25 Anlage kann mit Schrauben Schraube A auf anderer Seite nach dem Wunsc...

Page 7: ...Spostare verso sinistra la leva tray dell hard drive per rimuoverlo dal telaio Install your hard drive into the tray and secure with included screws Screw C C SCREW C SCREW C C SCREW C Festplatte auf...

Page 8: ...erStone SST CP05 puo essere compatibile con il SATA hard drive Fasten and secure included standoffs on the motherboard tray as required then install your motherboard and secure with included screws Sc...

Page 9: ...io Rimuovere il rivestimento della slot di espansione installare la scheda di espansione e avvitarla come richiesto Install your power supply as shown and then secure with included screws Screw B B SC...

Page 10: ...festigen v rifiez bien que tous les c bles sont bien connect s puis r installez les panneaux et fixez les avec des vis Aseg rese de que todos los cables necesarios est n conectados luego reinstale los...

Page 11: ......

Page 12: ...July 2008 Issue date G11207500...

Reviews: