


6
5
6
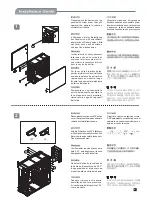
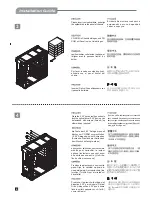
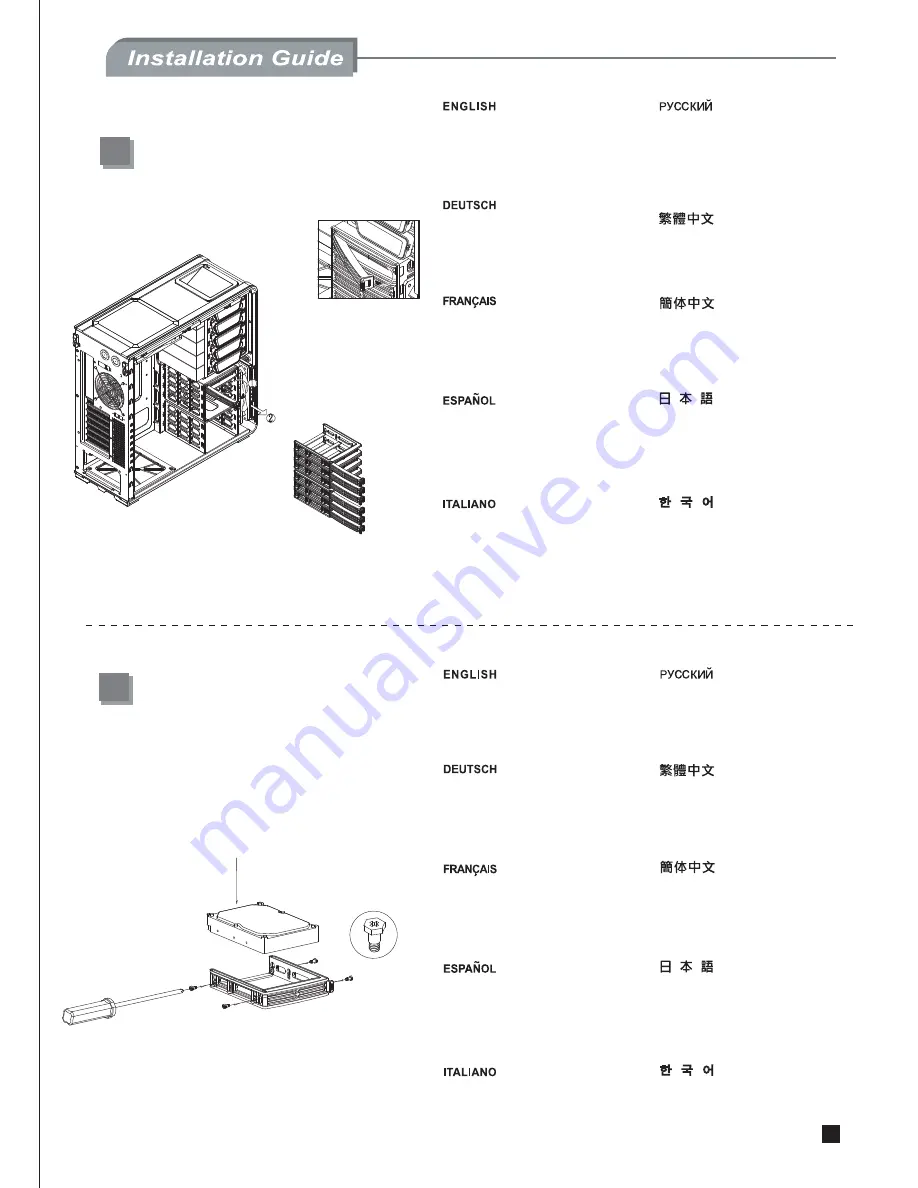
Pull the hard drive tray lever to the left to
remove it outward from chassis.
Потяните
налево
рычаг
для
извлечения
корзины
жесткого
диска
и
выньте
корзину
из
корпуса
.
請依圖示將硬碟托盤取出。
请依图标将硬盘托盘取出。
ハードディスクトレイレバーを左側に
引いて、ケースから取り外します。
하드 드라이브 트레이 레버를 왼쪽
으로 당긴 후, 케이스에서 제거합
니다.
Tabletthandgriff von HDD im Uhrzeigersinn
drehen und aufmachen,wieder nach vorne
ausziehen.
tirez le casier à disques durs vers la
gquche pour le sortir du boîtier.
Saque la bandeja del disco duro hacia
la izquierda para sacarla del chasis.
Spostare verso sinistra la leva tray
dell’hard drive per rimuoverlo dal telaio.
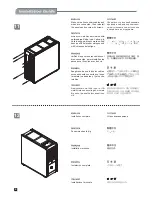
Install your hard drive into the tray and
secure with included screws. (Screw C)
Установите
ваш
жесткий
диск
в
корзину
и
закрепите
его
прилагаемыми
шурупами
(
Шуруп
C).
將硬碟放入托盤內,並在兩側用螺絲
(SCREW C)將其鎖固。
将硬盘放入托盘内,并在两侧用螺丝
(SCREW C)将其锁固。
トレイにハードディスクドライブを取り
付け、付属のネジ(ネジC)で固定します。
하드 디스크를 트레이에 장착한 후, 동봉된
나사 (SCREW C)로 고정시킵니다.
Festplatte auf Tablett einlegen und mit
zweiseitigen Schrauben(Schraube C)
die befestigen.
installez votre disque dur dans le
casier et fixez-le avec les vis
incluses. (Vis C)
Instale su disco duro en la bandeja y
asegúrelo con los tornillos incluidos.
(Tornillo C)
Installare l’hard drive nel tray e fissarlo
con le viti in dotazione. (viti C)
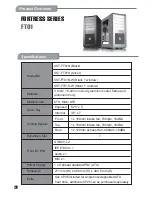
Summary of Contents for SST-FT01B
Page 1: ...MANUAL FORTRESS SERIES FT01...
Page 11: ......
Page 12: ...July 2008 Issue date G11207500...


