background image

USB-101 User manual                                                                     Getting Started 

   Page 

Getting Started 

Power up 

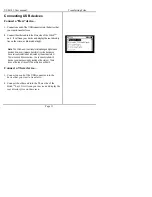
Step 1 – Power Up 

Press and hold the POWER button on the top of the 
unit for 3 sec. to power up your Hitch

TM

 unit. You will 

see the start-up screen for about 15 seconds, followed 
by the 

Settings

 menu on the LCD screen. Press the 

SELECT button to advance to the Main Menu.  Do not 
connect a USB device to the Hitch

TM

 unit before power 

up. 
 

Note

:  The Hitch™ unit is equipped with an 

internal Lithium polymer rechargeable battery 
pack that is capable of powering itself and two 
other USB devices. It is charged at the factory. 
If the battery has discharged, you can use the 
included AC adapter to initially test and operate 
the unit. We recommend fully charging your 
Hitch™ unit (3 – 4 hours) before using it. 
 
When the battery is completely discharged, the 
Hitch will not boot up, only the Here and There 
icons will light. You must charge it for 
approximately 1 minute with the AC adapter 
before using.  

 
When the Hitch

TM

 unit first powers up, it is 

automatically in  

Hitch Mode 

and ready to connect to 

any USB mass storage devices. To connect to an Apple 
iPod*, see the 

Music Mode 

section on page 15. 


Summary of Contents for Hitch USB-101

Page 1: ...Hitch USB Transfer Device Model USB 101 To register your product visit us at www gethitch com...

Page 2: ...r anyone who wants to transfer data images or music between media players USB thumb drives digital cameras camcorders and even USB external hard drives Hitch units support USB 1 1 and USB 2 0 devices...

Page 3: ...nsferring Files 12 Music Mode transferring music files 15 Updating with iTunes 20 Copy Protected files 21 Optional Features 22 Run User Program 22 Backlight Setting Hitch Mode 24 Idle Power Off Hitch...

Page 4: ...ollowing measures Reorient or relocate the receiving antenna Increase the separation between the equipment and receiver Connect the equipment into an outlet on a circuit different from that to which t...

Page 5: ...y destination location Uses Linux 2 4 31 operating system Compliant with OTG supplement Rev 1 0 and USB specification version 2 0 for full speed 12Mbps USB host and device Supports USB storage devices...

Page 6: ...ice is connected to the Here or There port and is being viewed on the display 2 HERE THERE button Retreats through the active menu tree or toggles the display between Here and There devices 3 Scroll w...

Page 7: ...101 User manual Getting Started Page 7 Side and top panel drawings Top Panel 1 5V DC adapter input 2 Power Button Press and hold for 3 sec to turn on Press to turn off Side panel 1 USB connection 1 2...

Page 8: ...argeable battery pack that is capable of powering itself and two other USB devices It is charged at the factory If the battery has discharged you can use the included AC adapter to initially test and...

Page 9: ...ww gethitch com If the version number on the website is higher than the version on your HitchTM unit we recommend you download the firmware upgrade To download new firmware refer to the Install User F...

Page 10: ...ectorsto the HitchTM unit Filetransfersfallinto two categories 1 HitchMode Transferring filesbetween2 USBmass storagedevices WecallthisHitchmode 2 MusicMode A specialmodethatsupports specific MP3 play...

Page 11: ...interchangeably between devices however it always transfers from the device you have currently selected as indicated by the active Here or There icon and direction arrow You can easily tell which devi...

Page 12: ...t time you connect a device to the HitchTM unit and transfer files to it it automatically creates a master folder called hitch in the root directory of the receiving device Inside the hitch master fol...

Page 13: ...master and session folder structure on the receiving device To transfer to a folder of your choice 1 Starting from the There device use the scroll wheel to select the destination folder you want 2 Pre...

Page 14: ...uring file transfers and not interrupt the operation of the HitchTM unit Notes You will not see photos or video on the screen of the HitchTM unit Only the names of files will be displayed The HitchTM...

Page 15: ...ecial mode that places transferred music files into the Artist Album Song database format in the receiving iPod device Note To determine what mode the HitchTM unit is in look in the upper left hand co...

Page 16: ...en Connect to the There side 6 Connect the USB end of the second iPod cable into the There side of the HitchTM unit 7 Connect the iPod end of the cable into the iPod 8 The HitchTM unit will read the i...

Page 17: ...le 1 To select a song to transfer turn the scroll wheel clockwise to scroll down the list to the Songs menu 2 Press the SELECT button to enter the Songs menu 3 Turn the scroll wheel clockwise to selec...

Page 18: ...n to view the There iPod 2 Choose the Songs folder and press the SELECT button to enter 3 Your song will be listed in the database of the receiving iPod Note In Music Mode the HitchTM unit transfers m...

Page 19: ...e sequence to disconnect the units Once disconnected the HitchTM unit will return to the Settings menu in Music Mode and the iPod s will return to normal operation Now you can enjoy the music that you...

Page 20: ...HitchTM To add the remaining copies to your iTunes library go to My computer and locate your iPod It will appear as a removable drive Double click to open and view the root directory You must copy the...

Page 21: ...iTunes Permission to unlock the copy protection must come from the music s owner The HitchTM unit allows you to view the song properties of a file including the file extension Music with the file exte...

Page 22: ...the SELECT button to advance to the Main menu 2 Turn the scroll wheel clockwise to select Run User Program 3 Press the SELECT button The files loaded during the Install User File step will be display...

Page 23: ...on completing the file transfer the HitchTM unit will proceed to shut itself down You will see a Shutting down countdown screen after which the unit will power off When powered up the HitchTM unit wil...

Page 24: ...t will not come on Always ON backlight will not go off 20 sec idle factory default After the scroll wheel is used or any button is pressed the backlight will stay on for 20 sec then turn off Using the...

Page 25: ...factory default Press the SELECT button to save your choice and return to the Settings menu Horizontal Scroll Hitch Mode When the highlighted text is greater than the number of viewable characters on...

Page 26: ...vices are attached to the HitchTM unit TAP SWAP In this mode the Here There button toggles between the Here and There devices TAP BACK HOLD SWAP Tapping the Here There button retreats back through the...

Page 27: ...de of the HitchTM unit Make sure the AC power is supplied to the HitchTM Note The file installation can only be completed with the device connected to the Here side and the HitchTM unit must be in Hit...

Page 28: ...e HitchTM unit To remove a user installed file 1 Go to the Main Menu in HitchTM mode 2 Scroll down to the Remove User File menu Press the SELECT button 3 Use the scroll wheel to select the file you wa...

Page 29: ...here side The options are Music DB to view the contents of the iPod s database or File to view the iPod as a hard drive Each side can have its specific view mode To enter Here There view 1 Go to the S...

Page 30: ...only to a folder only or to both the iPod s Music DB and folder default If the destination is not an iPod any file will only be copied to a folder To enter Send Mode 5 Go to the Settings Menu in Musi...

Page 31: ...find depending on your current mode either Hitch mode or Music mode Highlight and press select 2 When the battery is completely discharged the unit will not boot up You must charge it for approximate...

Page 32: ...ification for title and artist file information Supports USB 2 0 and USB 1 1 Standards 2 5 monochrome LCD screen with back light Provides up to 500mA at 5V to both ports simultaneously Provides file c...

Page 33: ...cidental or consequential damages is specifically excluded The Company shall have no liability for any damages due to lost profits loss of use or anticipated benefits or other incidental consequential...

Reviews: