106
EN
7 MAINTENANCE
7.1
Adjustments
For the appliance to operate safely, correctly and efficiently,
current legislation requires that the system manager call upon
the services of a professionally qualified technician to carry
out regular maintenance, at least
annually
or according to the
specific legal provisions
.
m
CAUTION
– The maintenance interventions described must
ONLY be carried out the professionally qualified
personnel
who MUST wear
suitable protective safety
equipment.
– Make sure that the system components and pipes
are not hot (risk of burning).
m
CAUTION
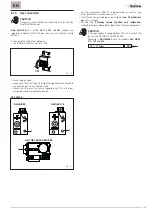
Before carrying out the interventions described
below::
– set the main system switch to "OFF"
– close the gas valve
– make sure that no hot parts inside the appliance are
touched
– if components are replaced, use ONLY original
spare parts.
OFF
Fig. 37
7.2
External cleaning
7.2.1
Cleaning the cladding
When cleaning the cladding, use a cloth dampened with soap
and water, or water and alcohol for stubborn marks, or with
special products.
Once cleaning is completed, dry the appliance.
d
IT IS FORBIDDEN
to use abrasive products.
7.3
Cleaning the inside of the appliance
7.3.1
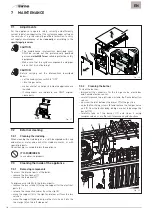
Removing components
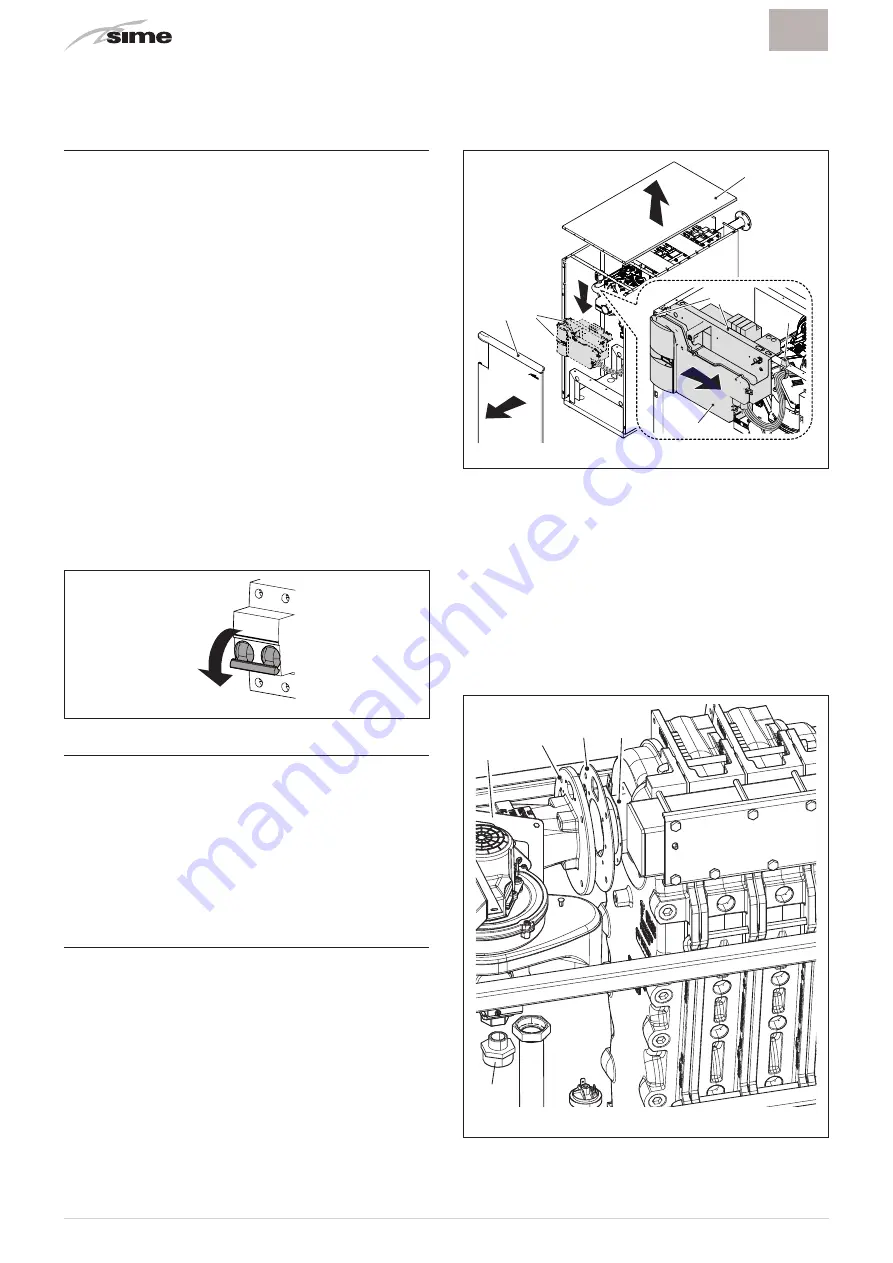
To access the internal parts of the boiler:
– remove the front panel (1)
– remove the top panel (2).
To improve accessibility to the internal parts:
– remove the two screws (3) fixing the support for the electrical
parts (4)
– release the connection cables from the clip (5)
– move the support (4) to the right and release it from the two
catches
– move the support (4) down and, via the slots, hook it into the
two clasps (6) on the left side panel.
2
1
3
4
5
6
Fig. 38
7.3.2
Cleaning the burner
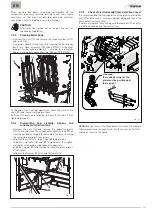
To clean the burner:
– disconnect the connectors for the fan, gas valve, electrodes
and flame detection sensor
– carefully remove the electrode unit and the flame detection
sensor
– unscrew the joint between the pieces (7) of the gas line
– undo the four fixing screws (8) and remove the fan-gas valve
unit (9) from the boiler body, taking care not to damage the
gasket (10)
– carefully take out the burner (11) and clean it using
compressed air or a soft brush to remove any obstructions
7
8
10
11
9
Fig. 39
Summary of Contents for ALU HE 116
Page 6: ...6 IT ...
Page 12: ...12 IT ...
Page 24: ...24 IT ...
Page 61: ...61 IT ...
Page 62: ...62 EN ...
Page 66: ...66 EN ...
Page 72: ...72 EN ...
Page 84: ...84 EN ...
Page 121: ...121 EN ...
Page 122: ...122 ...
Page 123: ...123 ...


