to the body of the boiler and with the special
cleaning brush clean the internal surfaces
and the smoke evacuation tube well, remov-
ing any deposits.
Once the maintenance is compled, the baf-
fles have to be fitted onto the original posi-
tions (ref.
“ESTELLE HE 4-5”
models).
The maintenance operations can be carried
out without removing the burner.
3.3.2
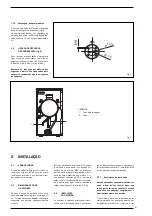
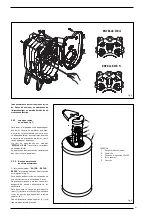
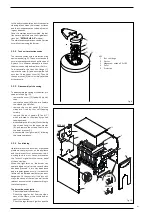
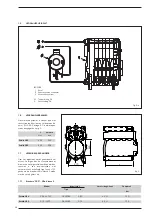
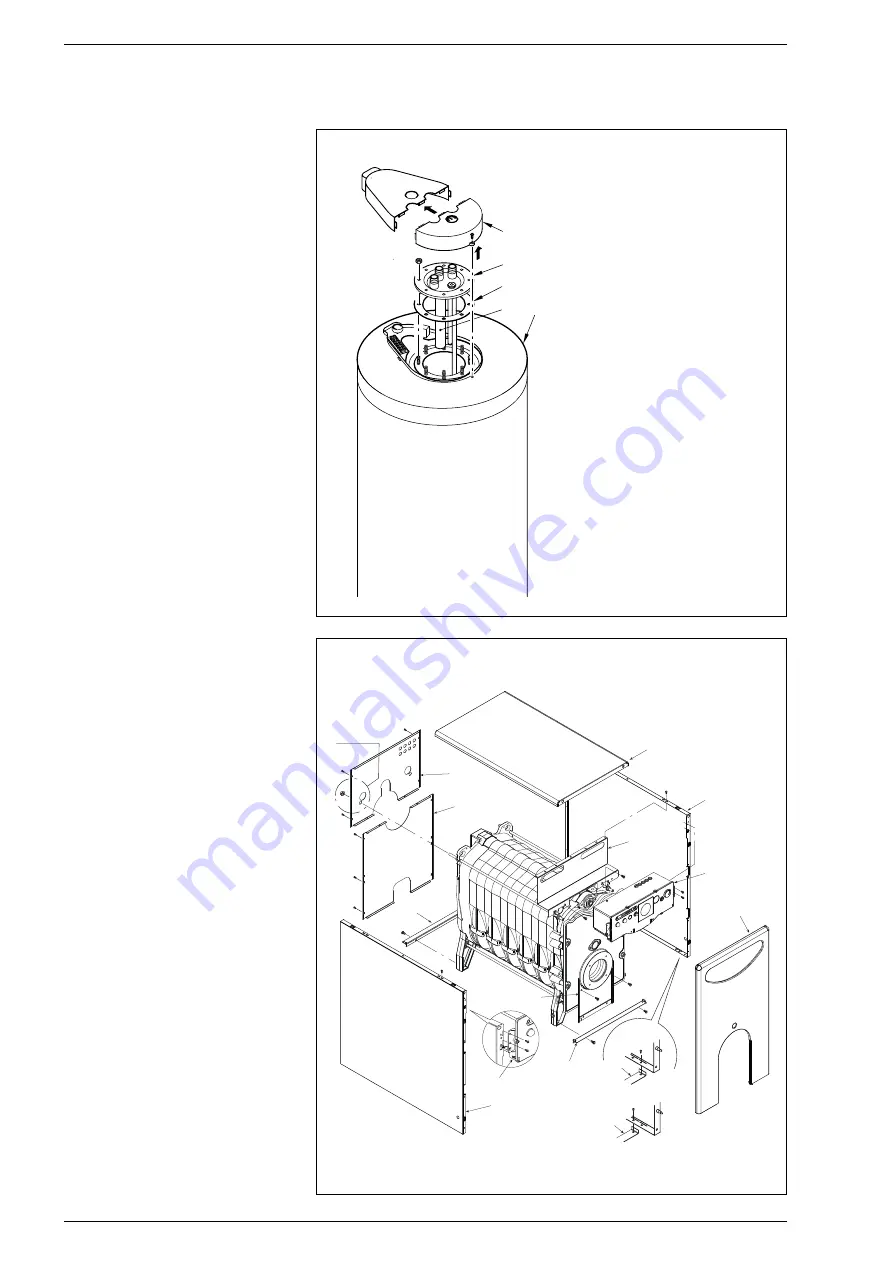
Tank unit protection anode
The tank unit comes with a protection mag-
nesium anode (fig. 9). This non-rust anode in
normal operating conditions has life span of
5 years. It is, however, advisable to check
the erosion annually and replace it if worn.
To disassemble the tank unit flange (1),
remove the cover (5) and unscrew the two
nuts that fix the upper cover (4). Then lift
the upper cover (4) which is simply inserted
with pressure.
3.3.3
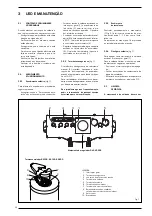
Disassembly of the casing
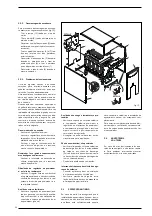
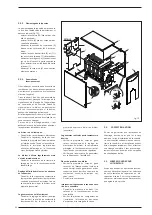
To disassemble the casing of the boiler, pro-
ceed as follows (fig. 10):
– remove the cover (12) fixed with pin clut-
ches;
– remove the panel (8) which are fixed to
the sides by pin clutches;
– remove the control panel (9) whose
sides are fixed by four self-tapping
screws;
– remove the back panels (6) and (7)
which are fixed to the sides by ten self-
tapping screws;
– disassemble the left side (3) unscrewing
the screws fixing it to the upper bracket
(5), and remove the screws that fix it to
the lower bracket (1);
– disassemble the right side (4) following
the same operations.
3.3.4
Fault finding
Herefater we outline a number of potential
problems that may occur on the appliance
and the relevant list of actions required. A
working fault, in most cases, provocates
the “lock out” signal onto the control panel
of the control box.
When this light turns on, the burner can
operate again only after the reset button
has been pressed; if this has been done
and a regular ignition occurs, it means the
failure can be defined momentary and not
dangerous. On the contrary, if the “lock out”
stays, the cause of the fault, as well as the
relevant action must be made according to
the following chart:
The burner does not ignite
– Check the electric connections.
– Check the regular fuel flow, the clean-
ness of the filters, of the nozzle and air
vent from the tube.
– Check the regular spark ignition and the
1
2
3
4
5
Fig. 9
KEY
1
Tank unit flange
2
Gasket
3
Magnesium anode ø 33x185
4
Cover
5
Protection
41
ESTELLE
RONDO’
12
6
7
2
5
4
9
8
11
1
3
9
1
ESTELLE
1
Fig. 10
Summary of Contents for ESTELLE HE
Page 1: ...IT ES ENG FR SL BE GR DE PT RO RUS Estelle HE CERTIFICAZIONE DEL SISTEMA DI QUALITA AZIENDALE ...
Page 116: ......
Page 118: ......
Page 119: ......

