background image

92

USER INSTRUCTIONS

WARNINGS

–In case of fault and/or incorrect equipment operation, deactivate it, without making any repairs or taking any direct

action. Contact the authorised technical staff.

–The installation of the boiler and any servicing or maintenance job must be carried out by qualified personnel. Under

no circumstances, the devices sealed by the manufacturer can be tampered with.

–It  is  absolutely  prohibited  to  block  the  intake  grilles  and  the  aeration  opening  of  the  room  where  the  equipment  is

installed.

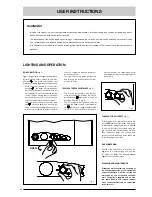
LIGHTING AND OPERATION

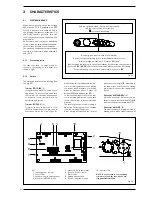
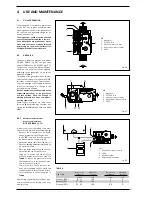
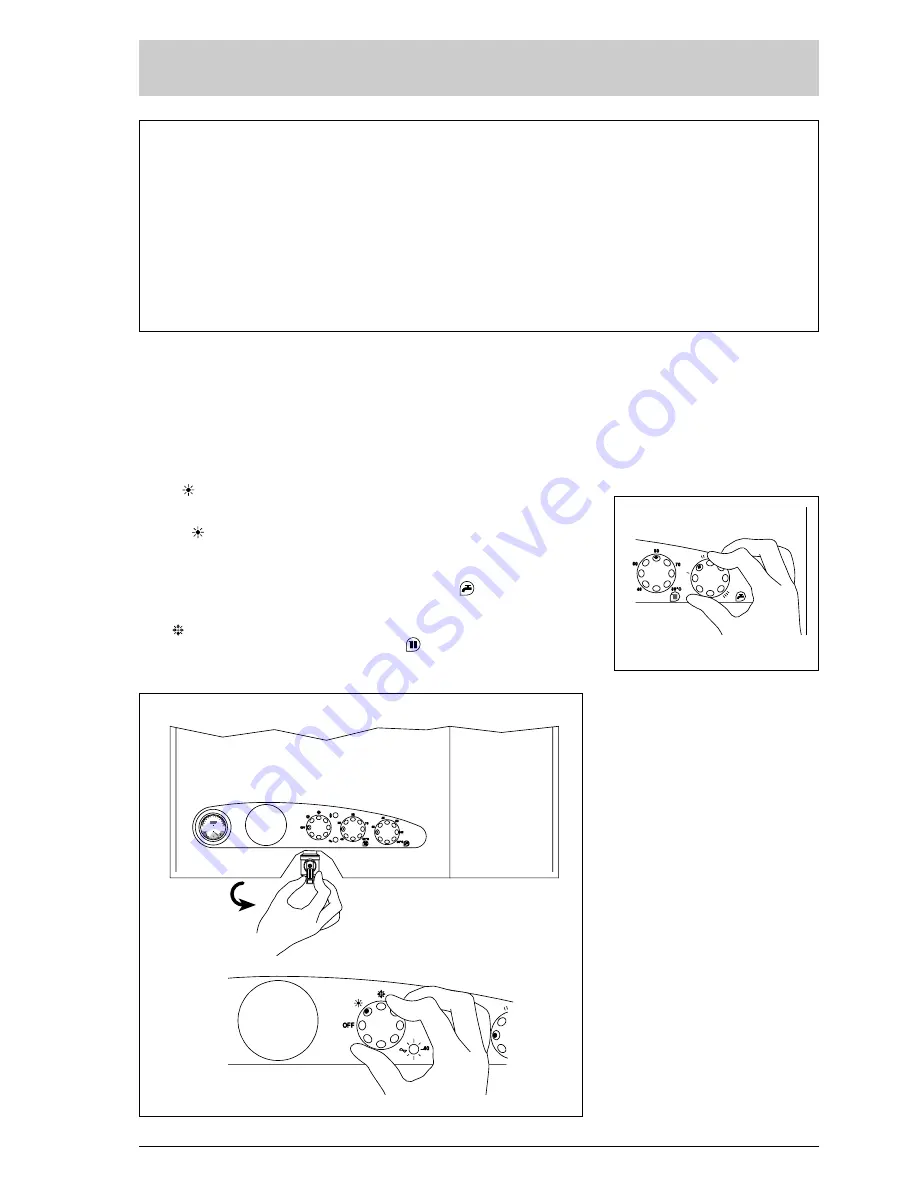
BOILER IGNITION 

(fig. 1)

Open the gas valve and light the appliance

by  turning  the  rotary  switch  to  summer

position

.  The  green  led  indicates  that

electricity is being supplied to the appliance.

– With  the  rotary  switch  in  the  summer

position

,  the  boiler  will  start-up  upon

demand  for  domestic  hot  water,  and  run

at full power to reach the selected tempe-

rature. The gas feeding pressure will then

automatically  vary  to  ensure  that  the

required temperature is kept constant.

–With the rotary switch in the winter posi-

tion

, once the boiler has reached the

value set on the heating potentiometer, it

will  start  to  modulate  in  automatically  in

order  to  supply  the  required  power  out-

put to the system.

The  operation  of  the  boiler  will  be  stop-

ped through the intervention of the ther-

mostat or timer.

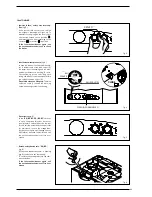
TEMPERATURES ADJUSTMENT

(fig. 2)

–The  D.H.W.  temperature  can  be  adju-

sted  by  turning  the  knob  of  the  D.H.W.

potentiometer

which  has  a  range  of

between 40 to 60°C (fig. 2).

–The C.H. temperature can be adjusted by

turning  the  knob  of  the  C.H.  potentiome-

ter

which has a range of between 40

to  80°C.  To  ensure  optimal  boiler  effi-

ciency at all times, we recommend not to

drop below a minimum working tempera-

ture of 50°C.

TURNING THE BOILER OFF

(fig. 1)

To turn the boiler off place the rotary switch

on the 

OFF

position. If the boiler is not going

to be used  for a lengthy period it is advised

to  turn  off  the  electricity  supply,  close  the

gas cock, and if low temperatures are fore-

seen,  empty  the  boiler  and  the  hydraulic

system to avoid breakage in the tubes due

to the freezing of the water.

GAS CONVERSION

Should  it  be  necessar y  t o  conver t  the

appliance  to  a  different  gas  from  the  one

for  which  the  boiler  has  been  equipped,

approach the technical staff.

CLEANING AND MAINTENANCE

Preventive  maintenance  and  checking  of

the  efficient  operation  of  the  equipment

and  safety  devices  must  be  carried  out

exclusively  by  the  authorized  technical

staff.  The  boiler  is  supplied  with  an  elec-

tric  cable.  Should  this  require  replace-

ment,  contact  exclusively  an  authorised

technical staff.

APRE

0

30

60

90

120

bar

°

C

0

3

4

1

Fig. 1

Fig. 2

OPEN

Summary of Contents for Format 25/60 BF

Page 1: ...e for the outlet of the products of the combustion is unobstructed and has been pro perly installed Make sure that any shutoff valves are open Make sure that the system is charged with water and is thoroughly vented Check that the circulating pump is not locked CAUTION Remember to release the pump coupled with the control panel if necessary to protect the electronic control card Purge the system b...

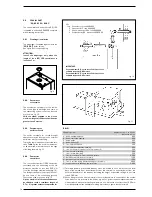
Page 2: ...ber natural draught FORMAT 25 60 BF 30 60 BF with electronic ignition and modulation room sealed forced draught Follow the instructions given in this manual for the correct installation and perfect func tioning of the appliance 73 1 DESCRIPTION OF THE BOILER 1 2 DIMENSIONS 1 2 1 25 60 OF model 600 135 D 865 225 110 495 782 460 25 125 80 70 70 70 107 E U C M R G 63 Fig 1 600 105 865 235 110 495 782...

Page 3: ...pansion vessel Water content Preloading pressure l bar 8 1 8 1 8 1 C H setting range C 40 80 40 80 40 80 D H W setting range C 10 60 10 60 10 60 D H W production Tank capacity l 60 60 60 Continuous D H W flow rate at t 30 C l h 684 684 774 Specific D H W flow rate EN 625 1 l min 14 5 14 5 16 1 D H W maximum water head bar 7 7 7 Recovery time from 25 C to 55 C min 4 30 4 30 4 D H W expansion vessel...

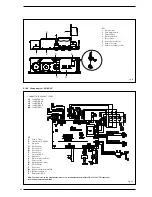
Page 4: ...onal 20 C H flow cock optional 21 D H W cock optional 22 D H W drain cock 23 D H W sensor SB 24 Limit stat 80 C 25 Magnesium anode 26 Fixing jig optional 27 Filling cock 28 Non return valve 1 5 MAIN COMPONENTS 17 16 15 14 13 12 11 1 2 3 4 5 6 7 8 9 10 Fig 3 KEY 1 Control panel 2 Gas valve 3 C H pump 4 Non return valve 5 Burner 6 Water pressure switch 7 Water gas exchanger 8 Limit stat 80 C 9 Fan B...

Page 5: ...l The kit code 8093900 is supplied comple te with mounting instructions 2 3 CONNECTING UP SYSTEM Before proceeding to connect up the boiler you are recommended to make the air cir culating in the piping in order to eliminate any foreign bodies that might be detrimen tal to the operating efficiency of the applian ce When making the hydraulic connections make sure that the dimensions indicated in fi...

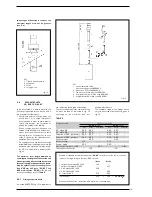
Page 6: ...ro ducts and their possible condensates Follow a vertical path and not present any throttling throughout its entire length Be adequately insulated to prevent phe nomena of condensation or smokes coo ling in particular if located outside the building or in unheated ambiences Be set at an adequate distance from combustible or easily inflammable mate rial by means of an air gap or suitable insulating...

Page 7: ...ves necessary to provide for 78 KEY 1a b Coaxial duct kit code 8084802 2 Extension L 815 code 8084800 3 Vertical extension L 584 code 8086900 4 Supplementary 90 elbow code 8085600 TABLE1 Siting of terminal Appliances from 7 to 35 kW distances in mm A below openable window 600 B below ventilation opening 600 C below eaves 300 D below balcony 1 300 E from adjacent window 400 F from adjacent ventilat...

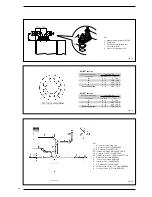
Page 8: ...is type of discharge The sector diaphragm that comes with the kit must be used as indicated in fig 15 according to the maximum load loss allowed in both ducts The complete range of the fittings neces sary for each type of installation is given in fig 16 79 KEY 1 Tile with articulated joint 2 Lead panel 3 Collar 4 Locking screw Fig 12 Fig 13 KEY 1 Vertical extension L 194 with take off point code 8...

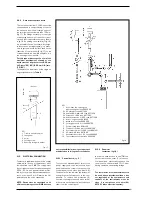
Page 9: ... extension L 1000 code 8077306 4 Outlet terminal code 8089501 5 Int est ring kit code 8091500 6 Intake terminal code 8089500 7 45 elbow MF code 8077406 8 Condensation outlet L 135 code 8092800 9 Locking junction n 5 code 8092700 Sectors of diaphragm Total head loss to remove mm H2O Pa 0 0 2 0 19 6 2 2 3 19 6 29 4 4 3 4 29 4 39 2 6 4 5 39 2 49 0 Remove diaphragm 5 8 49 0 78 4 Sectors of diaphragm T...

Page 10: ...ling to earth the boiler 2 10 1 Control board fig 19 To access the electrical panel turn off the power supply and then remove the front panel and the two screws that anchor the control panel to the sides see point 4 6 The panel will move towards the bottom at an angle that will allow access to the com ponents To remove the protection 6 unscrew the fixing screws and with a screw driver press on the...

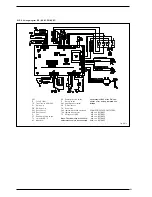
Page 11: ...AR Ignition detection electrode TRA Ignition transformer TS Safety stat 100 C Note The room stat or the chronothermostat must be connected to terminals 10 11 of the TA connector after having removed the bridge 1 2 6 7 5 8 3 4 Fig 19 KEY 1 Thermometer 2 Time programmer 3 Rotary switch 4 Electronic board 5 Earth faston 6 Instrument protection 7 Room stat cover 8 Room stat connector TA CONNECTOR SPAR...

Page 12: ...ulator PA Water pressure switch C Rotary switch SM Heating sensor blue SB D H W sensor TA Room stat EAR Ignition detection electrode TRA Ignition transformer TS Safety stat 100 C Note The room stat or the chro nothermostat must be connected to terminals 10 11 of the TA con nector after having removed the bridge CONNECTOR SPARE PART CODES J2 cod 6278622 J3 cod 6278621 J5 cod 6278625 J6 cod 6278620 ...

Page 13: ...immer in an anti clockwise direction The level of pressure of slow starting is able to be set during the first 3 seconds from the starting of the burner After having established the level of pressure at starting STEP according to the type of gas check that the heating gas pressure is still on the value previou sly set Connector METANO GPL 4 With the connector disconnected the boiler is ready to fu...

Page 14: ... that the cable of the electrode is interrupted or is not well fixed to the terminal of the ignition tran sformer The electrode is earthed or very worn and needs to be substituted The electronic board is faulty Due to a sudden fall in electricity the burner is immediately arrested once the electricity is restored the boiler will automatically restart 3 4 SMOKE SAFETY DEVICE 25 60 OF It is a safety...

Page 15: ...CUITO CON VALVOLE DI ZONA NOTA I relé vengono impiegati solo nel caso le valvole di zona siano prive di micro CIRCUITO CON POMPE DI ZONA CR1 CR Connettore TA 10 11 RL Cavo pompa impianto NOTA Sostituire la pompa impianto della caldaia con il tronchetto optional cod 8094001 Collegare il cavo della pompa impianto ad un relè di potenza RL L N TA1 CRL R1 P TA R P1 CR CR1 LEYENDA TA TA1 Zone room stat ...

Page 16: ...UM 4 2 1 Maximum and minimum pressure adjustment SIT 845 SIGMA fig 29 In order to carry out the setting of the maxi mum pressure proceed in the following way Connect the manometer to the down stream pressure plug of the gas valve In the BF versions instead connect the manometer as shown in fig 28 Remove the plastic cap of the modulator 1 Place the heating potentiometer knob on the maximum value St...

Page 17: ...nob set to the maximum the hot water tap turned on and the burner lit hold nut 3 locked in place and simulta neously turn nut 2 using a fixed ø 7 wrench to identify the minimum pres sure value shown in Table 4 turn the nut anti clockwise to reduce pressure or clockwise to increase it Turn the boiler on and off repeatedly while keeping the hot water tap turned on checking that pressure corresponds ...

Page 18: ...bracket Before refilling the system make sure that the expansion vessel is pre loaded to a pres sure of 0 8 1 bar 4 6 REMOVAL THE OUTER CASING For easy maintenance of the boiler it is pos sible to completely dismantle the casing fol lowing these simple instructions fig 33 Pull the front panel 5 fixed with pin clut ches forward Unscrew the two screws that fix the con trol panel to the shell Remove ...

Page 19: ...at 80 C and restarting at 70 C Before activating the chimney sweep func tion make sure that the radiator valves or eventual zone valves are open The test may be carried out also during hot water service functioning To do so it is enough after having activated the chimney sweep function to take some hot water from one or more cocks Even in this condition the boiler functions at the maximum temperat...

Page 20: ...y of water of the system Check the pre loading pressure of the expansion vessel Replace the expansion vessel if faulty The radiators do not heat up in winter The rotary switch is in the summer posi tion put it on the winter position The room stat is regulated too low or needs to be replaced as it is faulty The electrical connections of the room stat are not correct The principal burner burns badly...

Page 21: ...e system The operation of the boiler will be stop ped through the intervention of the ther mostat or timer TEMPERATURES ADJUSTMENT fig 2 The D H W temperature can be adju sted by turning the knob of the D H W potentiometer which has a range of between 40 to 60 C fig 2 The C H temperature can be adjusted by turning the knob of the C H potentiome ter which has a range of between 40 to 80 C To ensure...

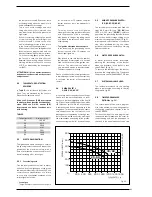
Page 22: ... filling tap The blue coloured scale 1 shows the working field with heating system functioning Other faults fig 5 In the 25 60 BF 30 60 BF versions in case the green bicolour detector fan pressure switch deactive the boi ler and call the authorised technical staff for assistance In case the orange bico lour detector lights upt heating sensor SM failure deactive the boiler and call the authorised t...

Page 23: ...n memorized by pressing button P The display then changes to the further programme Repeat the same opera tions to set the successive programmes At the end of the programming Move the selector to the RUN position Cancelling one or more programmes fig 9 The programmed switch on time and switch off time must be cancelled for each individual programme by moving selector 2 to the P position Select the ...

Reviews: