59
EN
POSITION B
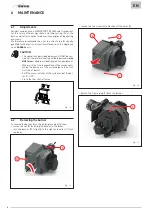
6.2.3
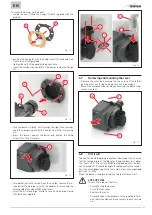
Cleaning and replacing the combustion head
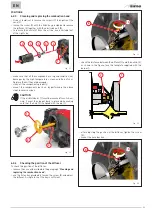
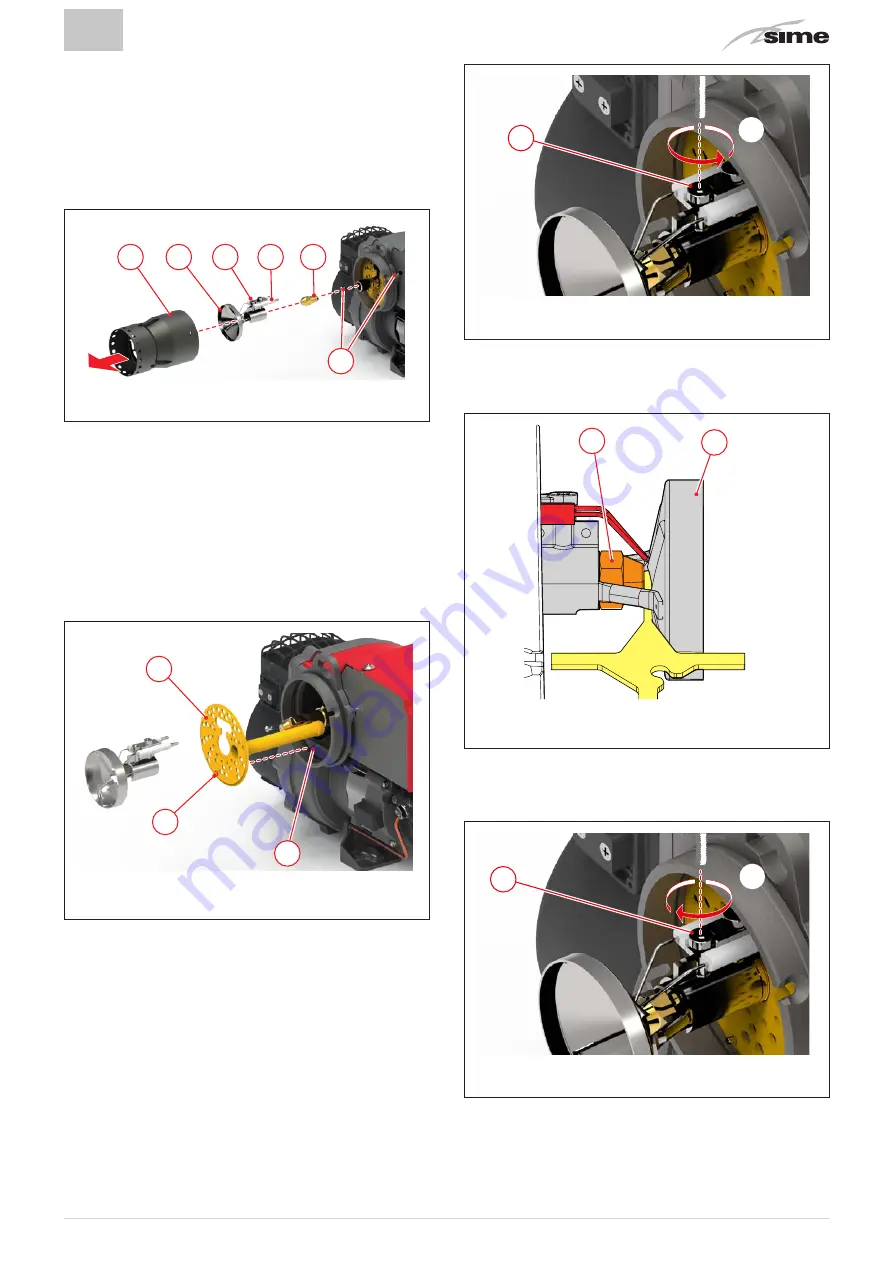
– Use a screwdriver to remove the screws (1) then pull out the
nose (2);
– loosen the screw (3) with the Allen key provided and remove
the diffuser (4) together with the electrode unit (5);
– to remove the nozzle (6) from the oil line, use a suitable tool
of the right size;
2
4
3
5
6
1
Fig. 41
– make sure that all the components are in good condition, not
damages by the high temperatures, clean and free of soot.
Replace them if they are damaged;
– clean all the components properly;
– mount the components back on by performing the above
steps in reverse order.
m
CAUTION
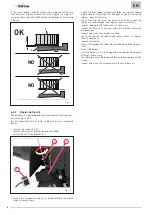
If the air distributor (1) must be removed from its hou-
sing, it must then be put back in place while making
sure that the hole (2) is aligned with the pin (3).
1
2
3
Fig. 42
6.2.4
Checking the position of the diffuser
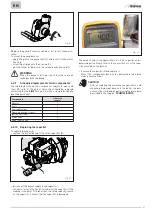
To check the position of the diffuser:
– remove the nose as described in the paragraph “Cleaning and
replacing the combustion head”;
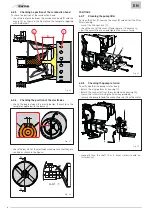
– use the Allen key provided to loosen the screw (8) and adjust
the diffuser. A single turn of the key is sufficient;
8
1X
Fig. 43
– check the distance between the diffuser (1) and the nozzle (2),
as shown in the figure (use the template supplied with the
burner);
2
1
Fig. 44
– after adjusting the position of the diffuser, tighten the screw
(8);
– mount the nose back on.
8
1X
Fig. 45

