14
VIEWING THE PHOTOS and VIDEOS
After your camera has been operating for awhile, you will of course want
to review the photos and/or videos it has been capturing. This can be
done by either of two methods, according to your preference or the
availability of accessory equipment:
Using an SD Card Reader
1. Push the SD card in slightly to release it then pull it out gently.
2. Put the SD card into any of the widely available SD card readers
(either a dedicated SD card reader or “multi-card reader” that
features slots for several different memory cards, including SD cards.
3. Follow the card reader supplier’s directions to view or download the
photo and/or video files on the SD card.
Connecting the Camera to Your Computer via USB
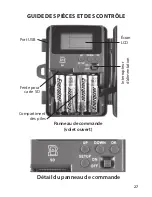
1. Slide the Power switch to the “ON” position, then press the SETUP
button.
2. Connect your camera’s USB port (
left side near the display with
camera unlatched and open
) to a PC or Mac computer with a USB
cable (not included
, available at most electronics/computer retailers
)
that has a “Mini-B” USB plug on one end (
camera
) and a “Standard-A”
USB plug at the other end (
computer
).
3. The PC will recognize the camera as an external storage device,
using the “USB Mass Storage” standard (
no driver installation
necessary-not compatible with Windows 98 or earlier
). The PC will
display a new disk symbol under “My Computer” or in Windows
Explorer (
Macs-new disk appears on the desktop
), and you will see a
dialog window on your desktop with several options to view, move,
or copy the photo and video files that are stored on the SD card.
The camera’s LCD will display “STO”, meaning the camera is in mass
storage mode.


