8
9
OWNER’S MANUAL
ASSEMBLING YOUR KIT
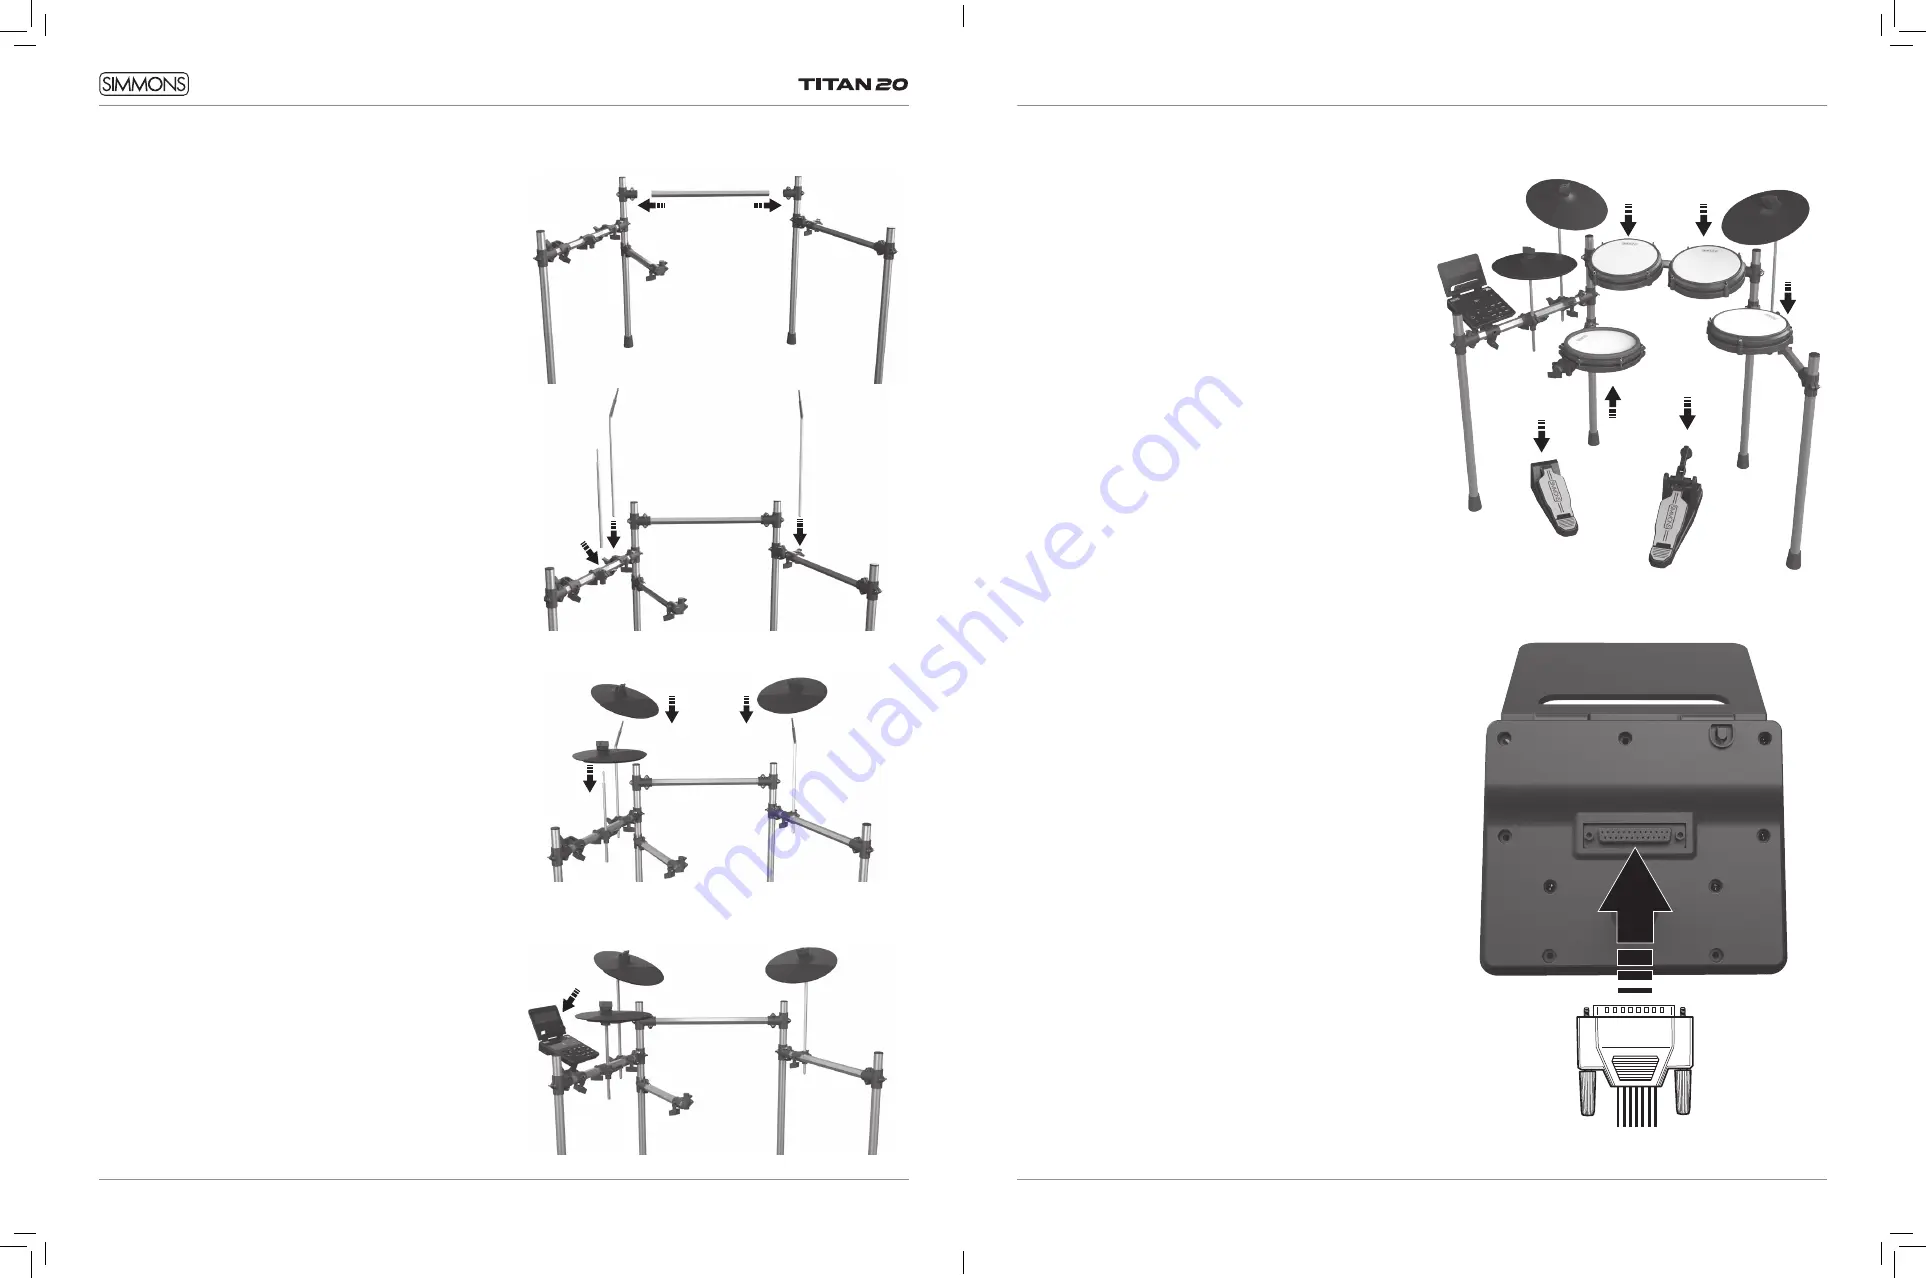
STEP 1 - DRUM RACK
The Drum rack will be partially assembled in the box.
Remove the drum rack components from the box. The rack is
in three components:
One component is shaped like an “h”, and the two vertical
posts have feet on the bottom. This is the right side of the
rack. The taller post should be on the inside edge.
The second component looks the same, but it has an
additional arm attached. This is the left side of the rack.
Again, the tall post (with two arms attached) faces the
inside of the rack.
Finally, there is one long bar with three clamps attached.
This is the center of the rack, and it joins the other two
together.
Insert the long bar between the two other components.
The clamps on this bar should face away from the drummer.
Tighten the connecting clamps until the rack is stable.
STEP 2 - ATTACH CYMBAL ARMS
Insert each cymbal arm into the rack clamp. Insert (Long)
hi-hat arm on the left-side rack arm’s cymbal clamp. Slide
the hi-hat arm through the plastic sleeve to adjust the
height.
STEP 3 - ATTACH CYMBAL PADS
Place the cymbal pads on the tilter assemblies. Put the
felt on next, then screw down the cymbal nut to attach.
STEP 4 - ATTACH DRUM MODULE
Loosen the wing screw on the module mount located on
the crossbar. Place the drum module into the drum clamp.
Tighten the wing screw to secure the module.
ASSEMBLING YOUR KIT
STEP 5 - POSITION PEDALS & ATTACH DRUM PADS
Place the hi-hat pedal on the floor and to the left, as
illustrated below. Place the bass pedal on the floor in the
center of the rack as illustrated.
Loosen the wing screws on the drum mount clamps then
place the tom pads into the mounts and tighten the wing
screws.
Place the L-rod into the clamp on the short arm. Insert
this L-rod into the snare drum pad and tighten the wing
nut on the bottom.
STEP 6 - CONNECT MODULE TO THE PADS
Using the provided cables, connect the ¼” jacks to the
corresponding drum pads, cymbal pads and kick pad.
(Cables are marked accordingly, see diagram on next page).
The 25-pin connection will attach to the port on the bottom
of the sound module. Use the included hook-and-loop cable
strips to retain cables to the rack.
NOTE: The voice of the hi-hat pad is controlled by the hi-hat
pedal. Similar to a real drum kit, the hi-hat pad functions
as an ‘open hi-hat’ when the pedal is released. When the
pedal is pressed down, it functions as a ‘closed hi-hat’.


