11
OWNER’S MANUAL
CONNECTIONS
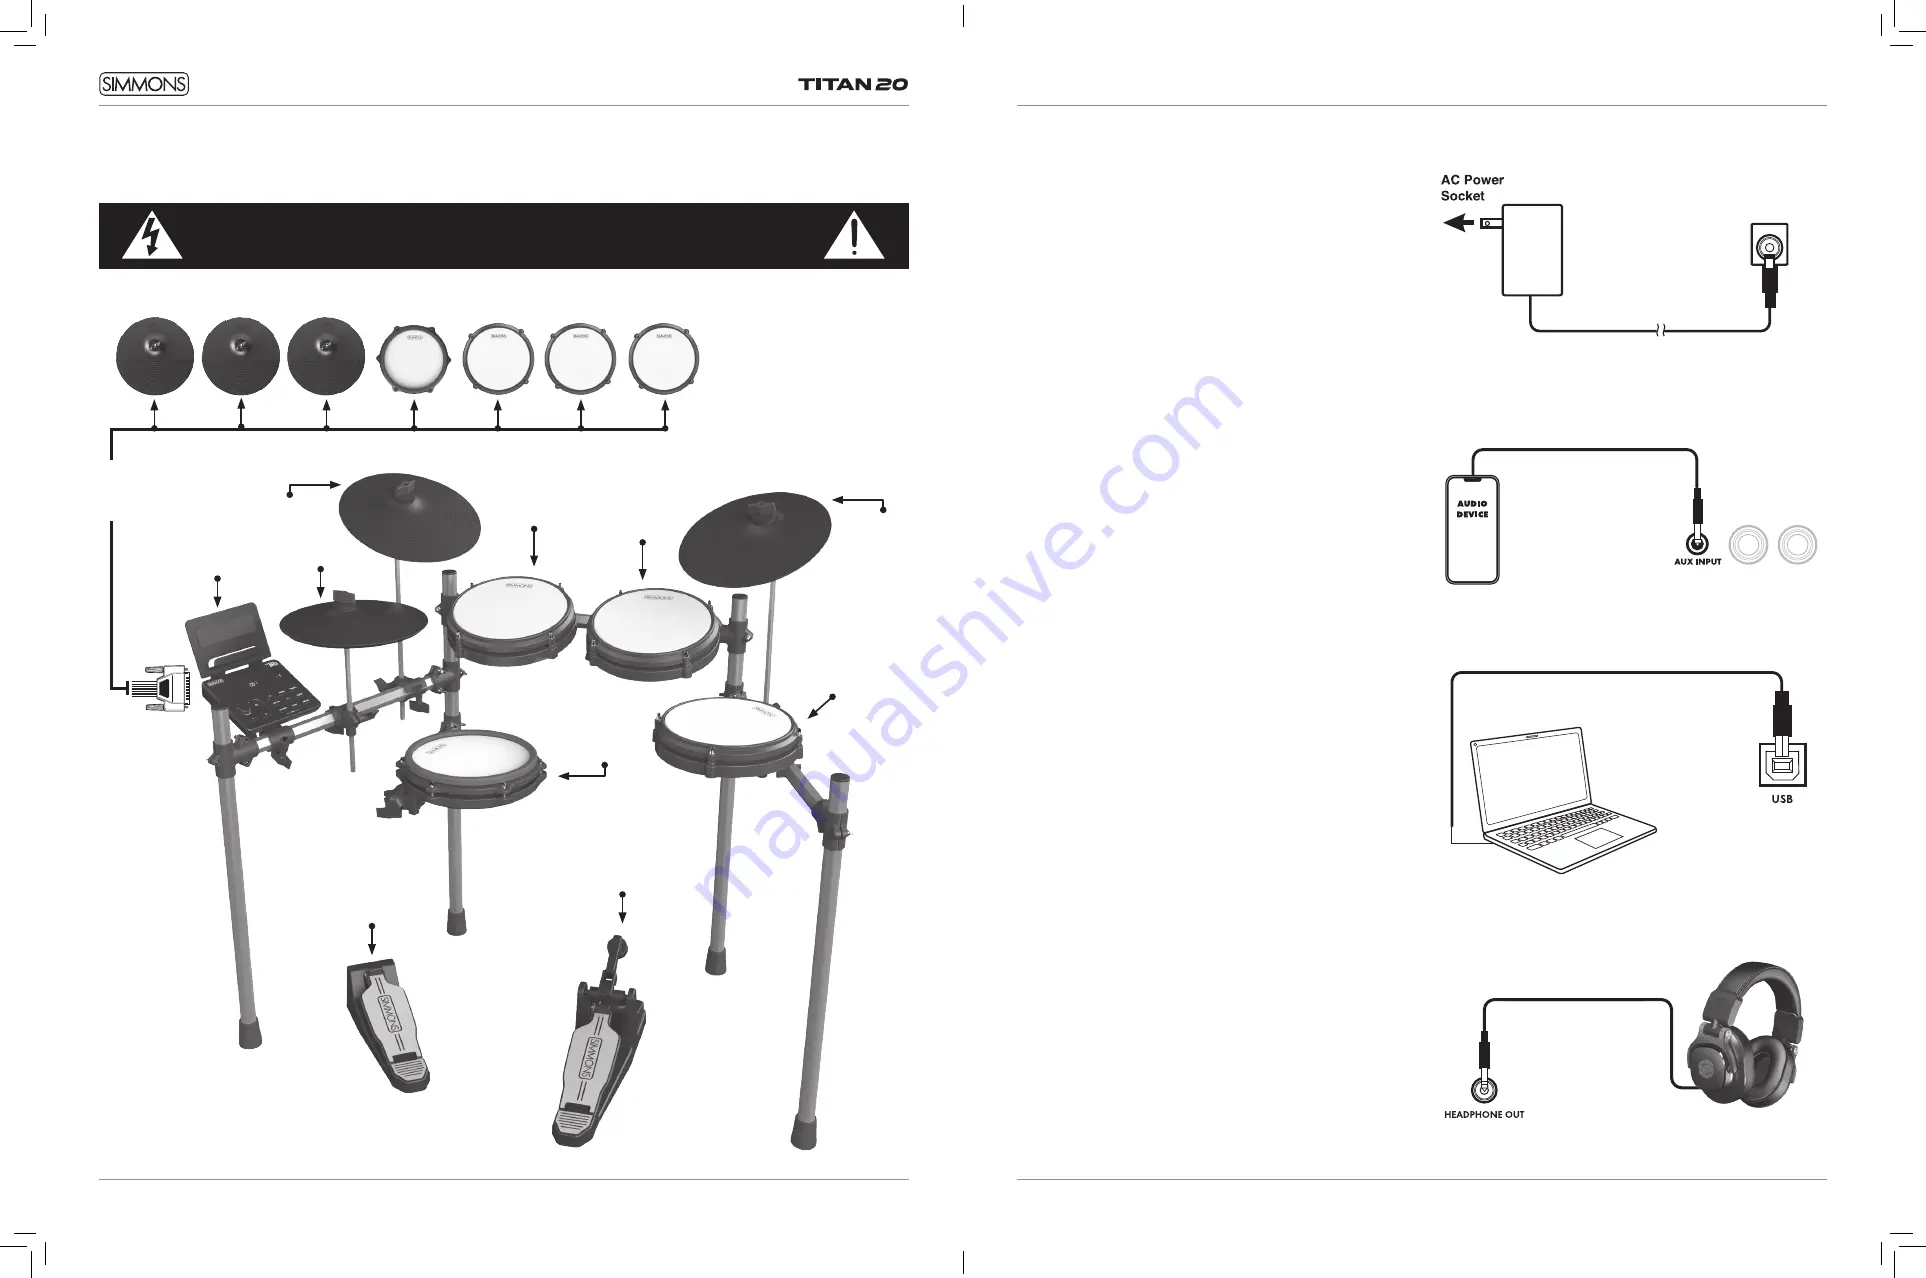
CONNECTING THE POWER SUPPLY
Connect the AC power adapter to a wall as shown in this
illustration. Under the module, there is a hook that you can
run the power cable through for added strain relief.
CONNECTING EXTERNAL AUDIO DEVICES
The audio output from an external source can be connected
to the AUX INPUT jack on the rear panel and mixed with the
sound of the drum module. This is ideal if you want to play
along with songs or follow an audio drum tutorial on your
smartphone or tablet. The volume of the external signal is
controlled on that device.
USB AUDIO AND MIDI CONNECTION
The USB connector allows you to connect the module
directly to your computer. It can be connected without driver
installation under the Windows & macOS environment. The
module will be recognized to receive and transmit Audio
and MIDI messages through a single USB cable, The Titan
20 module will appear as “Titan 20” in the USB device
options of your software.
NOTE: When the USB is connected to a computer, all MIDI
messages will be received and transmitted via USB.
You can also connect to a computer or mobile device
using Bluetooth Audio or Bluetooth MIDI. See page 20 for
instructions. (USB cable not included).
CONNECTING HEADPHONES
Your headphones can be connected to the Titan 20 module.
The headphone jack is located on the front left side of
module. Use the MASTER VOLUME knob to adjust the
headphone volume.
10
CONNECTIONS
CONNECTING THE PADS
CAUTION!
T
o prevent electric shock and damage to the device, make sure the power is switched
OFF on the sound module and all related devices before making any connection.
To Ride
To Hi-Hat
Sound
Module
To Hi-Hat
Pedal
To Kick
To Snare
To Tom 1
To Tom 2
To Tom 3
From
Sound Module
to 7 Pads
*See Appendix for Pad, Triggers, Name and MIDI chart.
To Crash


