background image

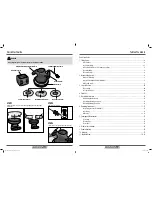
Ponceuse-cireuse orbitale à mouvement aléatoire 

de 10 po et accessoires

039-9055-6

Nous vous félicitons d’avoir acheté la ponceuse orbitale aléatoire et son kit 

de cirage 25,4 cm. Pour profiter au mieux de votre achat, veuillez lire les 

instructions qui suivent. Si vous avez besoin d’aide, veuillez contacter le service 

à la clientèle au numéro suivant :

1-866-4SIMONIZ 

(1-866-474-6664)

Contactez-nous si vous souhaitez obtenir de l'aide. Nous 

sommes à votre entière disposition!

Version n° 02

M

anuel d'

entr

etien et d'utilisa

tion

039-9055-6-Polisher kit-EN-FR-02.indb   1

11/9/12   4:10 PM

Summary of Contents for 039-9055-6

Page 1: ...isher Waxer Kit In order to ensure you have the best possible experience please read through the following instructions If you require any help please contact the customer service department at 1 866 4SIMONIZ 1 866 474 6664 Contact us for assistance we re here to help Version no 02 039 9055 6 Polisher kit EN FR 02 indb 1 11 9 12 4 10 PM ...

Page 2: ...andle Position 12 5 2 Attaching Polishing Accessories 12 5 3 AttachingWaxing Accessories 12 6 Operating Instructions 13 15 6 1 Switching the PowerTool ON OFF 13 6 2 Polishing 13 6 3Waxing 14 15 7 Cleaning and Maintenance 15 7 1 Cleaning 15 7 2 Lubrication 15 7 3 Storage 15 8 Technical Specifications 16 9 Troubleshooting 16 10 Warranty 17 11 ExplodedView 18 19 TableofContents QuickStartGuide STEP 1...

Page 3: ...ntact with earthed or grounded surfaces such as pipes radiators ranges and refrigerators There is an increased risk of electric shock if your body is earthed or grounded Do not expose power tools to rain or wet conditions Water entering a power tool will increase the risk of electric shock Do not abuse the cord Never use the cord for carrying pulling or unplugging the power tool Keep cord away fro...

Page 4: ...pad for cracks tear or excess wear wire brushforlooseorcrackedwires Ifpowertooloraccessory is dropped inspect for damage or install an undamaged accessory After inspecting and installing an accessory position yourself and bystanders away from the plane of therotatingaccessoryandrunthepowertoolatmaximum no load speed for one minute Damaged accessories will normally break apart during this test time...

Page 5: ...SIMONIZ 1 866 474 6664 2 1What is Polishing Polishing is the process of creating a smooth and shiny surface by rubbing it or using a chemical action leaving a surface with a significant specular reflection Polishing is usually a 2 3 step process starting first with an aggressive polish to remove imperfections swirls etc then followed by a milder finishing polish to remove any hazing or slight marr...

Page 6: ...r at 1 866 4SIMONIZ 1 866 474 6664 Please do NOT bring the unit back to the store until you have called this number If any parts are missing do not operate this tool until the missing parts are replaced Failure to do so could result in possible serious personal injury Do not attempt to modify this tool or create accessories not recommended for use with this tool Any such alteration or modification...

Page 7: ...otuseacircularmotionasthismakesswirls Testbefore use on scrap stock Any areas inaccessible to the waxer polisher should be waxed polished by hand 6 1 Switching the PowerTool ON OFF 1 Insert the power plug A into a suitable electrical outlet 120V AC 2 Holdthetoolfirmlybyitstwohandles B H andswitchthe tool on by pressing the on off switch H Fig 6 3 Switch the tool off by pressing the on off switch H...

Page 8: ...ax in subsequent applications 6 After the wax has been applied to the work surface switch the tool off and unplug it 6 Operating Instructions 7 Remove the applicator D or E from the foam pad C and use it manually to apply the wax to those hard to reach areas suchasnearandaroundmirrors lights doorhandles under bumpers etc Fig 9 9 8 Allow sufficient time for the wax to dry on the work surface Afterw...

Page 9: ...situationin which the tool is used Wear appropriate hearing protection taking into consideration an estimation of exposure in the actual conditions of use taking account of all parts of the operating cycle such as the times when the tool is switched off and when it is running idle in addition to trigger time 9 Troubleshooting important If your unit still is not functioning properly once you have u...

Page 10: ...AWG 1015 1 11 Counter balance 1 35 Pipe Φ6 1 12 Motor case 1 36 Logo label 1 13 W magnet 2 37 Spring 2 14 Bearing 608z 2 38 Spring cover 2 15 Fan 1 39 Self tapping screw ST4x12 C 6 16 Armature assembly 1 40 Right housing 1 17 Brush holder 2 41 Top cover 1 18 Brush support 2 42 Self tapping screw ST4x18 C 11 19 Carbon brush spring 2 43 Rating label 1 20 Wire 1 22AWG 1015 1 44 Right hand bottom base...

Page 11: ...r profiter au mieux de votre achat veuillez lire les instructionsquisuivent Sivousavezbesoind aide veuillezcontacterleservice à la clientèle au numéro suivant 1 866 4SIMONIZ 1 866 474 6664 Contactez nous si vous souhaitez obtenir de l aide Nous sommes à votre entière disposition Version n 02 Manuel d entretien et d utilisation 039 9055 6 Polisher kit EN FR 02 indb 1 11 9 12 4 10 PM ...

Page 12: ...n des poignées 12 5 2 Fixation des accessoires de polissage 12 5 3 Fixation des accessoires de cirage 12 6 Instructions d utilisation 13 15 6 1 Mise en MARCHE ARRÊT de l outil électrique 13 6 2 Polissage 13 6 3 Cirage 14 15 7 Nettoyage et entretien 15 7 1 Nettoyage 15 7 2 Lubrification 15 7 3 Entreposage 15 8 Caractéristiques techniques 16 9 Dépannage 16 10 Garantie 17 11 Vue éclatée 18 19 Tablede...

Page 13: ...réduitlesrisquesd électrocution Évitez tout contact du corps avec les surfaces mises à la terre tellesqueconduits radiateurs calibresetréfrigérateurs Lerisque d électrocutionestaccrulorsquelecorpsestmisàlaterre N exposez pas les outils électriques à la pluie ou à des conditions degrandehumidité Touteinfiltrationd eaudansl outilélectrique accroîtlesrisquesd électrocutionqu ilprésente Manipulez le c...

Page 14: ...s abrasives afin de détecter des écaillements et fissures des fissures des signes d usure excessive sur les plateaux porte disques ainsi que des fils lâches ou fendus des brosses métalliques En cas de chute de l outil électrique ou de l un de ses accessoires vérifiez tout dommage ou montez un accessoire non endommagé Après l inspection et le montage d un accessoire tenez vous et toutes personnespr...

Page 15: ...6664 2 1 En quoi consiste le polissage Le polissage est le processus d obtention de surfaces lisses et brillantes grâce à des frottements ou à une réaction chimique donnant à la surface traitée un reflet spectaculaire Le polissage passe habituellement par 2 ou 3 étapes l opération débute avec un traitement agressif permettant de supprimer les imperfections spirales etc Ensuite il s agit de procéde...

Page 16: ... 1 866 4SIMONIZ 1 866 474 6664 Veuillez NE PAS retourner cet appareil au magasin avant d avoir appelé au préalable ce numéro Si vous constatez des pièces manquantes n utilisez pas cet outil avant remplacement de celles ci Le non respect de cette disposition vous expose à d éventuelles blessures corporelles graves N essayezpasdemodifiercetoutiloudecréerdesaccessoiresnonrecommandésàutiliseraveccetou...

Page 17: ...t tout usage testez l appareil sur une surface d essai Les zones auxquelles la cireuse polisseuse ne peuvent accéder doivent être cirées polies à la main 6 1 Mise en MARCHE ARRÊT de l outil électrique 1 Insérezlafiched alimentation A dansunepriseélectrique adéquate 120V CA 2 Tenez fermement l outil au moyen de ses poignées B H et mettez l outil sous tension en appuyant sur l interrupteur marche ar...

Page 18: ...NT DE CIRE LORS DE NOUVELLES APPLICATIONS 6 Lorsque la cire a été appliquée sur la surface de travail mettez l outil hors tension et débranchez le 6 Instructions d utilisation 7 Retirez l applicateur D ou E de l éponge en mousse C et utilisez le manuellement pour appliquer la cire sur les surfaces difficiles d accès par exemple à proximité ou autour des miroirs des lumières des poignées de porte s...

Page 19: ...ipements adaptés de protection auditive en prenant en considération une estimation de l exposition dans les réelles conditions d utilisation prenez en compte toutes les étapes du cycle de fonctionnement notamment le temps où l appareil est arrêté inactif et en cours d utilisation sans oublier le temps de détente 9 Dépannage important Si votre appareil présente des dysfonctionnements après avoir su...

Page 20: ... 1 11 Équilibreur 1 35 Tuyau Φ6 1 12 Carter de moteur 1 36 Étiquette du logo 1 13 Aimant 2 37 Ressort 2 14 Roulement 608z 2 38 Gaine de ressort 2 15 Ventilateur 1 39 Vis auto taraudeuses ST4x12 C 6 16 Armature 1 40 Boîtier droit 1 17 Porte balais 2 41 Couvercle supérieur 1 18 Porte crosse 2 42 Vis auto taraudeuses ST4x18 C 11 19 Balais de carbone et ressort 2 43 Plaque signalétique 1 20 Fil 1 22AW...

Reviews: