Hinweis für SmartIntego-Nutzer
SimonsVoss empfiehlt die folgende Vorgehensweise:
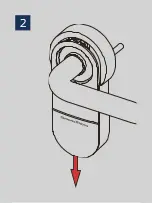
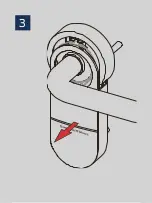
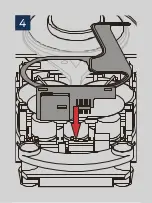
1. Entfernen Sie den vorhandenen LockNode.
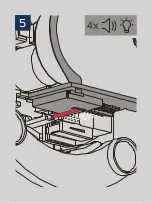
2. Montieren Sie den neuen LockNode.
3. Öffnen Sie den SmartIntego-Manager.
4. Wählen Sie „Ersetzen mit Chip-ID“.
5. Geben Sie die neue Chip-ID ein.
6. Führen Sie die Programmierung im SmartIntego-Tool durch.
7. Importieren Sie ggfs. in das Integratorsystem.
8. Aktualisieren Sie die Dokumentation (Einbauplan).
Verwenden Sie den alten LockNode nicht mehr.
Note for Smartintego users
SimonsVoss recommends the following procedure:
1. Remove the installed LockNode.
2. Install the new LockNode.
3. Start the SmartIntego manager.
4. Choose „Replace with Chip ID.
5. Enter the new Chip ID.
6. Carry out the programming in the SmartIntego-Tool.
7. If necessary, import into the integrator system.
8. Update the documentation (installation plan).
Don‘t use the old LockNode any longer.
Note pour les utilisateurs de Smartin-
tego
SimonsVoss recommande la procédure suivante :
1. Retirez le LockNode installé.
2. Installez le nouveau LockNode.
3. Démarrez le gestionnaire SmartIntego.
4. Choisissez „Remplacer par Chip ID“.
5. Entrez le nouvel ID de la puce.
6. Effectuer la programmation dans l‘outil SmartIntego-Tool.
7. Si nécessaire, importer dans le système intégrateur.
8. Mettre à jour la documentation (plan d‘installation).
N‘utilisez plus l‘ancien LockNode.
Summary of Contents for WaveNet LockNode SH AX
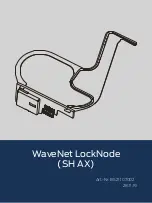
Page 1: ...WaveNet LockNode SH AX Art Nr BS21 107002 28 11 19...
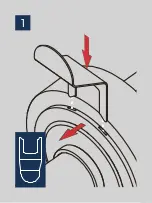
Page 11: ...1...
Page 12: ...2...
Page 13: ...3...
Page 14: ...4...
Page 15: ...5 4x...
Page 16: ...6...
Page 17: ...7...
Page 18: ...8...
Page 19: ...9...

