Atlas | Operation and Installation Manual
11
V-A. Conducting a Test
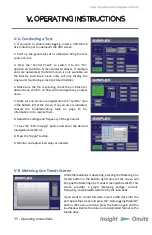
1. If you wish to enable data logging, insert a USB thumb
drive into the port underneath the HMI screen.
2. Start up the generator set or otherwise bring the test
source on line.
3.
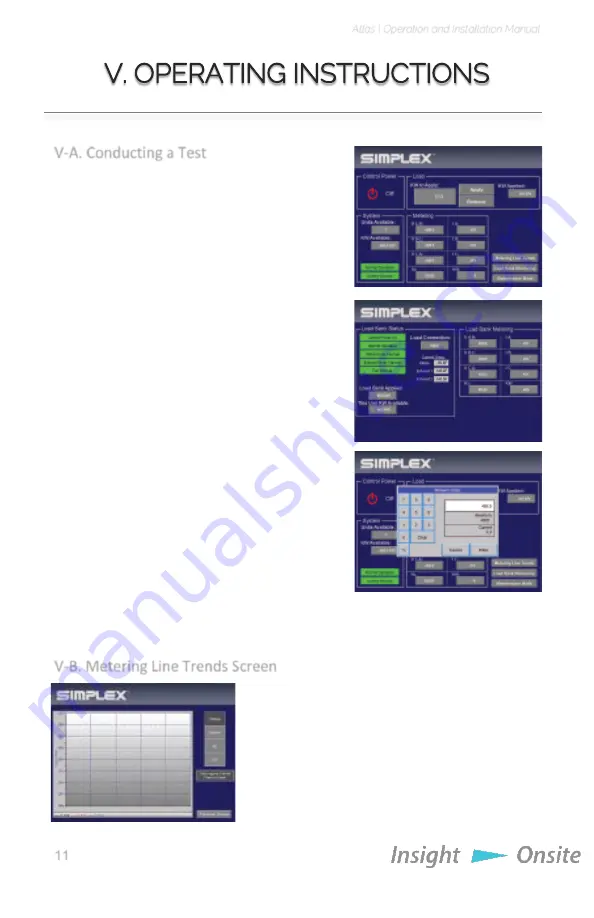
Press the “Control Power” to switch it to the “On”
position on the Main Screen (pictured above). If multiple
units are networked, the Main Screen is only available via
the Master Load Bank. Slave units will only display the
single-unit monitoring screen (pictured middle).
4. Make sure the fan is spinning, check the air intake for
obstructions, confirm air flow and investigate any unusual
noise.
5. Make sure no errors are registered in the
“System” area
in the bottom left of the screen. If any errors are indicated,
consult the troubleshooting table on page 16 for
information on to resolve them.
6. Adjust the voltage and frequency of the generator.
7.
Press the “KW to Apply” button and enter the desired
load (pictured bottom).
8.
Press the “Apply” button.
9. Monitor and adjust load steps as needed.
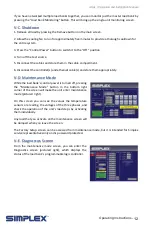
V-B. Metering Line Trends Screen
While the load bank is operating, pressing the Metering Line
Trends button in the bottom right corner of the screen will
bring up the Metering Line Trends screen (pictured left). This
screen provides a graph displaying voltage, current,
frequency, and kilowatts detected by the load bank.
If you want to record this data, insert a USB drive into the
port below the screen and press the “Data Logging Disabled”
button. When you are done, press the button again and the
load bank will write the data in a tab-delimited format to the
thumb drive.
- Operating Instructions


