44
Troubleshooting, Adjustment, & Service
48” Mower Drive Belt Replacement
NOTE: The left drive belt may be replaced without
removing the right belt. To replace the right belt, the left
belt must also be removed. The procedure below covers
removal of both belts.
1. Remove the mower deck. See Mower Removal and
Installation
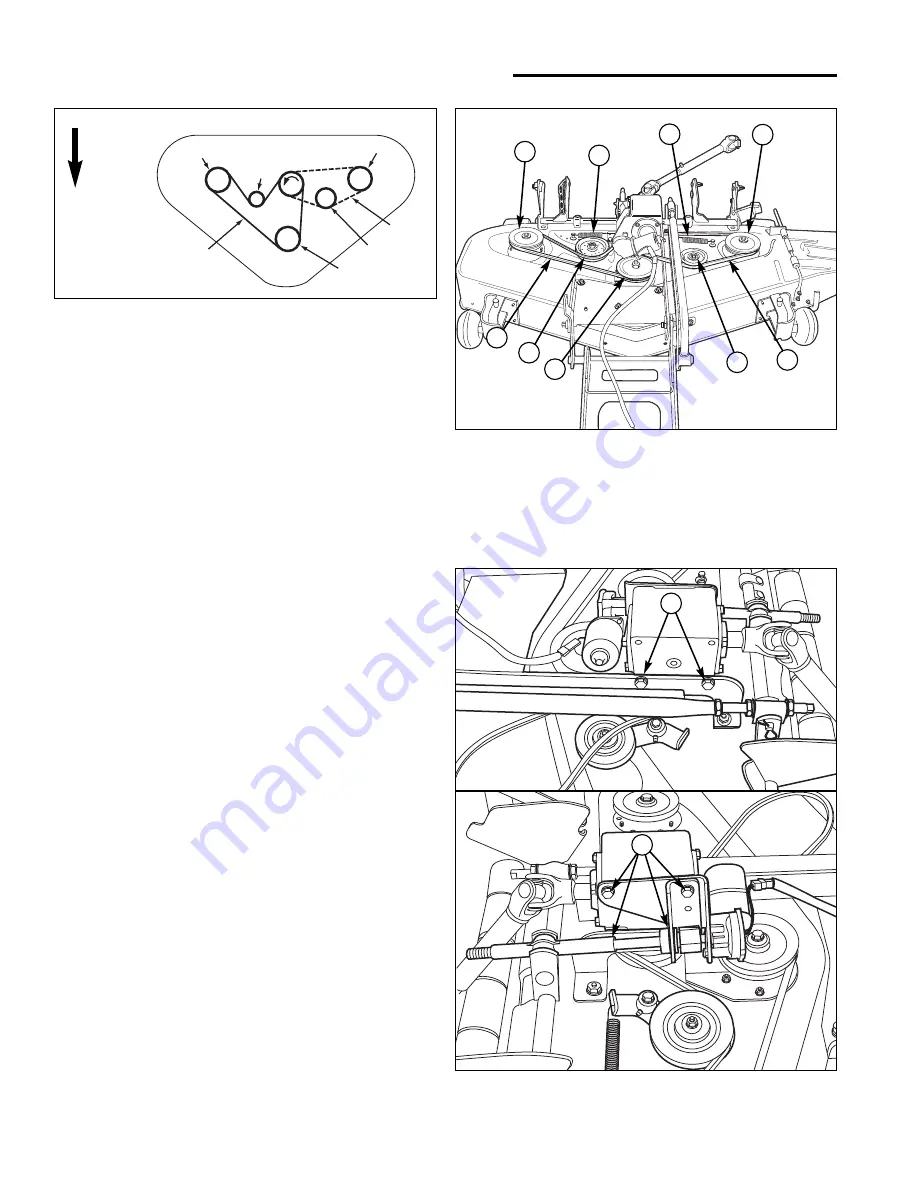
2. Remove the screws securing both deck belt covers
and remove the covers.
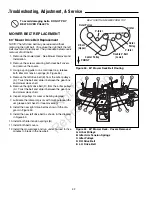
3. Using a spring puller or a small rope loop, release
both idler arm tension springs (B, Figure 58).
4. Remove the left drive belt (F) from the arbor pulley.
5. Remove the right drive belt (E) from the arbor pul-
leys.
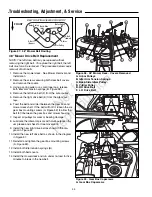
6. Twist the belt and slide it between the gear box and
mower deck shell. If the belt will not fit, loosen the six
gear box mounting screws (A, Figure 59) to allow the
belt to fit between the gear box and mower housing.
7. Inspect all pulleys for wear or bearing damage.
8. Lubricate the idler arm pivots with multi-purpose lithi-
um grease and check for free movement.
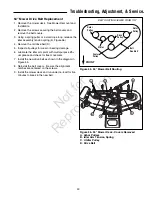
9. Install the new right drive belt as shown in the dia-
gram in Figure 57.
10. Install the new left drive belt as shown in the diagram
in Figure 57.
11. Reinstall and tighten the gear box mounting screws
(A, Figure 59).
12. Install both idler tension springs (B).
13. Install both belt covers.
14. Install the mower deck and run under no-load for five
minutes to break in the new belt.
Figure 57. 48” Mower Belt Routing
Figure 59. Gear Box Capscrews
A. Gear Box Capscrews
Outer Pulley
V-Idler
Back-Side
Idler
Center Pulley
V-Belt
(Upper)
Outer Pulley
V-Belt
(Lower)
BELT ROUTING VIEWED FROM TOP
FRONT
A
A
Figure 58. 48” Mower Deck - Covers Removed
A. Arbor Pulleys
B. Idler Arm Tension Springs
C. Back-Side Idlers Pulley
D. V-Idler Pulley
E. RH Drive Belt
F. LH Drive Belt
A
B
B
A
D
A
C
F
E
Not
for
Reproduction

