SimpliFire • SF-FORMAT36 Service Manual • 2042-961 • 9/21
6
3.5 Control Board Replacement
(continued)
10.
If replacing the Rocker Switch
, squeeze the side
flanges to push it down and out of the mounting hole.
Install the new rocker switch included with the replac-
ment PCB by pushing it up into the mounting hole
from below.
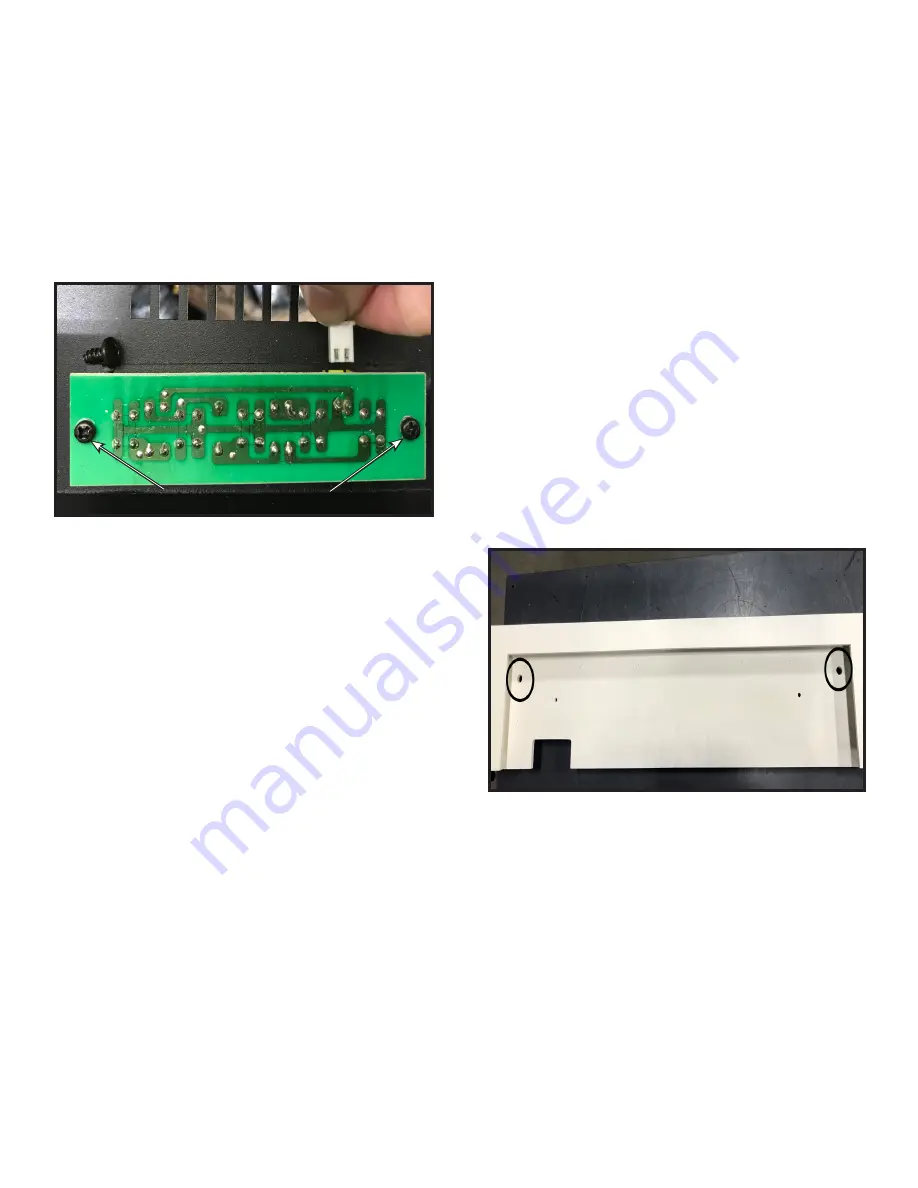
Figure 7 Remove / Replace Button Control Board
11.
If replacing the Button Control Board
, remove the
two (2) screws. See Figure 7. Unplug the wire con-
nector attaching it to the PCB, replace with the but-
ton control board included with the replacement
PCB.
Installing the Replacement Control Board
1. Install the new PCB by aligning the holes on the
board to the two (2) pins on the appliance.
2. Install two (2) screws securing the PCB to the appli-
ance.
3. Reconnect all the removed connections. See Figure 6.
4. Replace top panel 12 screws. See Figure 3.
5. Refer to Mantel Installation Instructions to re-install
the mantel.
6. Plug in the appliance power cord, or for hardwired
installations restore power at the breaker.
REMOVE TWO (2) SCREWS
REMOVE TWO (2) SCREWS
3.6 Accent LED Replacement
1. Disconnect electrical service to the appliance. For
hardwired electrical installations, find and shut-off
service at the breaker. For installations that use a
corded plug, disconnect the cord from the receptacle.
2. Remove two (2) screws securing the bottom mantel
to the appliance.
3. Unplug Accent LED strip from appliance.
4. Slide mantel off of appliance.
5. Remove two (2) screws securing the Accent LED
light strip to the bottom mantel. See Figure 8.
6. Remove Accent LED light strip and discard.
7. Install new Accent LED light strip.
8. Secure Accent LED light strip with two (2) screws.
9. Slide bottom mantel onto appliance.
10. Plug the Accent LED light strip into appliance
11. Secure bottom mantel to appliance with two (2)
screws.
12. Plug in the appliance power cord, or for hardwired
installations restore power at the breaker.
Figure 8 Lower Mantel Accent LED Light Strip Screw Locations
3.7 Log Assembly Replacement
1. To replace the Log Assembly, Remove from packag-
ing.
2. Remove any media or lift and remove the existing
Log Assembly from the appliance fuel bed.
3. Place the new Log Assembly directly on the appli-
ance fuel bed surface. The Log Assembly is not
fastened in place.


