070-117
070-118
070-119
070-120
TM Patio Lockset
www.
simply
elegant
products
.com
3
INSTRUCTIONS
(Page 3 of 3)
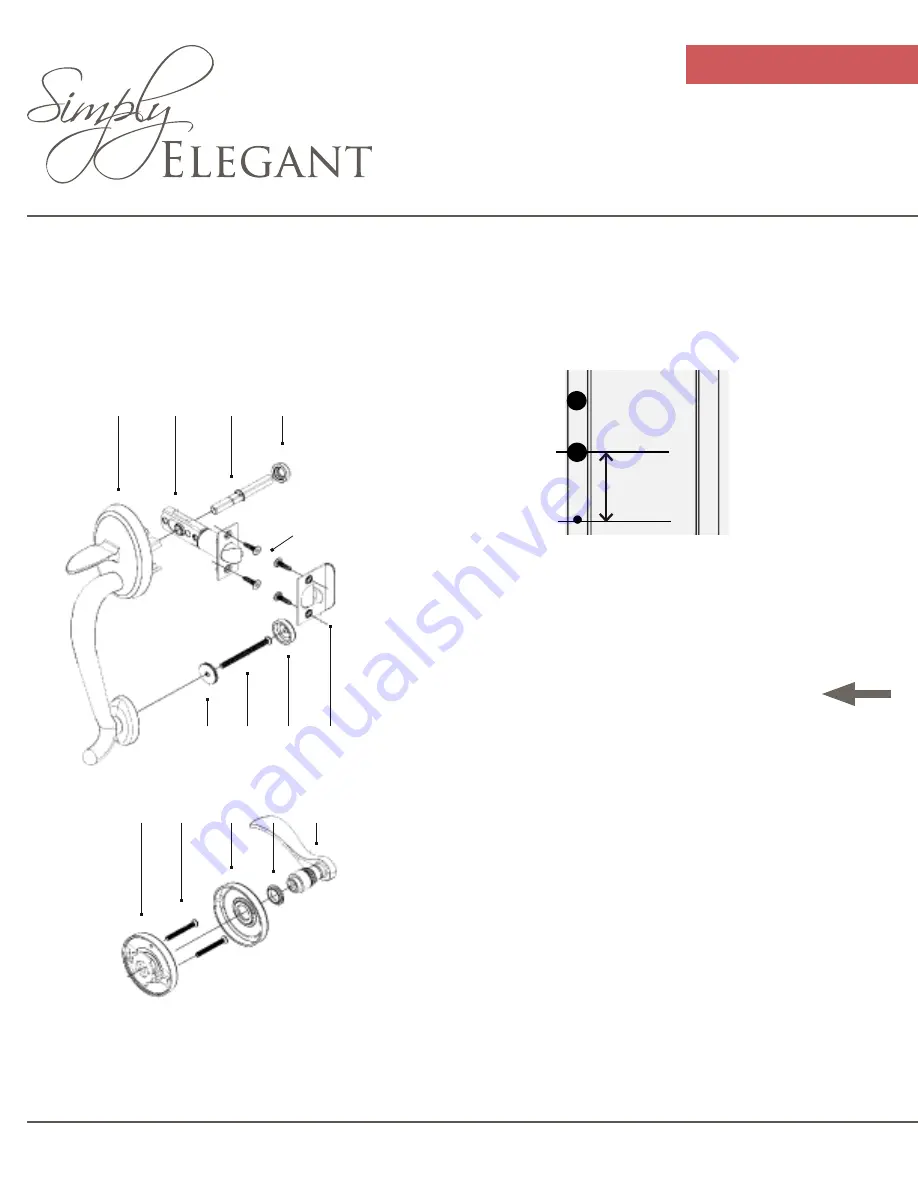
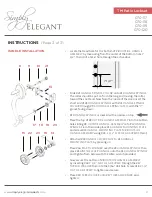
• Locate the tread hole for the bottom of #8
OUTSIDE HANDLE
ASSEMBLY
by measuring from the center of the bottom hole 7
1/2”. Then drill a 5/16” hole through the active door.
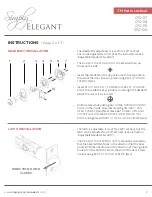
• Slide #21
HANDLE SPINDLE COLLAR
onto #10
HANDLE SPINDLE
.
The collar should be put on from the long end moving the collar
toward the short end. Now from the inside of the door insert the
short end of #10
HANDLE SPINDLE
with #21
HANDLE SPINDLE
COLLAR
through #9
ADJUSTABLE SPRING LATCH
with the “V”
groove facing down.
• #10
HANDLE SPINDLE
is marked with an arrow on top.
• Place the top of #8
OUTSIDE HANDLE ASSEMBLY
into the bottom
hole sliding #8
OUTSIDE HANDLE ASSEMBLY
onto #10
HANDLE
SPINDLE
. From the inside place #15
HANDLE MOUNTING PLATE
and screw #15
HANDLE MOUNTING PLATE
to #8
OUTSIDE
HANDLE ASSEMBLY
using #22
1 1/2” FLAT HEAD SCREWS
(two).
• Attached #23
HANDLE COVER PLATE
to #15
HANDLE
MOUNTING PLATE
by pressing on.
• Place #16
PLASTIC
WASHER
over the #10
HANDLE
SPINDLE
then
place #14
INSIDE LEVER HANDLE
onto the #10
HANDLE SPINDLE
and tighten from below with the Allen wrench provided.
• Now secure the bottom of #8
OUTSIDE HANDLE ASSEMBLY
by inserting #18
2 1/2” FLAT HEAD SCREW
through the #17
THREAD WASHER
then into the 5/16” drill hole. Screw #18
2 1/2”
FLAT HEAD SCREW
to tighten and secure.
• Place #19
SCREW COVER
onto #17
THREAD WASHER
and
tighten.
HANDLE INSTALLATION
8
9
10
.
7 1/2”
21
13
17 18
19 20
15 22
23 16
14


