E Q U O B O X R T U - M o d B u s
–
U s e r G u i d e R e v . 2 . 2
S I N A P S I S . r . l . |
V i a d e l l e Q u e r c e 1 1 / 1 3 - 0 6 0 8 3 B A S T I A U M B R A ( P G )
–
I t a l y
T . + 3 9
0 7 5 8 0 1 1 6 0 4
- F . + 3 9
0 7 5 8 0 1 4 6 0 2 |
w w w . s i n a p s i t e c h . i t
i n f o @ s i n a p s i t e c h . i t
31
15.1
Section 1
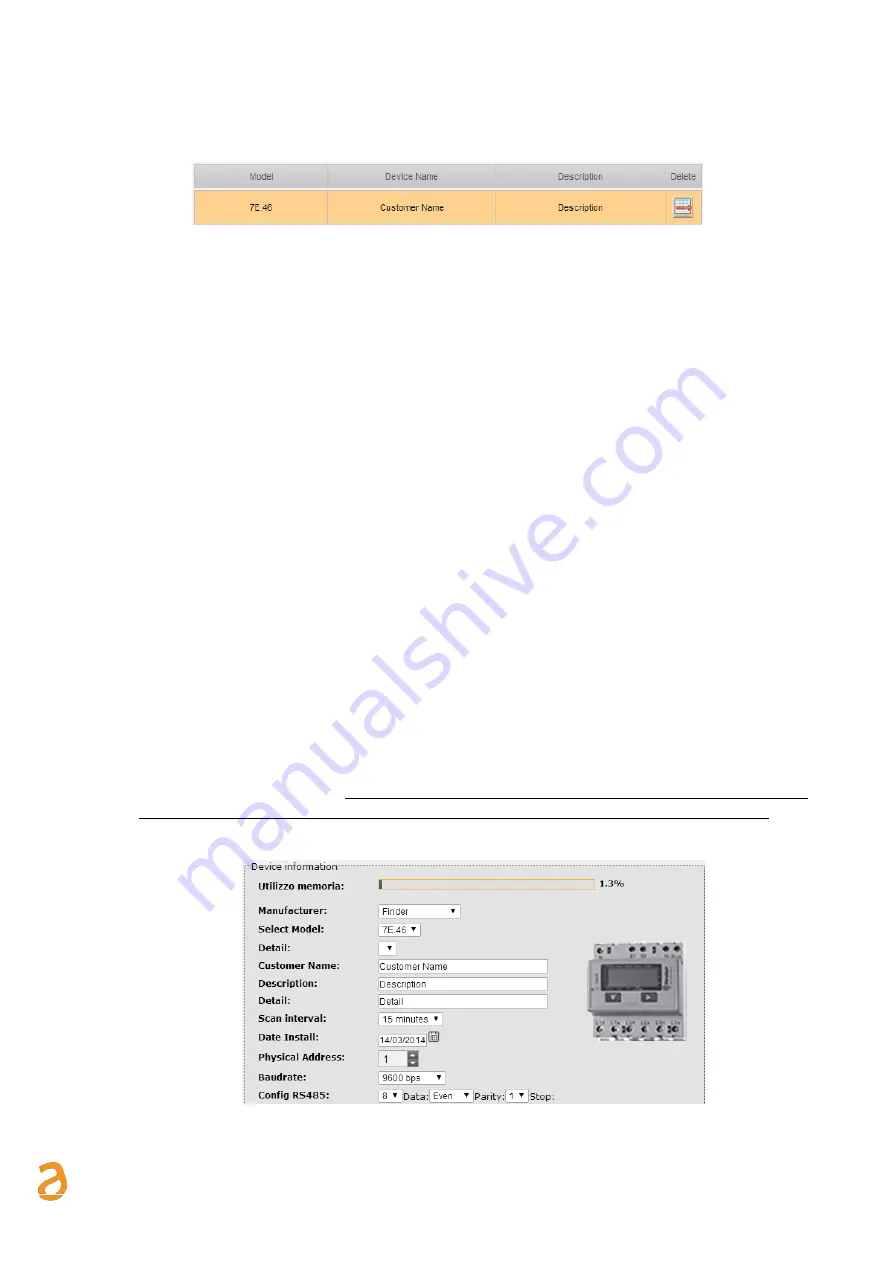
Returns a table with all the previously energy meters inserted
➢
Figure 30 - Meter previously inserted
➢
Model: Displays the model of the energy meter previously inserted (see section 2)
➢
Device Name: shows the name of the energy meter device previously inserted (see section 2)
•
Description: displays the description of the energy meter previously inserted (see section 2)
➢
Delete: deletes an energy meter previously entered
15.2
Section 2
Enter the onomastics of the energy meter and the parameters for the ModBus communication. The data to be
entered are:
•
Counter Name (editable): indicates the name of the device
•
Description (editable): enter the first description for the recognition of the energy meter
•
Details (editable): enter any details
•
Ranges (editable): select a readings sampling interval between 5 minutes, 15 minutes , 1 hour, 6 hours
, 12 hours, 1 day. Refer to Chapter 13
•
Installation date: indicates the energy meter data installation. This is automatically set upon saving the
energy meter as described in the previous chapter
•
Physical Address: enter the physical address of the energy meter. Always refer to the installation
manual of the energy meter to retrieve/change the ModBus address
•
Baudrate: Enter The baud rate of the energy meter. Always refer to the installation manual of the energy
meter to retrieve/change the ModBus address
•
Config RS485: insert the remaining communication parameters of the energy meter for ModBus
communications. Always refer to the installation manual of the energy meter to retrieve/change the
ModBus address
•
Save: Press save to save the data entered
On depending on the model of the counter added you can have two options:
a.
Integrated model: inserting a energy meter already integrated into the system in the right side of the
window will be displayed the image of the counter in insertion. See Figure 31. This option will be
described in detail in Section 3.
Always check the voice memory usage to check the available space
before inserting a new energy meter. You can enter up to a maximum of 60 energy meters
Figure 31
–
Integrated Energy Meter


