background image

PART  LIST       


7


PART NUMBER 

PART CODE 

PART NAME 

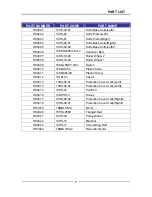
HS3001 13HS-03-01  Knife 

Base 

Units(Left)1 

HS3002 13HS-02 

Knife 

Frame(Left) 

HS3003 13HS-01 

Knife 

Frame(Right) 

HS3004 13HS-04-01  Knife 

Base Units(Right)1 

HS3005 13HS-03-02  Knife 

Base 

Units(Left)2 

HS3006 

15SSD2280

*

380

*

Conveyor Belt 

HS3007 

14HS-19-00 

Roller Wheel 2 

HS3008 

14HS-18-00 

Roller Wheel 1 

HS3009 16KGLTBSY-330 

Switch 

HS3010 

15SBL8

*

50 

Plastic Knob 

HS3011 14SM302-06  Plastic 

Screw 

HS3012 15LZLC3 

Castor 

HS3013 

13HS-05-01 

Protection Cover Units(Left)1 

HS3014 

13HS-05-02 

Protection Cover Units(Left)2 

HS3015 14HS-07 

Pull 

Rod 

HS3016 14DPHS-3 

Knives 

HS3017 

13HS-06-02 

Protection Cover Units(Right)2 

HS3018 

13HS-06-01 

Protection Cover Units(Right)1 

HS3019 16MDLHS3-1 Motor 

HS3020 15PDLZ560  Triangle Belt 

HS3021 14HS-09 

Pulley 

Wheel 

HS3022 14HS-15 

Mandrel 

HS3023 14HS-11 

Connectting 

Rod 

HS3024 16MDLHS3-2 Reduction 

Motor 


Summary of Contents for HS-3

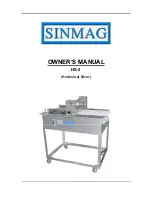
Page 1: ...OWNER S MANUAL HS 3 Horizontal Slicer ...

Page 2: ...CONTENTS 1 Introduction 2 Installation Commissioning 3 Operation 4 Cleaning Maintenance 5 Parts List 6 ...

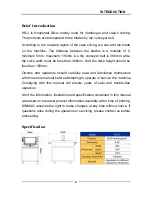
Page 3: ...80mm And the cake height should be less than 150mm Owners and operators should carefully read and familiarize themselves with this entire manual before attempting to operate or service this machine Complying with this manual will ensure years of safe and trouble free operation All of the information illustration and specification contained in this manual are based on the latest product information...

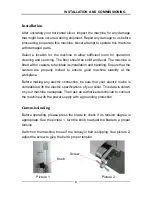
Page 4: ...e that the casters are properly locked to ensure good machine stability at the workplace Before making any electric connection be sure that your electric mains is compatible with the electric specifications of your slicer This data is shown on your machine nameplate Then ask an authorized electrician to connect the machine with the power supply with a grounding protection Commissioning Before oper...

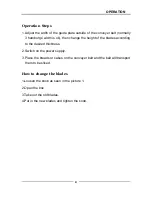
Page 5: ...e the height of the blades according to the desired thickness 2 Switch on the power supply 3 Place the breads or cakes on the conveyer belt and the belt will transport them to be sliced How to change the blades 1 Loosen the knob as seen in the picture 1 2 Open the box 3 Take out the old blades 4 Put in the new blades and tighten the knob ...

Page 6: ...e Please use the soft cloth to clean outside part of the machine and use the brush to clean the inside part 3 Normally there are much cake crumb remained on the working table do clean it and always keep it clean Attention 1 Nobody will be allowed to put his fingers close to the running blades 2 When the blades are dull do not push the cake by hand switch off the power supply first and then replace...

Page 7: ...PART LIST 6 ...

Page 8: ... Wheel 1 HS3009 16KGLTBSY 330 Switch HS3010 15SBL8 50 Plastic Knob HS3011 14SM302 06 Plastic Screw HS3012 15LZLC3 Castor HS3013 13HS 05 01 Protection Cover Units Left 1 HS3014 13HS 05 02 Protection Cover Units Left 2 HS3015 14HS 07 Pull Rod HS3016 14DPHS 3 Knives HS3017 13HS 06 02 Protection Cover Units Right 2 HS3018 13HS 06 01 Protection Cover Units Right 1 HS3019 16MDLHS3 1 Motor HS3020 15PDLZ5...

Reviews: