4
19
20
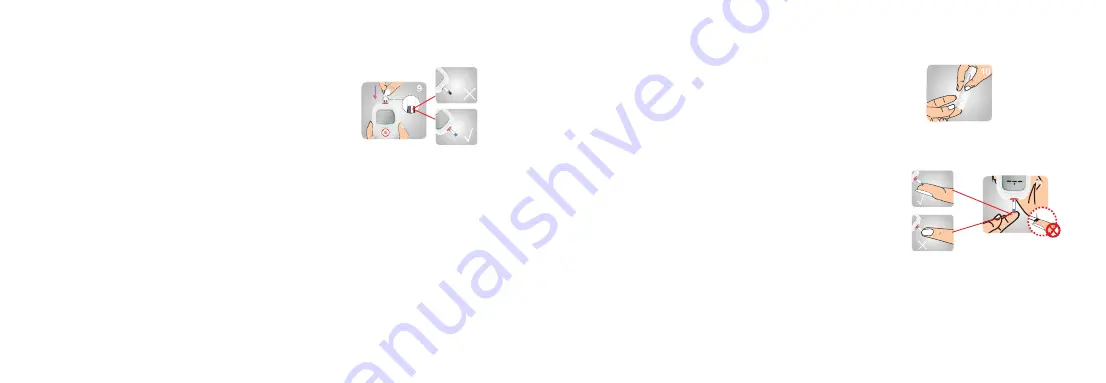
STEP 9:
Insert strip into the test strip port.
For Safe AQ Smart, Safe AQ Air, meter turn on.
For Safe AQ Voice, meter will turn on and play
“Please apply the blood sample”.
Tips: Insert the strip with the printed side facing up
and contact end into strip port.
Attention: If blood is not applied within 3 minutes,
the meter will automatically turn off. Reinsert the
strip and begin test.
For Safe AQ Smart, Safe AQ Air, if the meter display “E-2”; for Safe AQ Voice, if the meter
display “E-2” and play “ The temperature is beyond the range”, it means the environment
temperature is beyond the range. Please put the meter, strip, control solution at appropriate
place (10
℃
~35
℃
), wait at least 30 minutes and test again.
For Safe AQ Smart, Safe AQ Air, if the meter display “E-2”; for Safe AQ Voice, if the meter
display “E-2”and play “ The temperature is below the range”, it means the environment
temperature is below the range. Please put the meter, strip, control solution at appropriate
place (10
℃
~35
℃
), wait at least 30 minutes and test again.
STEP 10:
Make sure the lancing device is pressed
firmly to your finger. Press the button to lance.
Attention: If you didn’t get enough blood sample,
please gently massage your finger. DO NOT
SQUEEZE YOUR FINGER. Refer to step 6 to
adjust puncture depth and lance again.
STEP 11:
When the meter screen displays a flashing
blood symbol, apply the blood sample to the reaction
chamber.
Attention:
Hold the tip of the test strip to the blood drop until the meter beeps. Visually confirm
that the blood sample fills the entire reaction chamber at the end of the test strip.
Do not move meter or strip and press main button when testing.
If you didn’t apply enough blood sample to test strip, use a new test strip to test again.
Do not use test strip press finger firmly, otherwise it may cause inaccurate test result.
Summary of Contents for Safe AQ Smart
Page 26: ...45...


