

5
Note for Remote start A Pneumatic wireless start modules: The Remote start A module can send false signals if excessively jarred. It is
best to mount the module on a wall or onto the hard lines. All Remote start A modules are shipped without air fittings. The fittings on the
module are a 3/8” FNPT tapered. Any fitting desired can be attached with pressures up to 150 psi. The Remote start A module requires 2
AAA batteries. The mod ule is shipped with these batteries installed and should last many months with normal use. When the transmit light
stops blinking when air is flowing, remove the 4 screws on the module case to open the unit and replace the batteries.
Multiple wireless start modules:
The first time the vacuum receives a wireless signal, it will automatically recognize that
and only that device that send the signal. Each vacuum has the ability to learn to operate
on a specific set of wireless start modules (up to 16). For a vacuum to recognize multiple
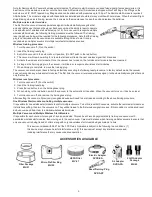
wireless start modules, the following training procedure must be followed. The training/
reset plug shown below will be required for the following procedures. Note that the training
plug is not included with the vacuum and is available through Sioux Tools. It is only
required when multiple vacuums or multiple remote start modules are used.
Wireless training procedure:
1. Turn the vacuum off. (O on the switch)
2. Insert the training/reset plug.
3. Switch the vacuum to the automatic or II position. (Do NOT push in the red button)
4. The vacuum will now be waiting for a remote start and will learn the next wireless signal that it receives.
5. Activate the wireless start module. Once the vacuum has turned on, that wireless start module has been learned.
6. As long as the training plug is in the vacuum, it will learn or recognize all wireless start modules.
7. When training is complete, remove the training plug.
The vacuum can also be reset back to factory defaults by executing the following reset procedure. In factory default mode, the vacuum
does not recognize any wireless start modules. The first time the vacuum receives a wireless signal, it will automatically recognize that and
only that device.
Wireless reset procedure:
1. Turn the vacuum off. (0 on the switch)
2. Insert the training/reset plug.
3. Press the red button in on the training/reset plug.
4. While holding in the red button, switch the vacuum to the automatic or II position. When the vacuum turns on, it has been reset.
5. Turn the vacuum off, and remove the training/reset plug.
After resetting the vacuum, all previously recognized devices will need to be retrained according to the above training procedure.
One Wireless Start module controlling multiple vacuums:
It is possible for one wireless start module to control multiple vacuums. To do this, reset both vacuums, activate the remote start module so
it starts transmitting, then turn the vacuums on. They will be trained to the first wireless signal received. If this condition is not desired, reset
both vacuums and train them to individual wireless start modules.
Multiple Vacuum and Multiple Wireless Start Modules:
It is possible for each vacuum to recognize 16 unique modules. This can be achieved by systematically training one vacuum with
associated wireless start modules, then moving on to the next vacuum. Care must be taken when training multiple vacuums to ensure that
only one vacuum is being trained at a time along with only one wireless start module being activated at a time.
This device complies with Part 15 of the FCC Rules. Operation is subject to the following two conditions: (1)
this device may not cause harmful interference, and (2) this device must accept any interference received,
including interference that my cause undesired operation
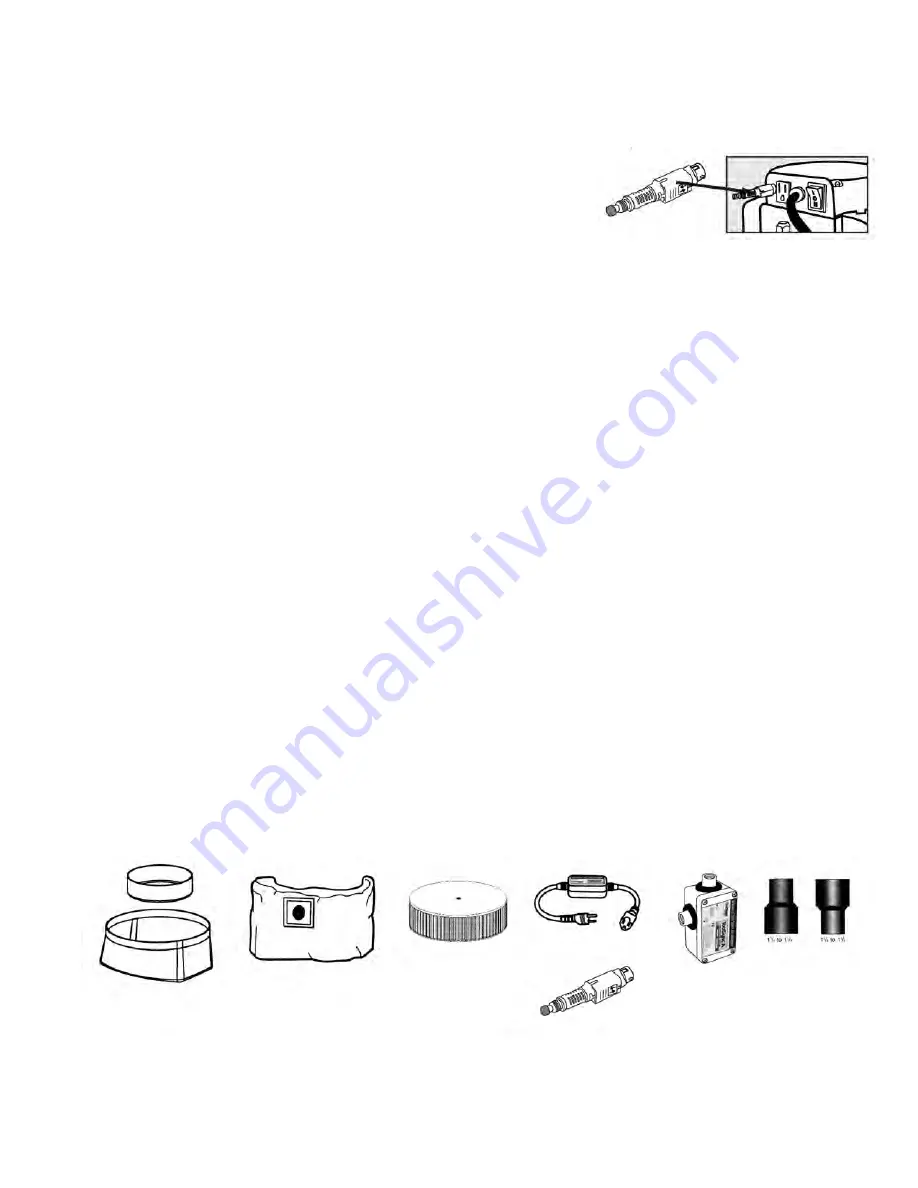
Filter Package
MV-51
Micro Prefilter Bag
MV-52
HEPA Filter
MV-21
Electric Adapter
DVRS-EA
Reset/Training Plug
DVRS-RT
Air Adapter
DVRS-PA
2 Cuff Adaptor
Package
MV-49
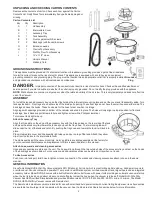
ACCESSORIES AVAILABLE


