Form ZCE780A
3
Date
2021October5/J
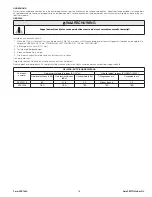
WARNING
Always remove the tool from the air supply be for installing or changing sanding discs!
NOISE AND VIBRATION READINGS
Catalog
Number
Weight
(lbs/kg)
Noise (Tested in accordance with ISO Standard 15744)
Vibration (Tested in accordance with
ISO Standard 28927-1:2009)
Sound Pressure (dBA)
Sound Power (dBA)
Uncertainty (dBA)
Vibration m/s
2
Uncertainty m/s
2
SPS10P18
1.7/0.8
80
91.6
0.3
Less than 2.5
0.3
SPS10P6
1.7/0.8
TBD
TBD
TBD
TBD
TBD
INTENDED USE
This tool is intended for use with small mounted abrasive wheel for precision material removal.
AIR SUPPLY
The efficiency and life of this tool depend on the proper supply of clean, dry air at a maximum of 90 PSI. The use of an air line filter, pressure regulator,
and lubricator is recommended.
Before connecting to tools, blow out the air line to remove water and dirt that may have accumulated.
HOSE AND HOSE CONNECTIONS
The air supply hose recommended is 3/8” (10mm) I.D. If an extension hose is necessary, use 1/2” (13mm) ID hose with couplings not less than 3/8”
(10mm) I.D.
LUBRICATION
All models may operate without airline lubrication. However, operating the tool without airline lubrication may reduce tool performance and vane life.
If an airline lubrication is not used, it is recommended that the tool be oiled daily before use to improve performance. Add 2-4 drops of air motor oil and
run the tool for 10-20 seconds to distribute oil through the tool.
For maximum performance and tool life, an air line lubricator, set to deliver 2 drops per minute, is recommended. SIOUX No. 288 Air Motor Oil is
recommended.
MAINTENANCE
Water, dust and other airline contaminants can cause rust and vane sticking. For long periods between tool use, flush the tool with a few drops of oil
and run for 10 seconds. This will help remove contaminants and reduce the formation of rust.
OPERATION
To install a sanding disc:
1. Install the 4 1/2 (114.3 mm) backing pad on the spindle. The 3” (76.2 mm) backing pad can be installed behind the 4 1/2 (114.3 mm) for additional
rigidity. DO NOT USE THE 3” (76.2 mm) BACKING PAD WITHOUT THE 4 1/2 (114.3 mm) BACKING PAD!
2. Install 5" sanding disc.
3. Install the retaining nut.
4. Insert the lever into the hub.
5. Turn the sanding disc by hand to tighten.
Start the tool by depressing the trigger.
Maintain a slight angle between the sanding disc and the work.
Do not use excessive pressure. Excessive pressure will cause the tool to slow down. Sanders work best at higher speeds.
Working in poorly lit areas makes it hard to see hazards.
Keep work area well lit.
Poorly lit work areas can cause injury.
Unauthorized or untrained personnel can misuse unattended tools.
Store idle tools in a dry, high or locked-up place, out of the reach of children.
Misused tools can cause injury.
Tools with the actuator left in the “ON” position when an unexpected air pressure loss occurs can start unexpectedly when the air
pressure is restored.
Release the actuator if an unexpected loss of air pressure occurs.
Unexpected tool starts can cause injury.
Sanders may coast for a short time after the trigger is released.
Be sure tool has come to a complete stop before setting it aside.
Sanders that do not come to a complete stop before setting aside can cause injury.
Regular preventative maintenance of the sander will keep the sander operating in a safe and efficient manner.
When disposing of a tool, do it in a way that does not harm personnel or the environment.


