background image


  ASSEMBLY INSTRUCTIONS


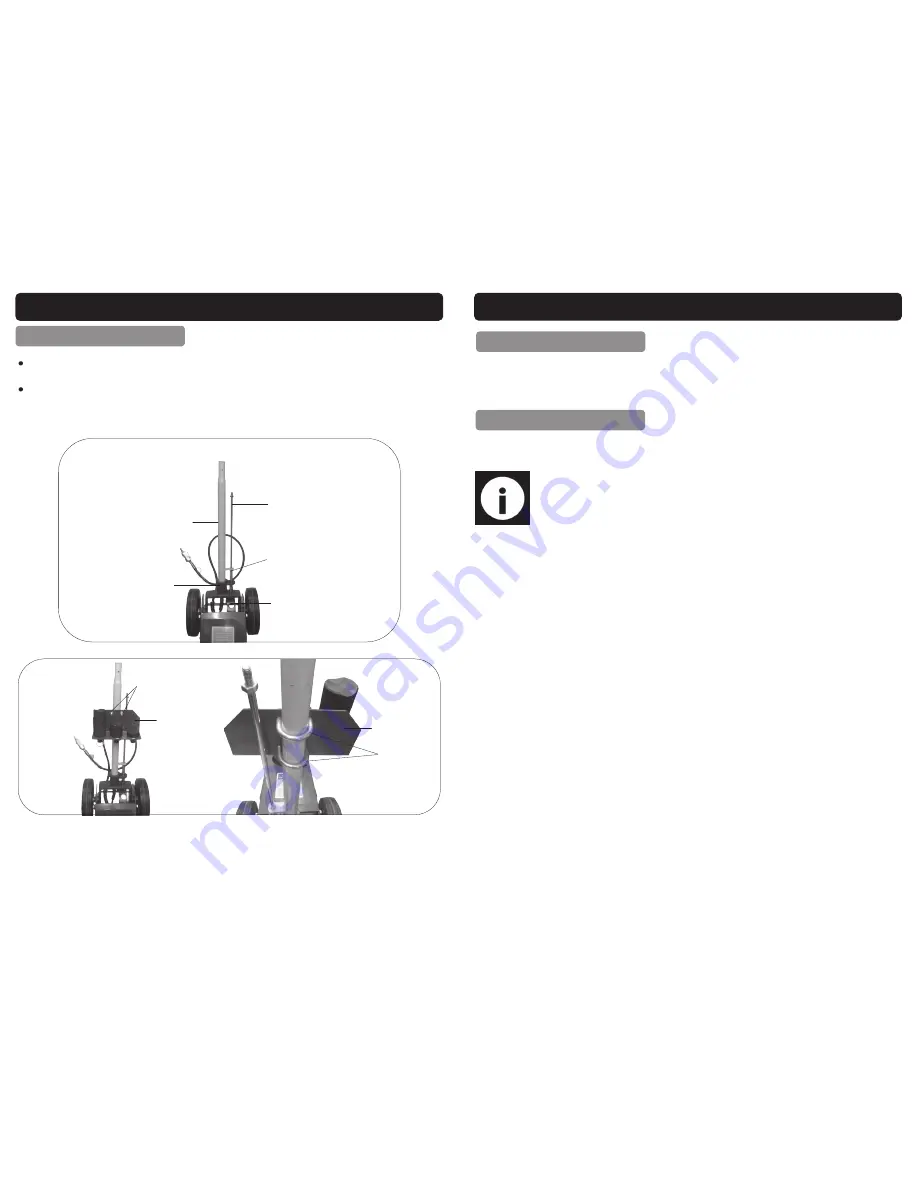
   FITTING THE HANDLE 

Fit the bottom half of the handle into the handle socket ensuring that the han-

dle lock / release control is also fitted into its bracket (Fig. 1).  
Using  the  2  U-bolts  and  nuts,  washers  &  spring  washers  fit  the  adaptor  holder 

onto the lower part of the handle; Tighten the nuts to secure in place (Fig. 2). 

Handle lock / release control 

Handle Socket 

Lower Handle  

Bracket 

Spring 

Fig. 1 

Adaptor Holder 

U-Bolts 

Adaptor Holder 

Front 

Rear 

Nuts & Washers 

Fig. 2 


13 

A periodic coating of light lubricating oil to pivot points, axles and hinges will help to 

prevent rust and assure that wheels, castors and pump assemblies move freely.  

   LUBRICATION 

   CLEANING 

Periodically  check  the  pump  piston  and  ram  for  signs  of  rust  or  corrosion.  Clean  as 

needed and wipe with an oily cloth.  

Note: 

Never use sandpaper or abrasive material on these surfaces.  

  MAINTENANCE….cont


Summary of Contents for 03643

Page 1: ...0316 Please dispose of packaging for the product in a responsible manner It is suitable for recycling Help to protect the environment take the packaging to the local amenity tip and place into the app...

Page 2: ...anufacturer s authorised representative within the EC declare that the 22 Ton Pneumatic Floor Jack SIP Part Number 03643 Conforms to the requirements of the following directive s as indicated 2006 42...

Page 3: ...hroughout This Manual 4 Safety Instructions 6 Guarantee 7 Technical Specifications 7 Getting to Know Your Floor Jack 8 Assembly Instructions 10 Operating Instructions 11 Maintenance 14 Troubleshooting...

Page 4: ...operating the Floor Jack always check no parts are broken that no oil is leak ing and that no parts are missing Always operate the Floor Jack safely and correctly KNOW YOUR FLOOR JACK Read and underst...

Page 5: ...or Jack is a lifting device only Immediately after lifting support the load with a pair of appropriately rated jack stands Never work on under or around a load supported only by the Floor Jack Regular...

Page 6: ...r warranty covering failure due to manufacturers defects This does not cover failure due to misuse or operating the Floor Jack outside the scope of this manual any claims deemed to be outside the scop...

Page 7: ...inkages binding Low oil level Drain oil to proper level Ensure release valve is fully open Clean and lubricate moving parts Ensure proper oil level Low oil level Air trapped in system Air supply not s...

Page 8: ...2 Handle lock release control Handle Socket Lower Handle Bracket Spring Fig 1 Adaptor Holder U Bolts Adaptor Holder Front Rear Nuts Washers Fig 2 13 A periodic coating of light lubricating oil to pivo...

Page 9: ...To prime the pump 1 Remove the upper cover unscrew the 2 screws on each side see below left 2 Loosen the cap head bolt see picture below right by half a turn 3 Close the release valve 4 Operate the a...

Page 10: ...e vehicle PRE OPERATION CHECKS Note Follow the vehicle manufacturer s recommended guidelines for lift ing Engage the emergency brake and chock each un lifted wheel in both directions to prevent inadve...

Reviews: