12
DO NOT
use the tool if it is, or has parts that are worn, damaged or missing; Re-
move from service and have the parts repaired / replaced using original spare
parts.
Ensure that the air tool is lubricated with an inline lubricator or daily with a few
drops of air tool oil dripped into the air inlet.
Clean the air tool after each use.
Check hose and fittings for wear or damage before each use.
Drain the air tank / receiver of the compressor daily; Water in the air line will
damage the nailer stapler.
In the event that it becomes necessary to store the tool for an extended period
of time (overnight, weekend, etc.), it should receive a generous amount of lubri-
cation at that time. The tool should be run for approximately 30 seconds to en-
sure oil has been evenly distributed throughout the tool.
The tool should be stored in a clean and dry environment.
Disconnect the air tool from the air supply before changing accessories, servicing
or performing maintenance. Replace or repair damaged parts. Use genuine parts
only. Non-authorised parts may be dangerous and will invalidate the warranty.
MAINTENANCE INSTRUCTIONS
9
1.
Ensure the air trigger (2) is not depressed before connecting to the air supply.
2.
You will require an air pressure of
3 - 7 bar (58 - 102psi)
, and an air flow according
to specification.
3.
WARNING!
Ensure the air supply is clean and does not exceed 102 psi while op-
erating the nailer stapler. Too high an air pressure and unclean air will shorten
the product life due to excessive wear, and may be dangerous causing dam-
age and/or personal injury.
4.
Drain the air tank of the compressor daily; Water in the air line will damage the
nailer stapler.
5.
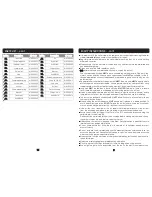
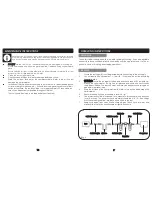
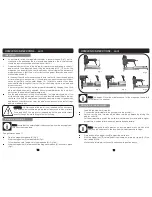
Recommended hook-up procedure is shown in fig 1.
6.
Line pressure should be increased to compensate for unusually long air hoses
(over 8 metres). The minimum hose diameter should be 3/8” I.D. and fittings
must have the highest flow rate that can be fitted to the tool.
7.
Keep hose away from heat, oil and sharp edges. Check hose for wear, and
make certain that all connections are air tight and secure.
This nailer stapler is designed with a durable lightweight housing. It has an adjustable
exhaust to reduce noise and direct air flow away from the operators face. It is the er-
gonomic choice for nailing and stapling operations.
DESCRIPTION
AIR SUPPLY
OPERATING INSTRUCTIONS
Tool
Compressor
Quick Connector
Quick Connector
Quick Coupler
Quick Coupler
Air Hose
Regulator
Lubricator
Filter
Cut Off Valve
Fig. 1


