6. Replacing Filters
-
The unit is equipped with a filter clogging countdown for approx. 6 months (approx. 4400 hours). The
countdown reads the unit's real operation.
-
Filter clogging depends on the environment, in which the unit operates. Especially, on the dustiness of
the surrounding air – the more dust particles are contained in the air, the sooner the filter box is clogged.
Therefore when filter clogging is indicated, always consider replacing them.
-
The filter replacement control is indicated on the control panel by a red flashing LED titled “filter”
(position 5 on the controller).
-
Before starting to replace filters, make sure you have new ones:
o
XR1-010-EC…
o
XR1-025-EC…
XR-010-FILTER-M5 or XR-010-FILTER-F7
XR-025-FILTER-M5 or XR-025-FILTER-F7
-
Do not switch off the unit to replace the filter. Safe disconnection of electrical parts is provided by the
integrated limit switch (position 18).
-
After release – removal of the front metal cover (position 17), the limit switch will safely disconnect
the electrical components, with which you can come into contact when replacing the filters.
-
Removal of the front metal cover is not considered opening of the unit. Even after removal of the front
metal cover, the unit ensures full electrical safety of the unit.
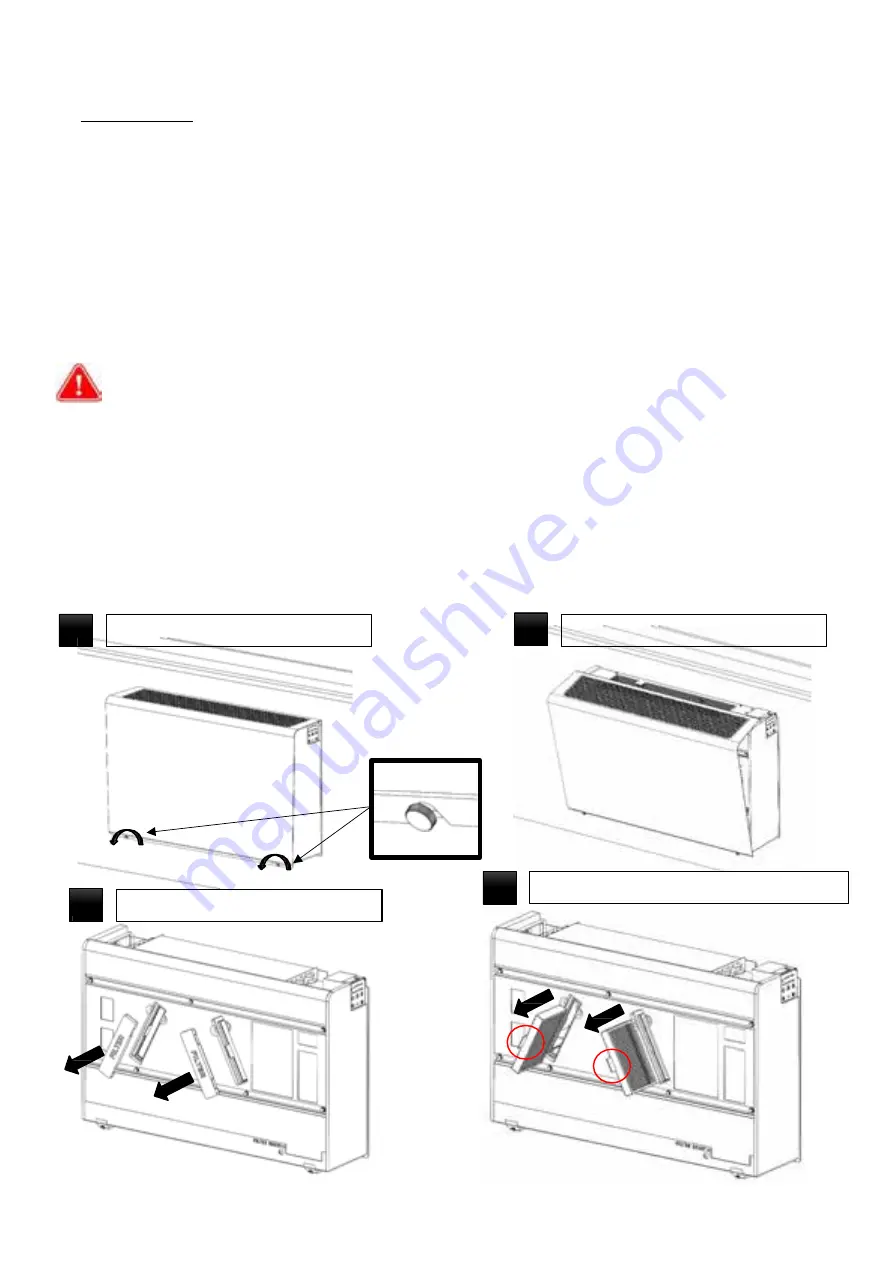
1. Removal of a filter
-
Loosen the M6x20 plastic bolts on the front metal cover, remove it from the unit, and put it in a safe
place.
-
Remove the plastic caps marked FILTER from the cover of the unit.
-
Use the filter holders to pull them out, check them, or replace them with new filters
LOOSEN THE BOLTS BY HAND
1
REMOVE THE FRONT COVER
2
REMOVE THE FILTER CAPS
3
PULL THE FILTERS OUT USING THE HOLDERS
4
43
Version 1 – GBR(23/06/2021)
D-502-0152
Fig. 37


