background image


Appendix A 


IN610 DIO Interface Module 


82 


IN

finity 

610


User’s Guide 


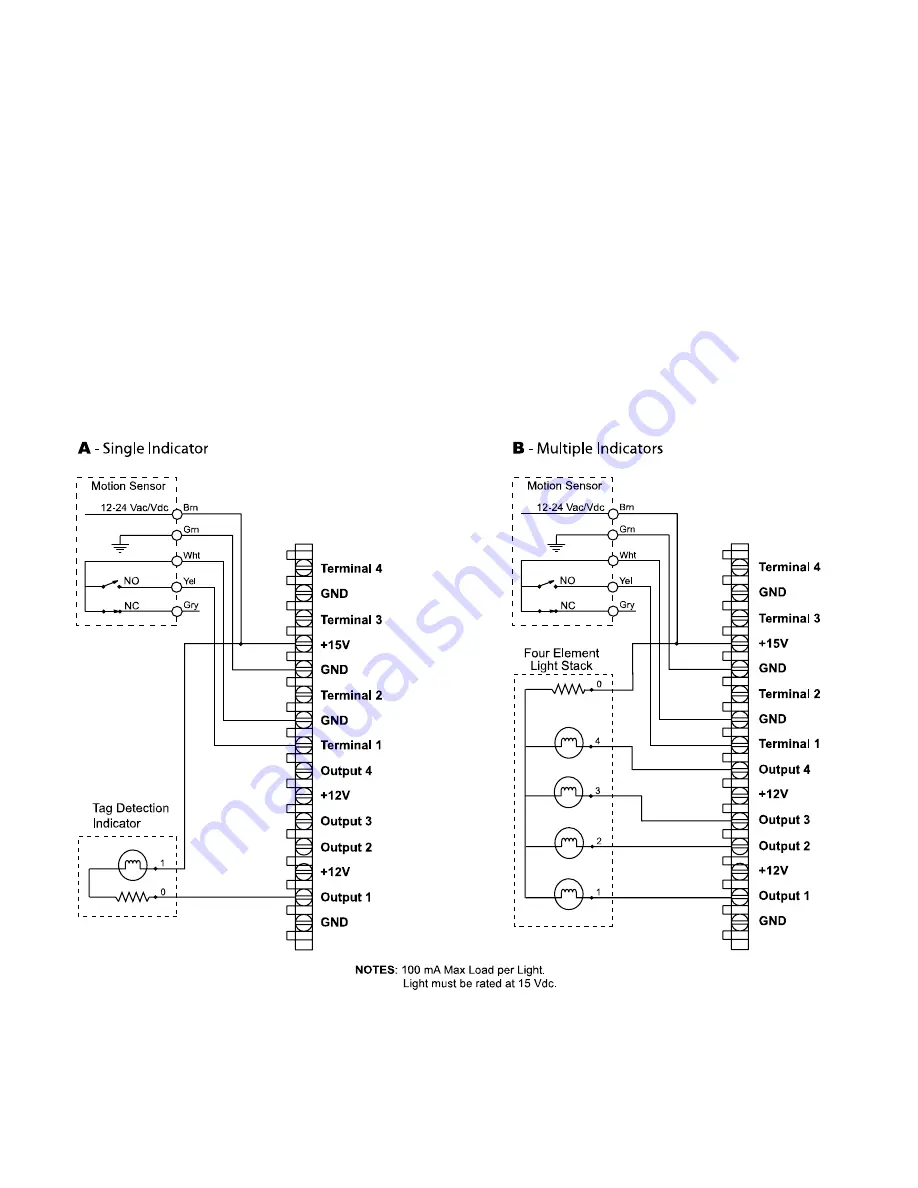
If using a multiple element light stack, such as the Allen Bradley 855T, 
connect the device as shown in the following figure (B). 

In the following example, the four-element light stack (Allen Bradley 855T) 

must be installed with the common (0) connected to +15V and each 
element (1, 2, 3, 4) connected to the appropriate output. This allows the 
reader to pull the LED low. 

If you are installing individual indicators or lights, connect each indicator as 
shown in the following figure (A). The maximum load per light can not 
exceed 100 mA. 


Summary of Contents for INfinty 610

Page 1: ......

Page 2: ...ations However there is no guarantee that interference will not occur in a particular installation If this equipment does cause harmful interference to radio or television reception which can be determined by turning the equipment off and on the user is encouraged to try to correct the interference by one or more of the following measures Reorient or relocate the receiving antenna Increase the sep...

Page 3: ...ly test a reader and how to operate deployed readers Chapter 5 Reader Startup Tool RST This chapter describes the RST and the various functions you can perform with this Microsoft Windows application Chapter 6 Reader Configuration Tool RCT This chapter describes the RCT and the various functions you can perform with this embedded reader application Chapter 7 Configuring Digital Inputs and Outputs ...

Page 4: ...tennas or I O ports WARNING Warnings advise the reader that a hazardous condition can be created by a particular action that can cause bodily injury or extreme damage to equipment ATTENTION This warning indicates that the device is susceptible to Electro Static Discharge and appropriate precautions must be taken to avoid equipment damage Caution Cautions advise the reader that a condition can be c...

Page 5: ... 2 3 Connecting and Configuring the Ethernet Port 7 2 2 4 Connecting the Antennas 8 2 2 5 Connecting Digital Inputs Outputs 9 2 2 6 Connecting the Power 9 3 Reader Startup Tool RST Software Installation 10 3 1 Installing RST Software 10 3 2 Windows 7 Setup 11 3 3 Reader Startup 12 3 4 Initial Reader Setup 13 4 Reader Operation 18 4 1 Basic Operation with RST 18 4 2 Deployed Reader Operation with R...

Page 6: ... Set Tag Protocol 45 6 1 4 Setup Ethernet LAN 46 6 1 5 Setup Serial Port 47 6 1 6 Setup Digital Accessories 48 6 1 7 Setup Antenna Cables 49 6 1 8 Set Regulatory Mode Region 50 6 1 9 Setup Summary 50 6 2 Advanced Functions 51 6 2 1 Firmware Management 51 6 2 2 Import Export Configuration 52 6 2 3 Command Line 54 6 3 Expert Configuration 55 6 3 1 Expert Configuration Setup 55 6 3 2 Expert Configura...

Page 7: ... 2 Environmental Specifications 75 8 1 3 Power Supply Specifications 75 8 1 4 RS 232 Specifications 75 8 1 5 Digital Input Output Specifications 76 8 1 6 Ethernet LAN Specifications 76 8 1 7 INfinity 610 Antenna Specifications 77 9 Safety Instructions 78 9 1 Power Disconnect Device 78 9 2 RF Safety 78 9 3 Electrostatic Discharge 78 9 4 Regulatory Compliance 78 A IN610 Digital Input Output Interfac...

Page 8: ...Contents vi INfinity 610 User s Guide This page intentionally left blank ...

Page 9: ...o Frequency Identification RFID System that operates in the 860 960 MHz UHF band Figure 1 INfinity 610 UHF Reader As shown in Figure 1 and Figure 2 this high performance reader supports up to eight Tx Rx antennas 8x1 monostatic or 4x2 bistatic and is equipped with RS 232 USB 2 0 and Ethernet interfaces Discrete digital inputs and outputs are also provided ...

Page 10: ...sure From left to right these LEDs provide indication for the following Number Indication Color State Indication 1 Power Off Amber Amber Flashing Green Power off Boot loader executing Linux initializing Unit operational 2 Activity Off Green Green Flash Amber RF Off TX Active Tag detect Antenna check failed 3 User Amber User defined 4 Status Off Amber Green Flash Red OK Firmware update GPIO activit...

Page 11: ...e reader into your web browser and the RCT allows you to fully modify and operate the reader With the same functionality as the RST this application allows you to modify the reader s communication network and operational parameters You can also read tags review tag data perform diagnostics and upload new software This application is primarily intended for configuring and managing deployed readers ...

Page 12: ...urface according to the following dimensions Any mounting surface must be able to support up to 5 pounds 2 3 kg Caution The INfinity 610 reader has been designed and tested to meet all regulatory requirements in the jurisdiction where offered Any attempt to open the reader housing or modify the reader in any way will void the reader warranty and may violate regulatory requirements Contact Sirit Cu...

Page 13: ... conveyor and container tracking Four and eight antenna configurations are used for portals and loading dock doorways The optional Sirit provided antennas are for indoor use only and must be installed on a solid surface or frame to prevent damage or later misalignment It is highly recommended that the antenna mounting be adjustable in order to obtain the best performance from the system WARNING FC...

Page 14: ...ications not expressly approved by Sirit Inc for compliance could void the user s authority to operate the equipment ATTENTION INfinity 610 antenna ports may be susceptible to damage from static discharge or other high voltage Use proper Electrostatic Discharge ESD precautions to avoid static discharge when handling or making connections to the INfinity 610 reader antenna or communication ports Eq...

Page 15: ...computer 2 2 3 Connecting and Configuring the Ethernet Port The maximum Ethernet cable length is 30 meters If you are communicating with your reader across a Local Area Network LAN connect an Ethernet cable from your hub or router to the RJ 45 connection See Figure 2 for location of the connector If you are connecting the reader directly to a PC you must use a crossover cable See Note to the left ...

Page 16: ...ted with a 50 ohm load or a functional UHF antenna before power up UHF Readers are factory configured to operate on RF port 1 and port 1 must be properly terminated before power up Before activating other RF ports they must also be properly terminated Always power down the reader before removing an antenna or load from an RF port The maximum antenna cable length is 10 meters ATTENTION INfinity 610...

Page 17: ...igured to provide an external read trigger from proximity sensors photo switches or other devices The digital outputs can be used as general purpose outputs to indicate tag reading activity or to indicate the reader is transmitting RF On The outputs can also be configured to trigger conveyor gates or other access control and sorting devices For detailed information on configuring the digital input...

Page 18: ...ication called Reader Startup Tool RST You can use this application to initially configure your reader as well as read and display tag data Install RST 1 To install RST load your product CD and double click the RSTInstaller msi file 2 Press Next 3 Read the License Agreement Select I Agree and press Next 4 Select Reader Tool Suite Press Next 5 Verify the path and folder where RST will be installed ...

Page 19: ...rewall 1 Log into your computer as Administrator 2 Navigate to the Control Panel and select Control Panel System and Security 3 Select Allow a program through Windows firewall 4 Scroll down the list and locate Startup Tool check it and press OK 5 If Startup Tool is not in the list press Allow another program 6 Locate Startup Tool check it and press OK 7 Restart RST and it should discover readers F...

Page 20: ...on Open RST 1 From your Windows desktop select Start Programs Sirit Reader Startup Tool RST 2 If this is the first time starting the RST application you may receive a Windows Security Alert This warning indicates that the firewall is blocking the RST application 3 If the warning window is hidden under the RST windows collapse the RST window ...

Page 21: ... configure a specific reader perform the following Reader Setup 1 Select the reader on the main RST page by clicking the button to the left of the reader Mac address 2 Press the button on the RST window 3 The INfinity 610 Reader Setup Wizard RSW is displayed NOTE Earlier versions of Microsoft Windows may not provide the Security Alert popup IF RST does not discover your reader check your Windows F...

Page 22: ... Software Installation 14 INfinity 610 User s Guide 4 Press Next and enter the Login admin and Password If this is the first time configuring your reader enter readeradmin 5 After entering your Login and Password press Next ...

Page 23: ...ely resembles your installation and press Next 8 Select the protocol of the tags you will be reading and press Next Custom Setup If your installation type differs from one of the choices shown in the Setup Wizard you can always customize your setup later using the embedded web interface capability See the Advanced Setup chapter in this guide for more information ...

Page 24: ... 9 RST Software Installation 16 INfinity 610 User s Guide 9 Select the antennas you will be installing and press Next 10 Estimate the number of tags that will be presented to the reader at any one time and press Next ...

Page 25: ...profile enter a Profile Name and press Finish to complete the initial reader setup Saving Reader Setup Reader setup information should be saved as a profile In the event that you need to reboot or power down a reader the reader setup can be quickly reloaded by loading the profile If you don t save the reader setup you can loose the information if the reader is rebooted ...

Page 26: ...rated either from the RST application or by logging directly into the reader s embedded Reader Configuration Tool RCT To operate the reader from RST perform the following Open RST 1 From your Windows desktop select Start Programs Sirit Reader Startup Tool RST 2 Select a specific reader and press Test 3 The Reader Test Tool RTT is displayed ...

Page 27: ...ministrator login select admin The initial password Pwd is readeradmin See Advanced Setup section to change the password 6 Verify the Operating Mode is set to Active From the pull down menu select Operating Mode Active 7 Select the Tag Performance tab and press Start 8 Place tags in front of antenna and verify tags are read and displayed ...

Page 28: ...rform the following 1 Enter the reader s IP address into your web browser or press the button on the main RST page 2 The reader s RCT interface is displayed 3 Log into the reader Press Login for the login screen 4 The default login is guest If you need administrator privileges login as admin and enter readeradmin as the password 5 Press Submit 6 Select Basic Configuration Setup Antenna Cables to c...

Page 29: ...in the proper mode 8 Select Basic Configuration Set Tag Protocol to verify the reader is configured for the proper tag protocol 9 Press System Status View Tags to view tag data 10 If you need to configure your reader refer to Chapter 7 Reader Configuration Tool for information on using RCT to adjust configuration variables and parameters ...

Page 30: ... and allows you to perform the following h View all readers on the network h Launch the Reader Setup Wizard to configure a reader h View and change a reader s network settings h Add a new reader to the network h Launch Reader Test Tool to perform basic reader tag operations h Launch Reader Diagnostic Tool to view statistics alarms and reports 5 1 View Readers on the Network When RST starts up all ...

Page 31: ...h this application you can select the following h Installation type h Regulatory region and sub region h Protocol h Number of antennas h Estimated tag volume To initially configure your reader perform the following 1 From the RST main page press the button The Setup Wizard is launched as shown 2 Refer to Chapter 2 Reader Configuration for detailed instructions on using the Reader Setup Wizard ...

Page 32: ...s Address used by RST to send out the UDP update request packets This is customizable on the reader In addition you can select if you want a secure connection for the Test Configure and Diagnostic Tools This connection uses the HTTPS protocol and any data transferred between devices is encrypted 3 From the RST main page press the button 4 Select either IP version 4 or IP version 6 5 Enter the List...

Page 33: ...k Settings 1 From the RST main page press the button 2 Verify the IP Address Subnet and Default Gateway are correct 3 If Enable DHCP is selected these fields will be locked 4 If required change the values 5 If your reader is running Version 2 0 or later firmware enter your login and password 6 Press Apply ...

Page 34: ...erform the following h Read tags h Issue commands to the reader and view the responses h Run macros h Observe reader events To access the Reader Test Tool press the button on the main RST page 5 5 1 General Page The General Page allows you to issue commands to the reader and view any responses From the pull down menus you can also login to the reader change the operating mode select another protoc...

Page 35: ...select Operating Mode Active Standby or press the Operating Mode select button on the left side of the tool bar h Active Reader is continuously attempting to singulate tags and automatically reports any singulated tag via an asynchronous event notification on the event channel h Standby Reader is not transmitting any RF energy unless processing a tag related command The transmitter is enabled at t...

Page 36: ...rotocols are indicated by Antenna Selection You can select the ports that have antennas connected and which antennas are active Perform the following 1 From the pull down menu select Antennas n Active antennas are indicated by 2 You can also select the order in which antennas are activated From the pull down menu select Antennas Mux sequence 3 Enter the antenna numbers in the order to be activated...

Page 37: ... select Active Operating Mode enter 30000 and press the Start button The test will complete after 30 seconds and the output statistics are updated for the query time Output statistics are read only and include Total Unique Tags Tag Read Count Cumulative Rate and Current Rate Detailed descriptions of the various Tag Performance fields and functions are provided in the following sections Tag read co...

Page 38: ...ess than 500 If Total Query Time is set to 0 query continues indefinitely Click to stop automatic query Indicates current read rate with audible tone Check to purge the reader s tag database after each query Refer to the INfinity 610 Protocol Reference Guide for more information on the tag database Tag Acquisition Analysis The Tag Acquisition Analysis fields provide the minimum maximum and average...

Page 39: ...fields on a single tag as well as writing the access password and locking a tag The Read button will cause the reader to singulate and read a tag in the selected antennas RF field Specific fields you can read include h Kill Code h Access Code h Tag ID h TID h User Data Clear Read and Write Fields To clear the Read or Write fields select Edit Clear ...

Page 40: ...t or command file is a text file that contains one or more reader commands These commands are used to configure the reader to a known configuration The Macros can contain variables These variables are resolved by a dialog box Macro Variables that appears when the Send to Reader button is selected The syntax of a variable is variable_name During execution the variable is replaced with user entries ...

Page 41: ...s must be resolved via this Windows Dialog box You can tab to each value field and enter the desired value For example one macro can be used for two different applications by using variables for antenna selection and transmit power Macro Example To configure the reader for ETSI EN302208 Dense four antenna portal operation send the following macro en302208_12tari_lf320_PR_M4 mcr configure region se...

Page 42: ...ividual events refer to Chapter 18 Events Namespace of the INfinity 610 Protocol Reference Guide Registering for an individual event To register for an individual event either type the event name or select an event from a pull down list Registering for a group of events Registering for event error events will cause the reader to autonomously send all events in the event error namespace to the RTT ...

Page 43: ...r Startup Tool INfinity 610 User s Guide 35 5 5 6 Antenna Settings Page The Antenna Settings page allows you to adjust the power settings for each antenna Only the controls for those antennas that are connected are activated ...

Page 44: ...DT The Reader Diagnostic Tool RDT is to be used by Sirit trained technicians to troubleshoot and diagnose various reader issues Administrator login is required 5 6 1 Channel Statistics The Channel Stats page shows details of channel changes This page is typically used to observe regional behavior ...

Page 45: ...nity 610 User s Guide 37 5 6 2 Alarms The Alarms page is used to capture autonomous alarms generated by the reader during normal operation The alarms are defined as autonomous reader events for the following namespaces event error event warning ...

Page 46: ...ation for each tag singulation This feature provides detailed attributes of tag singulations such as tag power RSSI and on which antenna that tag singulated Caution Use of this tool can adversely affect tag reader performance particularly if many tag fields are enabled Use the RTT Tag Performance page for normal tag performance testing ...

Page 47: ...waves in your surrounding environment This feature provides a graphical representation of the current spectral RF noise in units of dBm with a range of 0 to 120 dBm This feature is intended for expert users to verify RF environmental conditions during an installation Caution Using this feature during normal reader operation can significantly degrade tag reading performance ...

Page 48: ...low attenuation level usually 0 1 dBm and increments the level until it observes a response from the tag The transmitter is turned off and the minimum value to activate the tag for a given antenna and distance is reported The Power Ramp controls include h Increment Rate ms Time tool stays at a particular power level before incrementing to the next power level h Initial Attenuation Level dBm Starti...

Page 49: ... across the internet by entering the reader s IP address into your web browser With the RCT you can fully configure your reader for operation in a variety of applications and environments With this application you can perform the following h Basic Configurations h Advanced Configurations h Check System Status h Access the online Help To access the RCT press the button on the main RST page ...

Page 50: ...uest However a user can login as admin If not logged in as admin the default level is always guest The guest login level provides read only access to the reader Clients that login in at the guest level can read the settings of the reader and can access the tags that the reader has inventoried Clients at this level cannot change the configuration of the reader The admin login level provides read wr...

Page 51: ...ation variables in the reader The reader can support up to 8 unique profiles Detailed information about reader profiles is provided in Chapter 4 Reader Behavior of the INfinity 610 Protocol Reference Guide The Manage Profiles page provides a list of all profiles stored in the reader Save a Profile To save your current reader configuration under a new profile enter a profile name and press Save The...

Page 52: ...be recovered Reset to Factory Default In addition to managing reader profiles you can also reset the reader back to its factory default configuration From the Profiles page select one or more of the following h Stop All Embedded Applications This option terminates any embedded applications currently running on the reader h Reset Serial Port This option resets the serial port configuration to the f...

Page 53: ...ss Enable Selected Protocols to activate the protocol Click on a specific protocol to view the lower form This form allows you to configure various protocol level parameters The protocol level parameters are divided into two categories control and physical Control parameters configure the protocol control Physical parameters configure the physical air interface for the protocol For detailed inform...

Page 54: ...Setup Ethernet LAN page allows you to configure the network interface of the reader NOTE Always record the IP Mac subnet and default gateway addresses for your readers and keep this data in a safe location You can use this data to reconfigure the network in the event of application failure or data loss ...

Page 55: ...To manually specify this information deselect Enable DHCP and fill in the desired IP address subnet mask and default gateway Other Settings allow you to configure the NTP servers the reader can contact to obtain the current time DNS servers the reader can contact for domain name resolution and the Domain list to resolve names to IP addresses Enter all the required information and press Submit 6 1 ...

Page 56: ...ues 1 4 can be seen in this window The Current Value is not configurable and is shown as true or false The Debounce value can be set and is in milliseconds Digital Output The output value for each digital output can be set to true or false Press the Submit button to send the appropriate commands to the reader to update the digital inputs and outputs Refer to the INfinity 610 Protocol Reference Gui...

Page 57: ...rotocol Reference Guide To configure an antenna enter the antenna number in the Mux Sequence field The individual antenna Conducted Power fields will be activated in the lower window The current values will be displayed Only those antennas listed in the Mux Sequence will be shown Also you must set Conducted Power to 0 in order to set or change the Attenuation Cable Loss or Gain To change enter the...

Page 58: ...eader is deployed The sub region sets the secondary regulatory mode for the geographic region where the reader is deployed For detailed information on each of these parameters refer to the INfinity 610 Protocol Reference Guide Descriptions are provided in the setup region and setup sub_region configuration variable sections 6 1 9 Setup Summary This page allows you to quickly setup the basic operat...

Page 59: ... you to read the current firmware version upgrade the reader firmware files or rollback to the previous firmware version To upgrade reader firmware enter the name of the Sirit provided firmware file in the Firmware File field Use the Browse button to help locate the file Once the filename is entered pres Upgrade Firmware The same method is used to upgrade the LLRP Component firmware Use the Browse...

Page 60: ... Configuration Tool 52 INfinity 610 User s Guide 6 2 2 Import Export Configuration This page allows you to transfer a reader configuration to or from your host computer This is useful for configuring a reader to a known state ...

Page 61: ...tings for later uploading Press the XML Format button to view the XML file in the browser Save this file to your computer if you wish retain it for future If you wish to view the current configuration parameters for a reader press Text Format button Import Licenses This function is used to import a feature license file Navigate to the license file and press Import License to load the file into the...

Page 62: ...ool 54 INfinity 610 User s Guide 6 2 3 Command Line This page allows you to directly enter reader commands from your web browser To directly enter commands from the Command Line Interface CLI refer to the INfinity 610 Protocol Reference Guide ...

Page 63: ... by expert users Expert configurations include h Setup h Tag h Version h Information h Communication h Antennas h Digital I O h Modem 6 3 1 Expert Configuration Setup This page allows you to set the basic operating parameters of the reader including region sub region mode and active protocols You can also view the valid protocols and regions NOTE For details on reader variables refer to the INfini...

Page 64: ...ht filters and each filter is specified by the following configuration variables h enabled Enables or disables the filter h inclusive Indicates to either include tags that match Inclusive or include tags that do not match Exclusive the tag filter h mask Mask as an array of hex bytes for the tag filter h name Name given to the tag filter h pattern Pattern as an array of hex bytes for the tag filter...

Page 65: ...Nfinity 610 User s Guide 57 6 3 3 Expert Configuration Version This page displays the version of reader hardware and reader software within the reader The version numbers are read only and will be needed if you contact Sirit for technical support ...

Page 66: ...ool 58 INfinity 610 User s Guide 6 3 4 Expert Configuration Information This page allows you to customize the reader s identity You can assign each reader a name description location and zone You can also set how the reader reports timestamps ...

Page 67: ...s you to customize the reader s communication parameters Refer to the Setup Ethernet LAN and Setup Serial Port sections for additional information The following figure shows a portion of communication parameters available on the reader NOTE For details on communication parameters refer to the INfinity 610 Protocol Reference Guide ...

Page 68: ...tailed description of each of the antenna and cable variables refer to the Antenna Configuration section in Chapter 4 Reader Behavior of the INfinity 610 Protocol Reference Guide Enter the appropriate values for each antenna parameter and press the Submit button to update the antenna and cable configuration The following figure shows only a small sample of the available antenna configuration varia...

Page 69: ...ation Digital I O This page allows you to configure the digital inputs and output behavior You can set the digital input debounce time in milliseconds as well as the input and output pin values Refer to the INfinity 610 Protocol Reference Guide for detailed information on each of these variables ...

Page 70: ... the reader s modem control variables These variables control functions such as EPC link modulation depth return link frequency and others Refer to the INfinity 610 Protocol Reference Guide for detailed information on each of these variables The following figure shows only a small sample of the available modem configuration variables ...

Page 71: ...ning on the reader The application name process ID configuration and status are provided Controls are provided to view the application file and stop the application h Application Transfer This function allows you to load custom user applications onto the reader h Applications available on the reader This function allows you to view a list of all user applications stored on the reader Controls are ...

Page 72: ... Reader is continuously attempting to singulate tags and automatically reports any singulated tag via an asynchronous event notification on the event channel h Stand By Mode Reader is not transmitting any energy unless processing a tag related command The RF transmitter is enabled at the beginning of the command processing any protocol operations required for the command are performed and then the...

Page 73: ... the reader This page allows you to view the tags in the database as well as change the current Operating Mode Active or Stand By Press Start to begin displaying the tag database This page is automatically refreshed every five seconds Press Get Once to update the database one time refresh is off Press Purge to purge all tags from the database ...

Page 74: ...Tool 66 INfinity 610 User s Guide 6 7 Check Reader Status This page allows you to view the reader system status CPU utilization services and licensed features This information can be used by Sirit Technical Support to verify reader operation ...

Page 75: ...1 2 3 4 5 6 7 8 9 Reader Configuration Tool INfinity 610 User s Guide 67 ...

Page 76: ...peration The reader logs include h Reader level Logs System level reader operation h System Level Logs Linux logs h Firmware Update Log Status of last firmware update h Component Update Log status of last component firmware update h Rollback Log Previous firmware h Reader Applications Log User application logs h Command History Log Recent commands sent to the reader h LLRP Component Log LLRP servi...

Page 77: ...that power dissipation is 1W 7 3 Digital I O Monitoring and Control Scripts Several digital I O monitoring and control scripts are provided with the reader to allow you to monitor the digital I Os and take specific actions These Python application scripts can be used as is or modified to suit your particular application For detailed information on loading Python scripts refer to Chapter 5 Embedded...

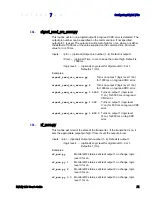
Page 78: ... 1 scan_trigger_timer py 3 4000 0 Monitors digital input 3 timer 4000 ms trigger on 0 7 3 3 signal_read py This routine will turn on a digital output if a tag is successfully read The optional output pin number can be specified on the command line If not specified output pin 1 is used The output pin will remain high for n ms where n is either the default of 1000 ms or the value supplied on the com...

Page 79: ...logic level 1 on for 1000 ms on tag read CRC error signal_read_crc_error py 1 5000 Turns on output 1 logic level 1 on for 5000 ms on tag read CRC error signal_read_crc_error py 1 500 Turns on output 1 logic level 1 on for 500 ms on tag read CRC error signal_read_crc_error py 1 800 0 Turns on output 1 logic level 0 on for 800 ms on tag CRC error 7 3 5 rf_mon py This routine will monitor the state o...

Page 80: ...to a input logic level of 0 low or 1 high The configuration variable dio in alarm timeout N where N is 1 2 3 4 sets the amount of time in seconds to wait for a signal state change A value of 0 default disables alarm generation The digital input logic level is used along with the corresponding digital input pin timeout value to determine if an alarm in the form of an event should be generated If a ...

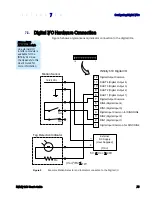
Page 81: ...utput 4 3 DIN2 Digital Input 2 10 DOUT3 Digital Output 3 4 Digital Input Common for DIN3 DIN4 9 DOUT2 Digital Output 2 5 DIN3 Digital Input 3 8 DOUT1 Digital Output 1 7 Digital Output Common 6 DIN4 Digital Input 4 External DC Supply User Supplied VDC _ RS 5V VDC 40V VDC 2 RS 1W INfinity 610 Digital I O 12 1 Figure 5 Example Motion Detector and Indicator connected to the Digital I O External DIO In...

Page 82: ... Power 10 mW 1W conducted 30 dBm Power Consumption 10W typical while idle 18W typical at 1W conducted output power 20W maximum at 1W conducted output power Connections RS 232 Digital I O Ethernet LAN Input Voltage 24 Vdc Input Current 2 5A maximum at 24 Vdc Figure 6 Typical Power Consumption versus Conducted Output Power at 910 MHz ...

Page 83: ... Case Dimensions 9 72 x 7 25 x 2 2 in 246 7 x 184 2 x 55 6 mm Weight 4 5 lbs 2 1 kg 8 1 3 Power Supply Specifications Input Voltage 100 240 Vac Input Consumption 60W maximum Input Frequency 50 60 Hz Output Voltage 24 VDC Output Current 4A maximum 8 1 4 RS 232 Specifications Connector DB 9S Baud rate 1200 115200 Default 115200 Parity None Data bits 8 Stop bits 1 Signals Pin 1 Pin 2 Pin 3 Pin 4 Pin ...

Page 84: ...nput 3 Pin 6 DIN4 Digital Input 4 Pin 7 Digital Common Ground Pin 8 DOUT1 Digital Output 1 Pin 9 DOUT2 Digital Output 2 Pin 10 DOUT3 Digital Output 3 Pin 11 DOUT4 Digital Output 4 Pin 12 Digital Common Ground NOTE Pins 7 and 12 can be used for both inputs and outputs Pin 1 is on the left when facing the end of the reader 8 1 6 Ethernet LAN Specifications Connector RJ 45 Ethernet 10 100 BaseT Indic...

Page 85: ...ited per regulations of Industry Canada unless power into the antenna is decreased to compensate for the increased antenna gain The required antenna impedance is 50 ohms To reduce potential radio interference to other users the antenna type and its gain should be so chosen that the equivalent isotropically radiated power EIRP is not more than that required for successful communication The installe...

Page 86: ...ed with a 50 ohm load or a functional UHF antenna before power up UHF Readers are factory configured to operate on RF port 1 As a result port 1 must be properly terminated before initially powering on the reader Before activating any additional RF ports they must also be properly terminated Never power up the reader unless the appropriate loads or antennas are connected Always power down the reade...

Page 87: ...ound The module connects to the reader s existing digital I O connector and 15 Vdc power connector Reader power passes through the interface module Term Signal Name D Sub Pin Description 1 3 5 9 13 15 17 19 GND 7 12 13 14 15 Ground 2 Terminal4 6 Digital Input 4 optically isolated 4 Terminal3 5 Digital Input 3 optically isolated 6 Terminal2 3 Digital Input 2 optically isolated 7 GND 7 12 13 14 15 G...

Page 88: ...4 can be used as general purpose outputs to indicate tag reading activity or to indicate the reader is transmitting RF On Digital outputs are pulled high in the DIO interface module to 12 Vdc through an LED and a series resistor The LED is in parallel with the output line and lights up when the output is activated by the reader Refer to the following figure for a typical light stack installed as a...

Page 89: ...lure can result if the antenna or communication ports are subjected to ESD A 4 Connecting External Switches and Indicators Various motion detectors and limit switches can be connected to the reader through the DIO interface module For example a typical motion sensor with normally open NO and normally closed NC contacts can be connected as shown in the following figure In addition to input switches...

Page 90: ...B In the following example the four element light stack Allen Bradley 855T must be installed with the common 0 connected to 15V and each element 1 2 3 4 connected to the appropriate output This allows the reader to pull the LED low If you are installing individual indicators or lights connect each indicator as shown in the following figure A The maximum load per light can not exceed 100 mA ...

Page 91: ...nnect a USB Type B cable to the reader and then to your PC or server The maximum cable length is five meters to the nearest hub router or computer B 1 Windows XP Driver Installation and Setup Before you connect the reader to your computer ensure that you have downloaded the latest version of the linux cdc acm inf setup information file This file can be found at http www kernel org doc Documentatio...

Page 92: ...Appendix B IN610 DIO Interface Module 84 INfinity 610 User s Guide 4 Select Install from a list or specific location Advanced and click Next 5 Setup the path to the driver and click Next ...

Page 93: ...Appendix B USB Port Setup INfinity 610 User s Guide 85 6 Since the Gadget Serial driver has not passed the Windows Logo testing a warning appears Press Continue Anyway ...

Page 94: ...ix B IN610 DIO Interface Module 86 INfinity 610 User s Guide 7 Once the installation is complete press Finish 8 Open the Device Manager and verify the driver was installed correctly as shown in the following ...

Page 95: ...Appendix B USB Port Setup INfinity 610 User s Guide 87 9 After driver installation start PuTTY and configure the new COM port as follows 10 The Command Line Interface should appear ...

Page 96: ...he following 1 Connect the reader to your computer using an A B USB cable 2 If the Gadget Serial driver is already mapped to a COM port the following will appear 3 If the driver is not mapped the Driver Software Installation warning will appear 4 Select Control Panel and click View Devices and Printers The Gadget Serial device should not be mapped to any COM port as follows ...

Page 97: ...Appendix B USB Port Setup INfinity 610 User s Guide 89 5 Right click the device and click Properties 6 Select the Hardware tab 7 Click the Properties button ...

Page 98: ...Appendix B IN610 DIO Interface Module 90 INfinity 610 User s Guide 8 Click the Change Settings button ...

Page 99: ...Appendix B USB Port Setup INfinity 610 User s Guide 91 9 Click the Driver tab 10 Click the Update Driver button ...

Page 100: ...finity 610 User s Guide 11 Select Browse my computer for driver software 12 Select Let me pick from list of device drivers on my computer 13 Uncheck the Show compatible hardware checkbox 14 Click the Gadget Serial and click the Have Disk button ...

Page 101: ... drivers Sirit 16 Copy the files gserial inf and win7_usbser sys from the USBWinDrivers directory on your Documentation CD into the new directory 17 After copying files rename win7_usbser sys to usbser sys 18 Go to c windows system32 drivers Sirit 19 Click the file gserial inf and click Open 20 Click OK ...

Page 102: ...Appendix B IN610 DIO Interface Module 94 INfinity 610 User s Guide 21 Click Next 22 Select Install this driver software anyway ...

Page 103: ...Appendix B USB Port Setup INfinity 610 User s Guide 95 23 Press Close 24 The driver is now mapped to COM5 and is ready for use ...

Page 104: ...e of the reader Never open the case of the Infinity 610 Reader unless you are going to remove the battery and dispose of the unit All disposal operations must be performed within local guidelines and laws It is the responsibility of the reader owner to ensure all local and regional laws and regulations are followed for proper reader disposal To remove the battery perform the following 1 Remove the...

Page 105: ...ant of the board 10 Use a small flat blade screwdriver to push the battery out of the holder 11 Properly dispose of battery according to local and regional laws and regulations 12 Replace the main circuit board and install the base on the reader 13 Using a Torx T15 screwdriver Install the six 6 torx screws to secure the reader base to the reader enclosure 14 Properly dispose of reader according to...

Page 106: ...Appendix C Disposal of the INfinity 610 Reader 98 INfinity 610 User s Guide This page intentionally left blank ...

Page 107: ...INfinity 610 User s Guide This page intentionally left blank ...

Page 108: ...INfinity 610 User s Guide ...

Reviews: