background image

7

SIR-ECL1 Operation and Installation Guide

7

SIR-ECL1 Installation Guide

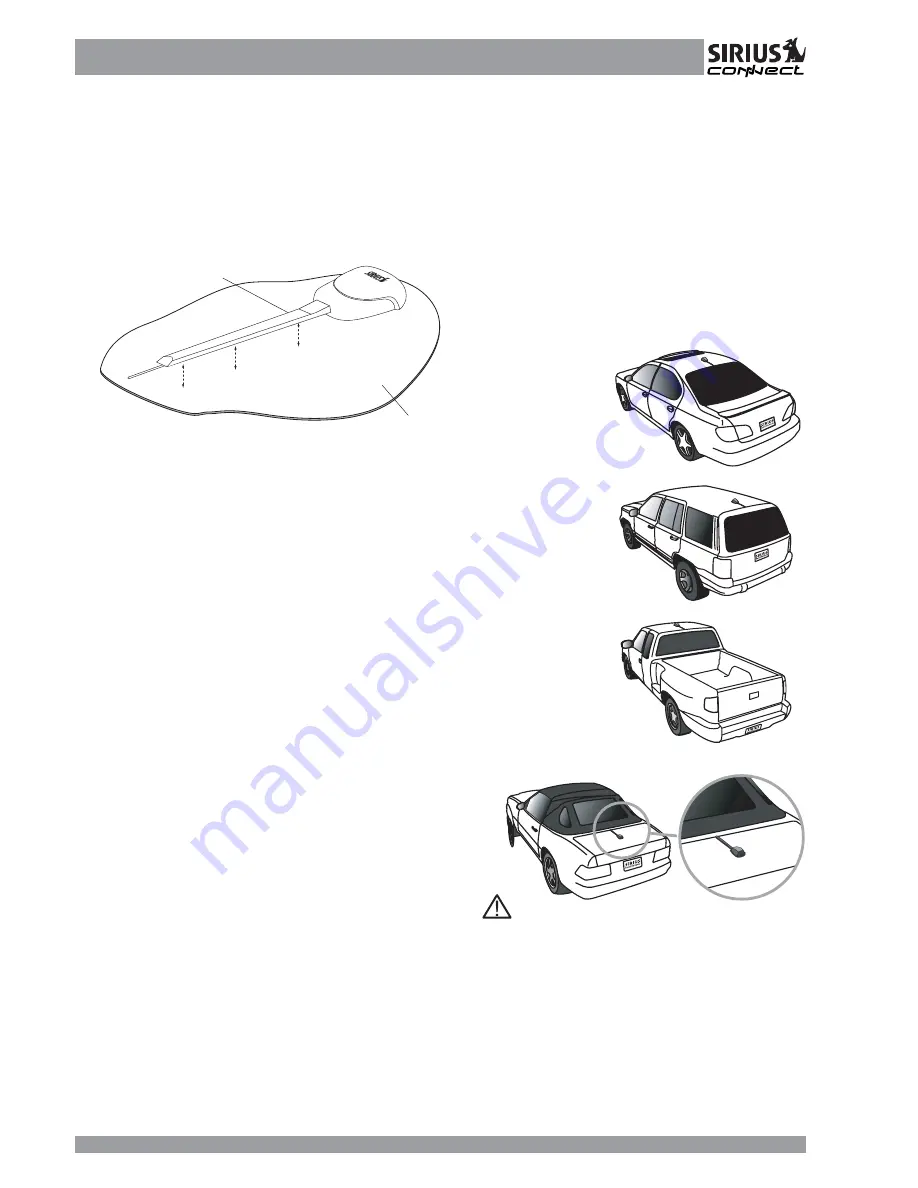
Cable Cover/Tail

Antenna

Optimum Antenna  Mounting
Locations

The optimum location to mount the
included antenna is on the roof of the
vehicle. It is important to avoid any
obstruction that will block satellite
signal – like a roof rack. For convertible
vehicles, install the antenna on the
trunk lid.

•   Place the antenna on a metal

surface of your vehicle at least 12"
x 12", and at least 6" from a
window. (Use the antenna cover/tail
as a guide for the proper distance).

•   The antenna’s powerful magnet will

secure it to the metal surface. The
adhesive that is attached to the
antenna cover/tail will secure the
cable to the vehicle.  Before routing
the antenna cable, confirm that the
antenna is mounted in a good
location.

•   Route the cable from the antenna to

the vehicle’s interior by tucking it
underneath the rubber molding
around the rear window (if possible).

•   Route the cable from the lowest point

of the rear window into the trunk.
Take advantage of any existing cable
channels or wiring conduits.

•   For SUVs, minivans and five-door

vehicles, bring the cable into the
vehicle under the rubber molding
for the tailgate, and continue under
the interior trim.

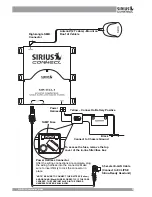
•   From the trunk, carefully route the

cable to the location of the
SIR-ECL1 and plug the SMB
connector onto the unit.

4) Remove the protective tape from the

adhesive, carefully position the
antenna with cover/tail and apply
pressure to secure to the vehicle.

Vehicle

 Caution:

•   Do not pull the wire across sharp

edges that could damage it.

•   Keep the wire away from areas

where it could become tangled in
the driver’s and passenger’s feet.

•   Keep the antenna wire away from

extreme heat – like exhaust systems.

•   Avoid placing the cable near any

moving parts.

Sedan/Coupe

SUV/Mini-Van

Truck

Convertible (only)

Summary of Contents for SIR-ECL1

Page 1: ...Installation Guide...

Page 2: ...trees or other objects that might block conventional satellite signals Once you experience more than 120 channels of digital entertainment you ll never want to leave your car For more information visi...

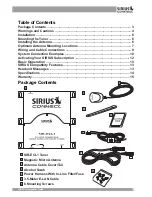
Page 3: ...ing Locations 7 Wiring and Cable Connections 8 System Connection Examples 10 Activating Your SIRIUS Subscription 12 Basic Opperation 13 SIRIUS Compatibity Features 13 Headunit Messages 13 Specificatio...

Page 4: ...HAT MIGHT HINDER VEHICLE OPERATION Doing so may obstruct vision or hamper movement which can result in a serious accident DO NOT INSTALL THE UNIT WHERE IT WILL BE EXPOSED TO HIGH LEVELS OF HUMIDITY MO...

Page 5: ...he wiring If the wiring must pass through a metal hole be sure to use a rubber grommet to prevent the wire s insulation from being cut by the metal edge of the hole USE THE SPECIFIED ACCESSORY PARTS A...

Page 6: ...ting location carefully You should make sure that you avoid the following Any location where the tuner is exposed to moisture Any location where the unit is exposed to extreme heat Any location that w...

Page 7: ...m the antenna to the vehicle s interior by tucking it underneath the rubber molding around the rear window if possible Route the cable from the lowest point of the rear window into the trunk Take adva...

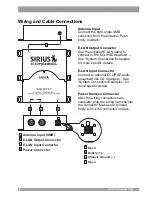
Page 8: ...nput Connector Connect to optional ECLIPSE audio equipment like CD Changers See System Connection Examples for more specific details Power Harness Connector After the wiring connections are complete p...

Page 9: ...attery Positive Right angle SMB Connector Power Harness Connector After the wiring connections are complete plug the wiring harness into the connector Make sure to insert firmly to lock the connector...

Page 10: ...AVN system Eclipse Sirius Ready Headunit E LAN CD Player or AVN system Optional Eclipse CD Changer CH3083 Note Set to L for Primary CD Changer CD Changer TOP H L System Connection Examples System 1 E...

Page 11: ...ection Examples System 3 ECLIPSE Headunit 2 CD Changers and SIR ECL1 Eclipse Sirius Ready Headunit E LAN CD Player or AVN system Optional Eclipse CD Changers CH3083 x 2 Note Set to L for Primary CD Ch...

Page 12: ...appears on the display For AV Headunits Some AVN units will display the SID on the top of the display at all times when in the SIRIUS source mode All others you must Press INFO button on the face of t...

Page 13: ...us Customer Support Departments for more information about compatibility Please consult your ECLIPSE owner s manual for proper operation instructions for using satellite radio products SIRIUS Compatib...

Page 14: ...ments 11 16 Volts DC Fuse Type 1 AMP Glass Chassis Size without Mounting Tabs 4 1 8 x 5 x 1 3 8 W XHXD 105mm x 126mm x 35mm WxHxD Chassis Size with Mounting Tabs 4 7 8 x 5 x 1 3 8 W XHXD 127mm x 126mm...

Page 15: ...E EXTENT OF THE COMPANY S LIABILITY UNDER THIS WARRANTY IS LIMITED TO THE REPAIR OR REPLACEMENT PROVIDED ABOVE AND IN NO EVENT SHALL THE COMPANY S LIABILITY EXCEED THE PURCHASE PRICE PAID BY PURCHASER...

Page 16: ...te Radio 1221 Avenue of the Americas New York NY 10020 888 539 7474 www sirius com SIR ECL1 Manual Feb 2005 Rev A Distributed by ECLIPSE Contact Fujitsu Ten Corp of America 19600 South Vermont Ave Tor...

Reviews: