17
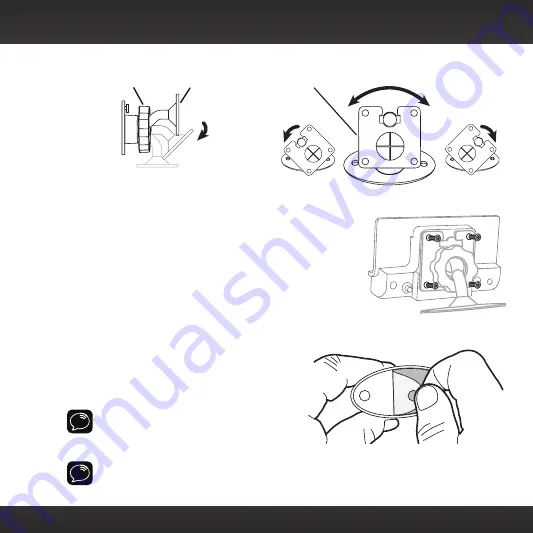
vehicle. When the orientation is correct, tighten the knob.
4.
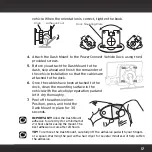
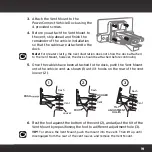
Attach the Dash Mount to the
Power
Connect Vehicle Dock using the 4
provided screws.
5.
Before you attach the Dash Mount to the
dash, skip ahead and finish the remainder of
the vehicle installation so that the cables are
attached to the dock.
6.
Once the cables have been attached to the
dock, clean the mounting surface in the
vehicle with the alcohol preparation pad and
let it dry thoroughly.
7.
Peel off the adhesive liner.
Position, press, and hold the
Dash Mount in place for 30
seconds.
IMPORTANT!
Allow the Dash Mount
adhesive to cure (dry) for a minimum of
2-4 hours before using the mount. The
best adhesion occurs after 24 hours.
TIP!
To remove the Dash Mount, carefully lift the adhesive pad with your fingers
or a spoon. Warming the pad with a hair dryer for several minutes will help soften
the adhesive.
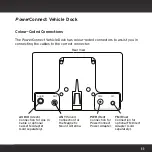
AUDIO
ANT
PWR
FM
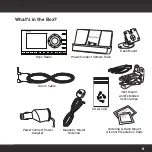
Knob
Adhesive Foot
Dock Mounting Plate
Summary of Contents for Onyx
Page 1: ...Onyx Radio Vehicle Kit User Guide ...
Page 2: ......
Page 4: ...4 ...
Page 5: ...5 Introduction ...
Page 13: ...13 Vehicle Installation ...
Page 48: ...48 ...
Page 49: ...49 Activation ...
Page 51: ...51 Using Your Onyx ...
Page 62: ...62 ...
Page 63: ...63 Special Features ...
Page 71: ...71 Configuring Your Onyx ...
Page 90: ...90 ...
Page 91: ...91 Troubleshooting ...
Page 96: ...96 ...
Page 97: ...97 Product Specifications ...
Page 103: ......

