Sirona Dental Systems GmbH
14 Adapting the Dentist Element
59 58 470 D 3370
D 3370.031.01.10.02
19
båÖäáëÜ
1.
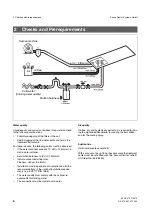
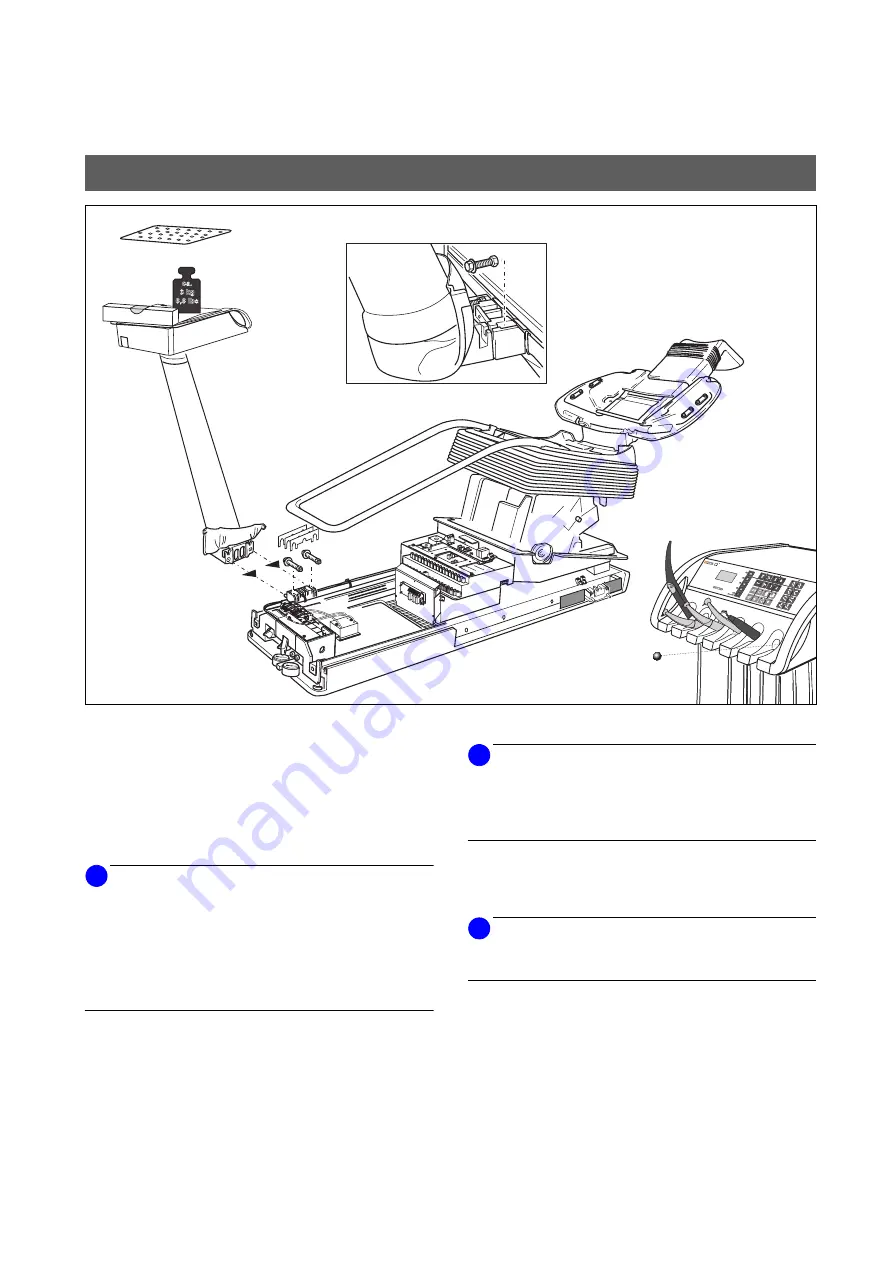
Hinge up the flexible cover.
Push the dentist element onto the guide bolts of the
slide.
2.
Insert two screws, nuts and washers in the plugged-in
connection.
3.
Insert the spacer plate
(2x0.5mm, 1x1mm)
NOTE
i
Inserting the intermediate plates enables the dentist ele-
ment head to be aligned horizontally. The unit-specific toler-
ances can be compensated for by an empirically deter-
mined combination of the intermediate plates . To
compensate for the still missing instruments the dentist ele-
ment head must be loaded with approx. 3kg during the ad-
justment.
4.
Tighten the screws.
Check the levelness of the dentist element head with a
spirit level at different places on the track.
If necessary loosen the screws again, remove the
spacer plate and repeat the process until the dentist el-
ement stands level.
5.
Put on the tray support.
NOTE
i
If the customer wishes to have the dentist element in the
neutral position at the head end of the chair, it is necessary
to repole as described in Chapter “Reversing the Direction
of the Travel Track” on page 49
6.
Plug the ball stopper
A
into the unoccupied instrument
holder to prevent a treatment instrument from being de-
posited inadvertently in this holder.
NOTE
i
The setting of the height adjustment and the swivel stops of
the support arms is described on page 43 and 45.
14 Adapting the Dentist Element
ca.
3 kg
6,6 lbs
1.
2.
5.
A
6.
3.
4.


