62 14 972 D 3507
18
D 3507
.
031.01.07
.
02 11.2010
Installation
Sirona Dental Systems GmbH
Installing the wall adapter
Installation Instructions HELIODENT
PLUS
5.1.3
Installation (surface installation)
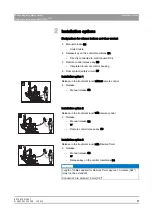
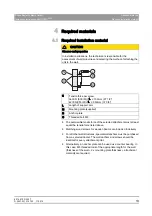
1. Remove wall adapter (P1) from the packaging.
2. Position the wall adapter on the prepared installation location.
3. Screw the wall adapter onto the wall loosely to hold it in place.
4. Align the wall adapter with a spirit level and attach the wall adapter
securely with suitable screws and washers, depending on the type of
attachment.
5. Insert the power cable into the mounting plate from underneath and
secure it with a cap clamp.
empty
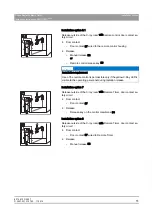
For remote control / Remote Timer only (cable L6 or L9):
1. Insert the cable (L6 or L9) into the mounting plate from underneath.
2. Route the cable toward the top along the side and secure it with a
clamp.
P1
CAUTION
Risk of damage
Make sure that board DX1 is not damaged during installation!
Observe ESD protective measures!
L1
PE
N´
N
L9/L6


