64 95 142 D3632
D3632
.
031.01.02
.
02 03.2016
57
Sirona Dental Systems GmbH
5 Installation: X-ray unit
Installation Manual ORTHOPHOS SL
5.4 Installing the floor stand (option 2)
båÖäáëÜ
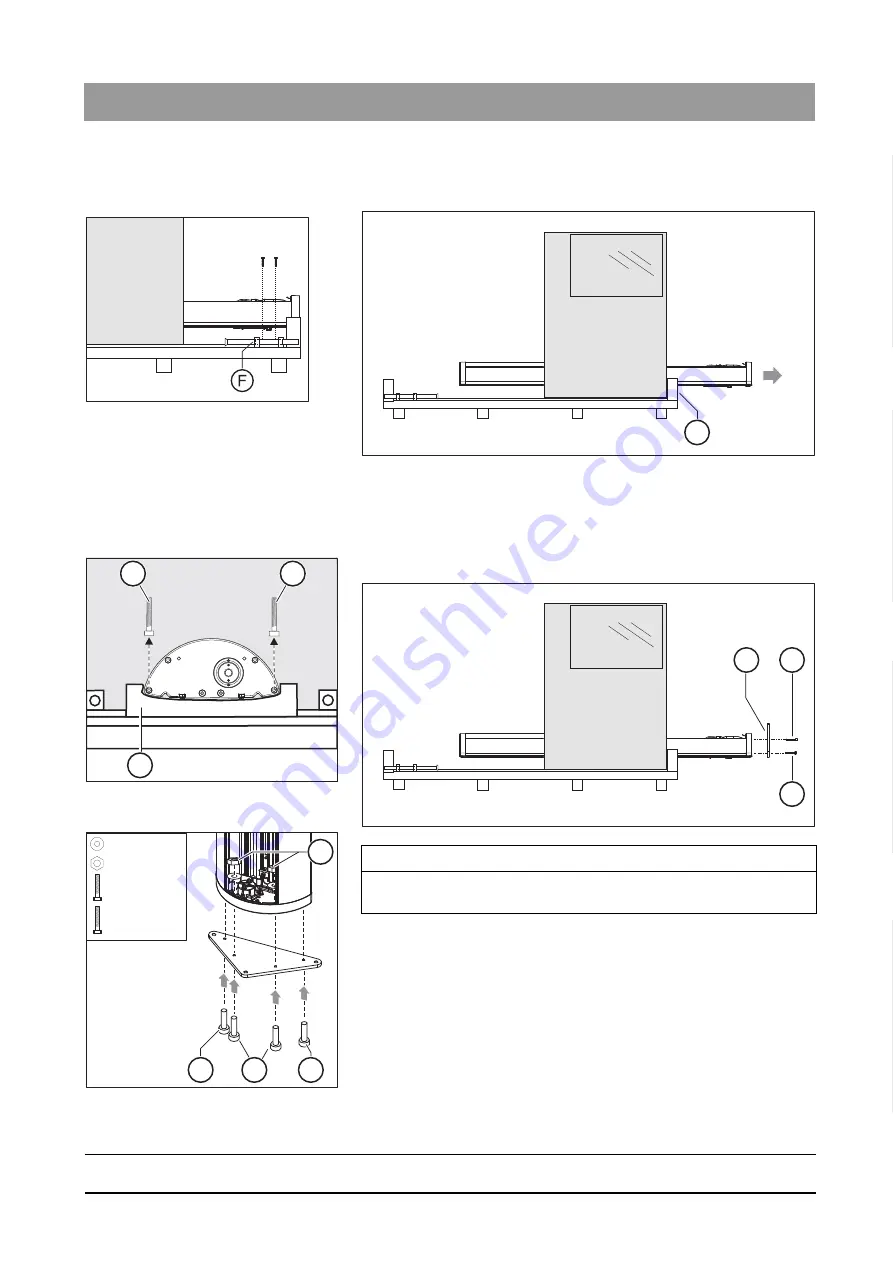
7. Loosen the screws and remove the holder (F).
8. Remove the cables from the stand and pull them out toward the rear.
9. Carefully push the unit toward the base just far enough so that the
center styrofoam part nudges the lower supporting block (G).
NOTICE! Do not damage the interfaces or cables. Make sure that the
interfaces and cables do not bear on the supporting block (G) and are
not damaged when you push the unit.
10. Remove the two screws (H) from the bottom of the stand.
11. Screw the adjustment plate (I) firmly onto the stand.
Use the M8x60 screws (H) for the front two holes. Secure the two
screws with the accompanying nuts and washers (J) (included in the
installation material). Use two new M8x80 screws (K) for the rear
holes.
G
H
H
G
I
H
K
2x Ø 8,4
2x M8x80
2x M8
2x M8x60
H
K
K
J
IMPORTANT
The countersunk drill holes of the adjustment plate must point
downward.
Summary of Contents for ORTHOPHOS SL 2D
Page 2: ......


