1.9
båÖäáëÜ
59 38 399 D3352
D3352.076.01.13.02
07.2008
1 – 27
Tab 1
1.9 Software update
1.9
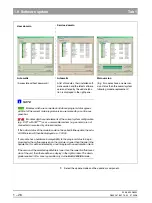
Starting the update
8.
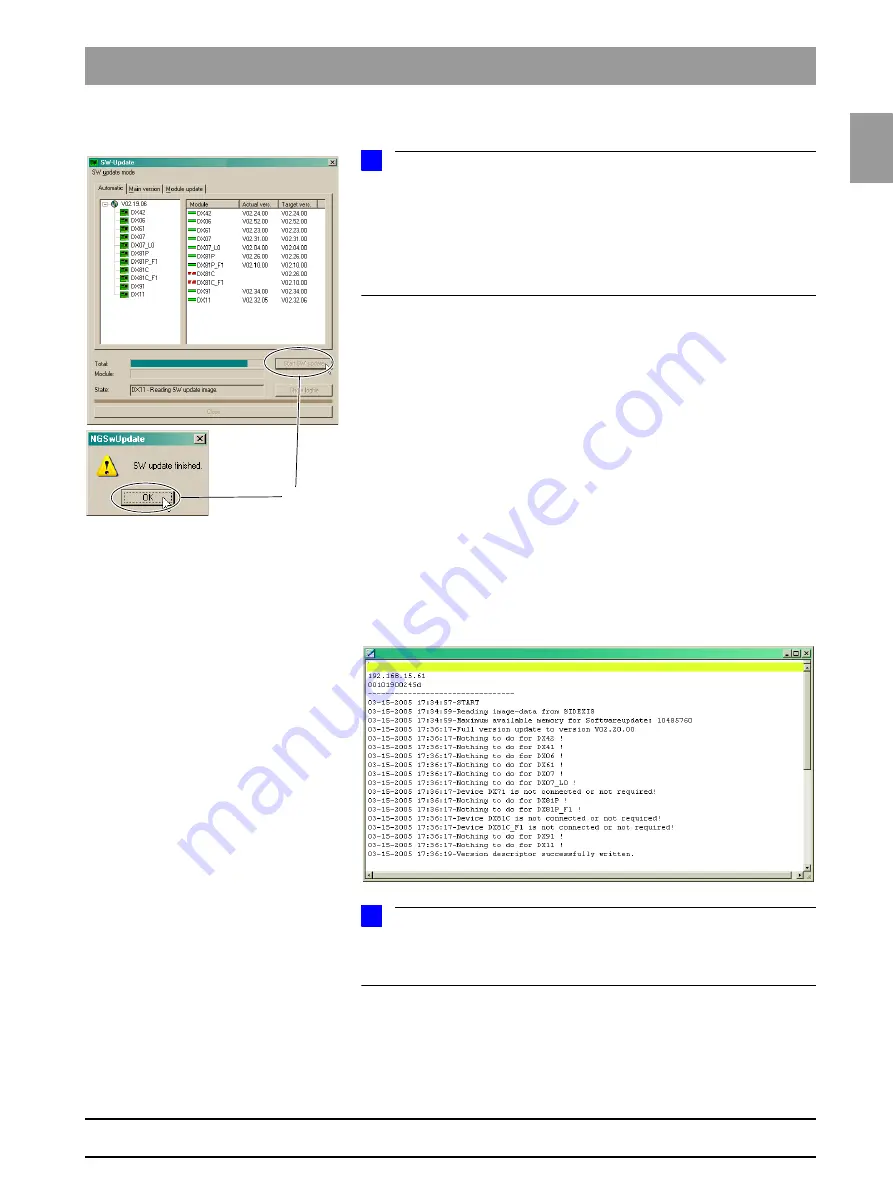
Start the update by clicking
START
UPDATE
.
NOTE
i
Before starting the software update, make sure that no unit movements are
active (especially any diaphragm movements)! Otherwise the system may be-
come inoperable in rare cases.
All of the sensors located in the unit (Pan or Ceph) must be inserted in the cor-
responding slots. Exposure readiness must be deselected in SIDEXIS and the
system must not be in the service mode already.
The update is started. A message box informs you when the update pro-
cess is completed. Confirm the update with
OK
.
Checking the log file
9.
Check the log file to make sure that the update was completed success-
fully.
Click
SHOW
LOGFILE
.
NOTE
i
If messages such as
Update of DXxx failed!
appear there, please perform
the update again. Repeat this procedure as often as necessary until the
“failed” messages no longer appear.
7.
Summary of Contents for ORTHOPHOS XG 3 DS
Page 4: ......
Page 9: ...ORTHOPHOS XG 1General information...
Page 12: ...59 38 399 D3352 1 4 D3352 076 01 13 02 07 2008 Tab1...
Page 59: ...ORTHOPHOS XG 2 Messages...
Page 124: ...59 38 399 D3352 2 66 D3352 076 01 13 02 07 2008 2 6 List of available service routines Tab 2...
Page 125: ...ORTHOPHOS XG 3 Troubleshooting...
Page 153: ...ORTHOPHOS XG 4 Adjustment...
Page 269: ...ORTHOPHOS XG 5 Service routines...
Page 433: ...ORTHOPHOS XG 6 Repair...
Page 436: ...59 38 399 D3352 6 4 D3352 076 01 13 02 07 2008 Tab6...
Page 530: ...59 38 399 D3352 6 98 D3352 076 01 13 02 07 2008 6 21 Replacing cables Tabs 6...
Page 531: ...ORTHOPHOS XG 7 Maintenance...
Page 577: ...b 59 38 399 D3352 D3352 076 01 13 02 07 2008...


