59 38 399 D3352
D3352.076.01.13.02
07.2008
3 – 25
Tab 3
3.10 Check data paths/Generate test images
3.
10
3.10
Check data paths/Generate test images
SIDEXIS XG must be installed and configured before you begin checking the
data paths.
NOTE
i
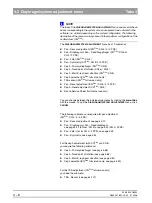
For a panoramic test image, the panoramic mode must be activated on the
unit; for a ceph test image, the cephalometric mode must be activated; for a
TSA test image, the TS mode must be selected (see operating instructions).
Generate the test images for the different operating modes in succession.
1.
Select constancy test in SIDEXIS XG:
Select
EXTRAS
‡
CONSTANCY
TEST
The typical SIDEXIS user interface is started. Constancy test is already
preset.
2.
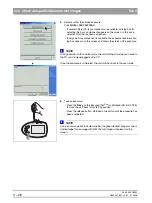
Starting the exposure mode:
Click
XCXP
The dialog box for selecting the X-ray device opens.
NOTE
i
If no X-ray device has been configured yet in SIDEXIS XG, the password input
dialog box will appear instead of the dialog box for selecting the X-ray device.
3.
Select/confirm the X-ray device:
Select e.g.
KAMMER
4
and click
OK
The dialog box for selecting the test type appears on the screen.
4.
Select/confirm the test type:
Click
SERVICE
EXPOSURE
The dialog box for selecting the service exposure appears on the screen.
Summary of Contents for ORTHOPHOS XG 3 DS
Page 4: ......
Page 9: ...ORTHOPHOS XG 1General information...
Page 12: ...59 38 399 D3352 1 4 D3352 076 01 13 02 07 2008 Tab1...
Page 59: ...ORTHOPHOS XG 2 Messages...
Page 124: ...59 38 399 D3352 2 66 D3352 076 01 13 02 07 2008 2 6 List of available service routines Tab 2...
Page 125: ...ORTHOPHOS XG 3 Troubleshooting...
Page 153: ...ORTHOPHOS XG 4 Adjustment...
Page 269: ...ORTHOPHOS XG 5 Service routines...
Page 433: ...ORTHOPHOS XG 6 Repair...
Page 436: ...59 38 399 D3352 6 4 D3352 076 01 13 02 07 2008 Tab6...
Page 530: ...59 38 399 D3352 6 98 D3352 076 01 13 02 07 2008 6 21 Replacing cables Tabs 6...
Page 531: ...ORTHOPHOS XG 7 Maintenance...
Page 577: ...b 59 38 399 D3352 D3352 076 01 13 02 07 2008...

