båÖäáëÜ
59 38 399 D3352
D3352.076.01.13.02
07.2008
6 – 59
Tab 6
6.20 Replacing circuit boards
6.20
6.20
Replacing circuit boards
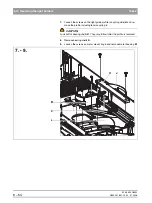
CAUTION
Please observe the usual precautionary measures for handling
printed circuit boards (ESD).Touch a ground point to discharge
static electricity before touching any boards.
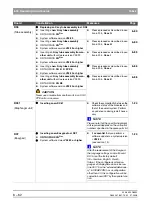
CAUTION
Replacement of printed circuit boards DX6 and DX11:
Never replace both boards at the same time. After replacing one of these
boards, first proceed as specified in section 6.20.1 and then restart the unit.
Only then may you begin replacement of the other module.
CAUTION
Prior to circuit board replacement:
Open the
PAN
and
CEPH
RESET
ADJUSTMENT
menus in SIDEXIS and write
down the adjustment values before you start replacing the boards.
CAUTION
Replacement of circuit board DX11:
– If the old DX11 is still working:
Open the "extended detail query"in SIXABCON, search for
the "Language Set ID" (listed in "Extended Configuration DX7") and
write down the configuration of theLanguage Set Index. If it differs from 00
the Language Set Index has to be resetafter inserting a new
DX11, using the service routine S017.5
(see page 5-86).
– The replacement of circuit board DX11 also causes the loss of user
preference settings (patient symbols, quickshot pre-selections etc.).
Point this out to the user or set the original values up again after the
replacement of the circuit board, provided they could still be queried prior to
the replacement.
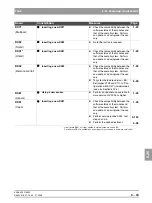
CAUTION
Please be sure to read the notes in Section "Measures following replacement
of boards" (see page 6-60)!
This Service Manual describes all measures required after the replacement of
modules or circuit boards, provided they were known at the time of publication.
You will find more up-to-date information and supplements concerning this
subject on the latest ORTHOPHOS XG CD and on the Sirona dealer page on
the Internet. For this reason, you should always check for the latest informa-
tion on the replacement of modules and performing updates before you start
replacing any modules or boards.
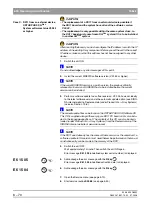
NOTE
i
The connectors on the boards are labeled on delivery of the system.
Tip:
Check the designations on the connectors when pulling off the cables and
label them correctly if necessary.
Summary of Contents for ORTHOPHOS XG 3 DS
Page 4: ......
Page 9: ...ORTHOPHOS XG 1General information...
Page 12: ...59 38 399 D3352 1 4 D3352 076 01 13 02 07 2008 Tab1...
Page 59: ...ORTHOPHOS XG 2 Messages...
Page 124: ...59 38 399 D3352 2 66 D3352 076 01 13 02 07 2008 2 6 List of available service routines Tab 2...
Page 125: ...ORTHOPHOS XG 3 Troubleshooting...
Page 153: ...ORTHOPHOS XG 4 Adjustment...
Page 269: ...ORTHOPHOS XG 5 Service routines...
Page 433: ...ORTHOPHOS XG 6 Repair...
Page 436: ...59 38 399 D3352 6 4 D3352 076 01 13 02 07 2008 Tab6...
Page 530: ...59 38 399 D3352 6 98 D3352 076 01 13 02 07 2008 6 21 Replacing cables Tabs 6...
Page 531: ...ORTHOPHOS XG 7 Maintenance...
Page 577: ...b 59 38 399 D3352 D3352 076 01 13 02 07 2008...

