background image

From the library of: Superior Sewing Machine & Supply LLC

Summary of Contents for L818F-DM1

Page 1: ... r fffl J3 INSTRUCTION BOOK I C I Jt21T l UQI KAULIN MFG CO LTD From the library of Superior Sewing Machine Supply LLC ...

Page 2: ...tructions manual meets the essential safety and health requirements of the Machinery Directive For the most specific risks of the machine safety and compliance with the essential requirements of the Directive has been based on elements of the European Standard EN 292 1 2 1992 Safety of machinery basic concepts general principles for design The compliance of the model with the requirements of EC Ma...

Page 3: ...instructions for lubrication and changing accessories Inspect tool cord periodically and if damaged have it repaired by an authorized serviced facility a Disconnect machine When not in use before servicing and when changing accessories 9 Avoid unintentional starting Do not carry a plugged in tool with a finger on the switch Ensure switch is off when plugging in 1O Check damaged parts Before furthe...

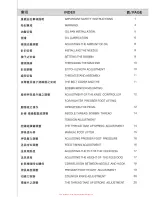
Page 4: ...EE CONTROLLER FOR HIGHTER PRESSER FOOT LIFTING OPERATING THE PEDAL NEEDLE THREAD BOBBIN THREAD TENSION ADJUSTMENT THE THREAD TAKE UP SPRING ADJUSTMENT MANUAL FOOT LIFTER ADJUSTING PRESSER FOOT PRESSURE FEED TIMING ADJUSTMENT ADJUSTING THE TILT OF THE FEED DOG ADJUSTING THE HEIGHT OF THE FEED DOG CORRELATION BETWEEN NEEDLE AND HOOK PRESSER FOOT HEIGHT ADJUSTMENT COUNTER KNIFE ADJUSTMENT THE THREAD ...

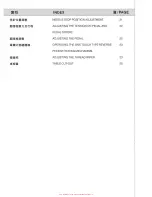
Page 5: ...______________________________________________________________________ j NEEDLE STOP POSITION ADJUSTMENT 21 ADJUSTING THE TENSION ON PEDAL AND 22 PEDAL STROKE ADJUSTING THE PEDAL 22 OPERATING THE ONE TOUCH TYPE REVERSE 23 FEED STITCHING MECHANISM ADJUSTING THE THREAD WIPER 23 TABLE CUT OUT 25 From the library of Superior Sewing Machine Supply LLC ...

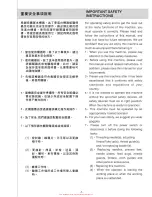
Page 6: ...ad this manual and all related instructions In addition please save this manual for your future needs 3 Please use this machine after it has been ascertained that it conforms with safety standards and regulations of your country 4 It is not allowed to operate this machine without the specified safety devices All safety devices must be in right position When the machine is ready for operation 5 Thi...

Page 7: ...sk 10 Qualified techn icians are required for machine adjustment modification and repair Only genuine parts from SIRUBA are recommended for replacement Damage resulted in using generic parts are subject to your own risk 11 Routine maintenance and check up have to be performed by appropriately trained persons or qualified technicians 12 Qualified technician or well trained persons are required for ...

Page 8: ... can only be used for the designed purpose Other uses of this machine are not allowed 18 Any modification or conversion made on this machine must be conformed with the safety standards and regulations Precaution is necessary We assume no responsibility for damage caused by modification or conversion of this machine 19 Two safety warning signs are applies 1 For the safety of operators and service p...

Page 9: ...ease turn off the power of the machine before tilting the machine head or removing the belt cover and the V belt to avoid possible accidents due to abrupt start of this machine g The motor does not produce noise while the machine is at rest if your machine is equipped with a servo motor So please turn off the power of this machine to avoid possible accidents due to abrupt start of the machine h Ne...

Page 10: ...the following operation or adjustment please turn the power off to prevent accidents caused by abrupt start of the sewing machine 5Eb OIL PAN INSTALLATION I t 1 5mfi IZ iin l 1 ffi z1m o 1 2 m ffi zn R m oo M A il f 1 F 1 J jijffl t Z R OO MB a n fl jijw 5mm J o 2 5 1 The corners of the oil pan has to place on the four corners at the cut out groove of the machine table Fig 1 11 Fig 1 2 Use nails a...

Page 11: ...4 4 Fig 4 OIL LUBRICATION 1 l15 aFJ I5 1 1 m m 5m 1 A5m RlOO tJ A o 2 Rl00fftn 1ft B a 1JD tiff MJ5 5m o 3 D IM 5 lE Sfl1 F f 1 1ftt5m e2 tJPA5mIJ o 6 1 Oil lubrication instruction Fig 5 1 Fill the oil pan with specified oil up to high mark A 2 Refill the oil pan with the specified oil if the oil level is lower below low mark B 3 You will see oil splashing via oil sight window 2 if the lubrication...

Page 12: ...nt of the hook oiling amount 1 Oil splashing test paper About 25mm x 70mm any material of test paper is accepted Paper material will not affect resu lts Fig 6 2 Confirm the oi l amount Place the test paper under the hook and fit the LD N E E 0 paper closely against to the wall of the oil pan Fig 7 j HOOK 2 PAPER OIL PAN TOUCHING BASE BUSHING 70 6 Fig 6 7 Fig 7 When doing step 2 carefully remove th...

Page 13: ...oil in the hook ref to the sample shown on Fig 9 shou ld be adequately adjusted according to the sewing materials and processes Insufficient amount of oil w ill cause the hook to cease and overheat Excess amount of oil may cause the sewing product stained with oil 2 Adequate adjustment should be reached in the way that same oil splashing observation w ill be collected in 3 times on separate paper ...

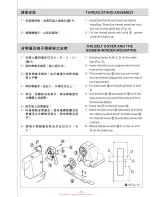
Page 14: ... its highest position 2 Loosen screw 2 and hold the needle CD with its indented side A facing exactly to right in direction B and make sure that long groove Cof the needle is facing exactly to the left in direction D 3 Place the needle into the hole on the needle bar all the way to the end of the hole in the arrow direction 4 Firmly lock screw 2 A J c B ii11 Fig 11 SETTING THE BOBBIN l 1 M m 0 111...

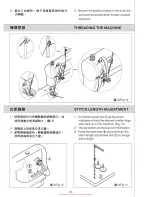
Page 15: ...fi ll A o 13 2 eJ JmIti11LA11r o 3 MR a QJtJMm e IE1a M 1 i1 o 13 Fig 13 10 1 Turn stitch length dial as the arrow indicates to have the desired number align with mark A on the machine Fig 13 2 The calibration on the dial is in millimeters 3 Press the feed lever down and turn the stitch length adjustment dial to change stitch length II14 Fig 14 From the library of Superior Sewing Machine Supply LL...

Page 16: ...i H JSit Wi Eo 8 M H M mJLA B 0 i 11 1 Grinding holes A I 8 I C I D on the table top Fig 15 2 Insert the belt cover support into the bolt hole on the machine 3 Tilt the belt cover then you can install the hand wheel diagonally from the rear of the hand wheel 4 Put belt cover on locating holes C and D 5 Use screws and washer to fix the belt cover on the machine body and lock the screws tightly 6 Pl...

Page 17: ...e bottom end of the needle bar in its lower position does not hit the presser foot i 17 Fig 17 OPERATING THE PEDAL The foot pedal is operated as the following 4 steps Fig 18 1 Lightly tread the front part of the foot pedal shown as Bin Fig 19 machine runs at low sewing speed 2 Further tread the front part of the foot pedal shown as A in Fig 19 Machine runs at high sewing speed The machine runs at ...

Page 18: ...s D the presser foot goes up The thread trimmer actuates if you further tread the back part of the pedal 2 Machine will stop after completing the backstitch if you relocate the pedal to its neutral position during executing the automatic backstitch 3 Whether the machine is under high speed or low speed sewing you can make the maching doing thread trimming any time by tread down the back part of th...

Page 19: ...urned counter clockwise in 8 direction 3 Increase the tension on needle thread by turning thread tension nut clockwise in C d irection 4 Reduce the tension on needle thread by turning thread tension nut counter clockwise in D direction 2 Bobbin thread tension adjustment 1 The bobbin thread tension will be increased as tension adjust screw is turned clockwise in E direction 2 The bobbin thread tens...

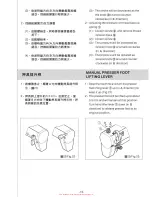
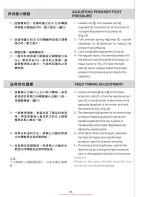
Page 20: ...ned clockwise in A direction 4 The pressure will be reduced as tension knob is turned counter clockwise in 8 direction L 1 I ttl 7t I MANUAL PRESSER FOOT LIFTING LEVER 1 H Anltil lht Am CD o 1121 2 lfJ AM J f 9 5 5 mm Mil Z o B7Jitiltt Ft511JtlfJAm CD flfJ AM l l l 1um o 122 Fig 22 15 1 Stop the machine and turn the presser foot lifting lever CD up in A direction to keep it up Fig 21 2 The presser...

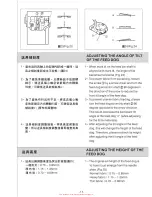
Page 21: ...j l l 0 123 2 fl S Ji fiOO a Jt JL flW tfi tf IJX i o 3 D 31 31 1 fE M f CJ 8 tAli 1 icr 1JfiJJ twitJte Jta r t M o 4 D ax 1JD M Jl IJ M f CJ 8 11 i j fi 1JfiJJ Q I1Ji l Jta ra f 0 Cc r E3 II 1 I5J M f CJ c J In 1 1 I5J a 51 iteIBfT t 0 16 1 Loosen screws 2 and on the feed eccentric cam CD move the feed eccentric cam CD in the direction of the arrow or the opposite direction of the arrow and lock ...

Page 22: ...nt uneven fabric feed ing please turn the feed dog eccentric shaft 2 90 degree opposite to the arrow direction This could decrease the backward tilt angle of the feed dog c while adjusting for the thick materials 4 After adjusting the tilt angle of the feed dog th is will change the height of the feed dog Therefore please recheck its height after agjusting the tilt angle of the feed dog I I i A Jl...

Page 23: ... M t J A tt t l M 8B f fl W Ilil l CD 0 b DA t M t J C tt t ll M 8B fl W ln l CD 0 2 ttfi 131m a DB t mf tt 3M ln l Qjj M t J B tt t l fi 8B o 18 1 The timing adjustment between needle and hook is turn the hand wheel to lower the needle bar down to the lower dead point of its stroke and loosen the screw G Fig 26 1 Adjusting the height of needle bar a DB needle Align mark line A on needle bar 2 wit...

Page 24: ...point with the center of needle Keep on ideal clearance of 0 05 0 1mm between the needle and the hook 2 Specify the correct part no before replacing hooks Attention If the clearance between the blade point of hook and the needle is less than the identified value the blade point of hook will be damaged If the clearance is too large stitch skipping will occur r J A I CD 27 Fig 27 _ I I m 1 MCD t Aa ...

Page 25: ...ting position will have longer thread tail after trimming 2 Moving the mounting position to the left in direction B will have shorter thread tail Attention Be sure to resharpen the counter knife with care a Moving knife b Center of needle c Standard 4 0mm d Standard 4 5mm a b c 18 1129 Fig 29 THE THREAD TAKE UP STROKE ADJUSTMENT 1 o Move thread guide to the left in direction A to increase the amou...

Page 26: ...e at its upper dead point and then loosen the screw CD and adjust the screw in the elliptic hole Move the screw in direction C to advance the needle stop timing Move the screw in direction D to delay the needle stop timing 2 Needle DOWN stop position Fig 32 When treading the pedal forward and returned to the neutral position the needle DOWN stop position can be adjusted as the followings Stop the ...

Page 27: ...part treading pressure of the pedal 1 The rear part treading pressure of the pedal can be adjusted by driving the regulator screw 2 2 The pressure is increased when you follow the direction on the screw to drive it 3 The pressure is decreased when you drive the screw by the opposite direction of the arrow on the screw 3 Adjusting the pedal stroke The pedal stroke is shorter as connecting rod moved...

Page 28: ...e will resume the normal sewing function fi ADJUSTING THE THREAD WIPER l 1 fi 11I 36 37 38 m m o W m O F 1 1 IEm wI1J11 jI1J tnfi 1 tnfi1 z s 2CD 7 ff fiftl 2 2 o 2 m 3 tflHB11IW t Ji l G 1mm llf f I I CID 1 f R llf Ill 1iJ Q o 23 1 The thread wiper location Fig 36 37 38 Please adjust the thread wiper according the the thickness of the materials The adjusting steps are as the followings 1 Turn the...

Page 29: ...ii36 Fig 36 24 3 Please turn off the thread wiper switch when there is not necessary to use the thread wiper J 1 37 Fig 37 138 Fig 38 From the library of Superior Sewing Machine Supply LLC ...

Page 30: ...10 1 a J1 15 N 0 Jl Jl o 2 R26 m f 15 6 1 I u 6 1 1 D w I I 0 1 1 1 0 D I t C2 2 C2 1 2 C2 C CH Joo 2 R30 L 3 8 5 w 16 vm i 40 g v 1 A q5 18 I w Jl Jl 0 D Jl 0 0 0 I R17 25 755 675 1 tt_ B BHIJ rm 0 c 25 IQC 302 263 I R2 1 R3o I R2 IJII f 227 r 183 _ 19 0 5 50 I 0 D i 19 0 5 i t L I 25 0 5 I 40 From the library of Superior Sewing Machine Supply LLC ...

Page 31: ...TD The specification and or appearances of the equipment described in this instruction book are subject to change because of modification without previous notice LY18 AUG 2008 From the library of Superior Sewing Machine Supply LLC ...

Reviews: