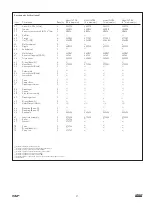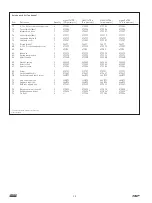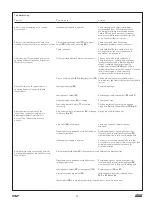
Before connecting air
motor to air line
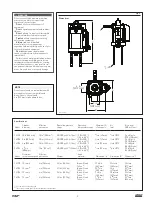
Lincoln series III air motors are fully
pneumatic and require minimum specified
size of air supply hose for proper operation
Check specifications for minimum ID of air
supply hose, corresponding sizes of air
controls and accessories that allow
nonrestrictive air flow Lincoln filter,
regulator with gauge and lubricators are
available as combination units (FRL)
It is recommended to use a 40 micron
minimum pneumatic filter and pressure
regulator with this system
Special lubricant is used in assembly of air
motors It is not recommended to lubricate
system after it has been installed New
lubricant will wash away factory lubricant
and may result in air motor failing Added
lubrication could also result in critical small
pneumatic paths being blocked resulting in
malfunction
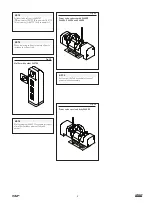
For
1
/
2
in
(13 mm)
air line -
Model 85387-8
For
3
/
4
in
(19 mm)
air line -
Model 85387-12
If quick disconnect coupling should be
used, install supplied coupler to ensure
proper air motor operation
Operating precautions
Use Lincoln replacement parts to assure
compatible pressure rating
Heed all warnings
Do not operate air motor in excess of
recommended pressure range
Disconnect air line and relieve (vent)
pressure before servicing and when idling air
motor for long periods of time
Service and
disassembly
procedure
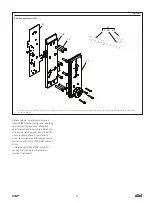
Attach air motor to
pump tube
1
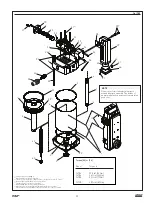
Tightly attach tie rods (
41
) to air motor
lower casting Use short threaded end of
tie rods
2
Mount air motor to top of pump tube
outlet and tightly connect coupling nut to
air motor piston rod (
5, 36
and
72
)
3
Attach tie rods to pump tube with four
nuts (
42
) Leave nuts loose
4
Connect air supply
5
Slowly cycle pump several times using
only enough air pressure to operate pump
without pump stalling
6
Stop pump on
up
stroke and tighten four
nuts (
42
) to securely fasten air motor to
pump tube
Modular design of air motor and accessibility
of vital operation parts make service
available without taking air motor out of line
or without complete disassembly
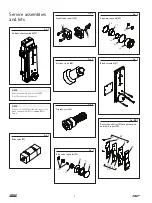
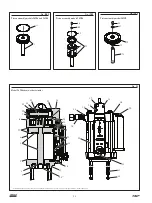
Power valve
1
Remove four screws (
27
and
34
)
2
Remove end caps (
10
and
14
)
3
Push out valve spool (
13
)
4
Remove spool bumpers (
9
)
5
Remove o-ring (
11
)
6
Remove four screws (
37
) and lift
valve body (
12
)
7
Remove gasket (
15
) to complete valve
disassembly
8
To reassemble, reverse procedure
WARNING
Do not
alter or modify any part of equip-
ment
Always
check equipment for proper
operation before each use Verify safety
devices are in place and operating properly
Failure to comply
may result in death or
serious injury
NOTE
Ground air motor according to local codes
when flammable materials are pumped
WARNING
Always disconnect air supply and relieve
pressure before checking, servicing or repair-
ing any part of air motor
Failure to comply may result in death or
serious injury
WARNING
Never
exceed maximum air or fluid working
pressure of lowest rated system component
Failure to comply may result in serious
bodily injury and/or property damage
WARNING
Always read and follow fluid and solvent
manufacturer’s recommendations in regards
to use of protective clothing and equipment
Failure to comply
may result in death or
serious injury
6

