background image

Machinery Balancing Module 


How to Set Up the Microlog for a Single

-Plane Procedure 


8 - Perform a Trim Run 

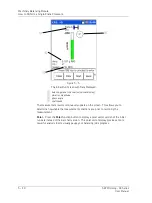
Spin

 - Start the machine and perform a trim run to verify the machine is balanced 

within tolerances.  If not, additional trim runs may be performed. 

How to Set Up the Microlog for a Single-Plane Procedure 

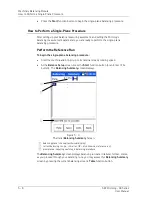
All balancing measurement parameters are set up from Balance Setup screens, which 
display immediately upon entering the balancing application. 

To initiate the Balancing application: 


From the main screen, use arrow keys to highlight the 

Balancing

 icon, and press 

an Enter button.  The 

Balancing

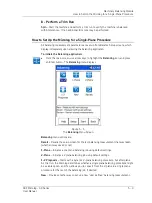
 menu displays.


Figure 5 - 1. 

The

 Balancing

 Menu Screen. 

Balancing

 menu options are: 

Recall

 –  Recalls the setup screen for the last balancing measurement that was taken 

(whether it was saved or not). 

1-Plane 

– Initiates a one plane balancing job using default settings. 

2-Plane 

– Initiates a 2 plane balancing job using default settings. 

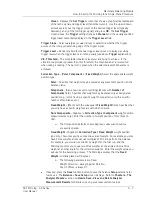
1-2 Prognosis

 – Starts with a dynamic 2-plane balancing procedure, but after plane 

A’s trial run, the Microlog determines whether a single plane balancing procedure might 
be a viable option, and if so, allows you to convert from the 2-plane to a single plane 
procedure for the rest of the balancing job, if desired. 

New

 - Provides another way to set up a new “user defined” balancing measurement. 

SKF Microlog - GX Series  

5 - 3 

User Manual 

Summary of Contents for Microlog GX Series

Page 1: ...e using this product Failure to follow the instructions and safety precautions in this manual can result in serious injury damage to the product or incorrect readings Keep this manual in a safe location for future reference Copyright 2016 by SKF USA Inc All rights reserved 5271 Viewridge Court San Diego CA 92123 1841 USA Telephone 858 496 3400 Fax 858 496 3531 Customer Service 1 800 523 7514 ...

Page 2: ...ge links for direct contact and support Product Sales For information on purchasing condition monitoring products services or customer support contact your local SKF sales office General Product Information For general product information i e product data sheet accessories catalog etc visit the Condition Monitoring Products page on SKF com and select the appropriate product link Technical Support ...

Page 3: ...essly provided below the warranty period for each Product shall commence on the date the Product is shipped by SKF to Buyer 90 DAY WARRANTY Products warranted for ninety 90 days by SKF are as follows cable assemblies MARLIN QuickConnect MQC magnetic temperature probes and all refurbished equipment ONE YEAR WARRANTY Products warranted for one 1 year by SKF are as follows all Microlog products and a...

Page 4: ...smic sensors of the CMSS 2XXX and CMSS 7XX series accelerometers and velocity transducers as marked and published in the SKF Vibration Sensor Catalogue A Subject to the terms herein SKF will provide a Limited Lifetime Warranty for the products specified above sold by SKF after April 15 2014 Under the Limited Lifetime Warranty those products shall at the time of shipment be free from defects in mat...

Page 5: ...orized in writing by SKF Buyer shall forward to SKF any Product claimed by Buyer as being defective Buyer shall prepay all transportation charges to SKF s factory or authorized service center SKF will bear the cost of shipping any replacement Products to Buyer Buyer agrees to pay SKF s invoice for the then current price of any replacement Product furnished to Buyer by SKF if the Product that was r...

Page 6: ... SKF S GROSS OR ORDINARY NEGLIGENCE AND IN ALL CASES REGARDLESS OF WHETHER OR NOT ANY OF THE FOREGOING WERE FORESEEABLE OR THAT SKF WAS ADVISED AS TO THE POSSIBILITY OF SUCH DAMAGES LOSS COST OR EXPENSE AND C NO PERSON HAS BEEN AUTHORIZED BY SKF TO MAKE ANY FURTHER OR CONTRARY INDEMNITIES REPRESENTATIONS OR WARRANTIES ON BEHALF OF SKF THE FOREGOING LIMITATIONS AND DISCLAIMERS OF LIABILITY SHALL BE...

Page 7: ...X Series Microlog 2 System Settings 2 1 Global Measurement Settings 2 7 Sensor Setup 2 10 Troubleshooting 2 13 The ROUTE Module 3 Overview 3 1 How to Download and Upload ROUTEs and ROUTE Data with the GX Series Microlog 3 2 Selecting Operators 3 3 The Route Manager 3 3 How to Collect ROUTE Measurements 3 4 Viewing Dynamic Measurement Data 3 10 Viewing Time Waveform Data 3 14 Viewing Multi Channel ...

Page 8: ... Two Plane Balancing Procedure Overview 5 24 How to Set Up a 2 Plane Procedure 5 26 How to Perform a Dynamic 2 Plane Procedure 5 27 How to Perform a 1 2 Plane with Prognosis Procedure 5 38 Balancing Using the Strobe light 5 47 Data Recorder Module 6 Overview 6 1 How to Perform a Data Recorder Measurement 6 2 Run Up Coast Down Module 7 Overview 7 1 How to Set Up a RUCD Measurement 7 2 Recording the...

Page 9: ...10 26 Idler Sound Monitor Module 11 Overview 11 1 Hardware Setup 11 5 How to Set Up a Conveyor Idler Survey 11 11 How to Perform a Conveyor Idler Roller Survey 11 14 Transferring Reviewing and Deleting Survey Data Files 11 19 Resetting Measurement Alarm Thresholds 11 22 Non ROUTE A Overview A 1 Non ROUTE Mode Operations A 1 How to Collect Pre set Non ROUTE Measurements A 3 How to Collect User Defi...

Page 10: ...e Light C How to Use the Headphones with the GX C 1 How to Use the Strobe Light with the GX C 2 Safety Instructions D Instrument Installation Drawing 090 22600 1 Rev B D 1 Safety Instructions 090 22861 1 Rev C D 4 Glossary of Terms Index TOC 4 SKF Microlog GX Series User Manual ...

Page 11: ...lways wear eye protection Non skid safety shoes hard hat or hearing protection must be used for appropriate conditions Do not repair or adjust energized equipment alone under any circumstances Someone capable of providing first aid must always be present for your safety To work on or near high voltage you should be familiar with approved industrial first aid methods Always obtain first aid or medi...

Page 12: ...damage fire or electrical shock Avoid Battery Compartment Exposure Do not open the battery compartment in a hazardous area or in locations where contact with water or other contaminants may occur About This Manual This manual introduces you to SKF s GX R M F and A series Microlog models It offers complete and detailed reference to GX R M F and A model setup screens data collection displays and dat...

Page 13: ...p and perform bump test procedures that determine the natural frequencies of a machine or a structure shaft orbit measurements and motor current measurements Chapter 5 Balancing Module Describes how to perform machinery balancing procedures for resolving single plane two plane and static couple balances with high precision Chapter 6 Data Recorder Module Describes how to use the data recorder to re...

Page 14: ...onnel who wish to collect and analyze vibration data from their rotating machinery to help reduce maintenance costs and downtime Figure 1 1 The GX Series Microlog A GX Series Microlog System consists of three components A GX Series Microlog data collector Application modules installed on the Microlog data collector and A host computer with ptitude Analyst software or Analysis and Reporting Manager...

Page 15: ...area Values read from other indicators may be entered into the Microlog by pressing the appropriate alpha numeric keys on the Microlog keypad You can also enter your observations as coded notes In addition to its function as a data collector the Microlog has all the features and performances of a powerful analyzer to capture and display high resolution spectra for detailed analysis A Fast Fourier ...

Page 16: ...if you require a module that is not pre licensed for any Microlog model you may purchase the license and activate the module at your site This allows you to customize your GX Series Microlog for your specific needs ROUTE Based Microlog Models The GX R M and F series Microlog systems are pre licensed for ROUTE based data collection purposes That is they facilitate the collection and review of ROUTE...

Page 17: ... are then purchased for the GX A to provide a customized GX A setup for specific machinery monitoring needs For example vibration analysts in a motor repair shop might purchase the GX A model Microlog with the Check to Conformance Analyzer and Balancing module licenses If they then expand their operation and need to conduct ROUTE based condition monitoring they can purchase the ROUTE module s lice...

Page 18: ...t host software is used See your ptitude Analyst host software s User Manual for detailed minimum configuration information SKF s Analysis and Reporting Manager Software Data from Analyzer modules e g Run up Coast Down Data Recorder etc is typically stored and viewed on the GX Series Microlog In addition SKF s Analysis and Reporting Manager application ARM provides more powerful analysis features ...

Page 19: ...conds the GX Series Microlog automatically displays its main menu screen showing all of the modules modules that were not purchased are inactive dimmed module icons and will require a license key entry to activate before use Reference the Module Management section for more details on how to delete unwanted or unused icons from the Main screen Figure 1 3 The GX Series Microlog Main Menu Screen SD c...

Page 20: ...ing Icons Icons for modules that are not activated appear dimmed The Microlog Module Manager allows you to hide pre installed module icons For example you may choose to hide all the inactive dimmed icons You can also use the Module Manager to show previously hidden icons For example if you decide to purchase and activate a module whose icon has been hidden you first need to show the icon You may h...

Page 21: ...dules that already reflect that status will not be affected Press the Back function button when you have finished hiding or showing modules to exit the Module Manager Uninstalling Modules The Uninstall function button on the Module Manager screen allows you to completely remove highlighted selected modules from the Microlog s internal memory This can be useful if memory is low and you do not inten...

Page 22: ...icrolog Buttons and Keypad Function Buttons The bottom of the main screen displays command words that describe the current functions of the Microlog s four function buttons Each command word describes the current use of the function button beneath it The functions of these buttons change as you operate in various Microlog modes and displays When you first turn on your GX Series Microlog three func...

Page 23: ... the Buttons and Keypad The graphic below locates and identifies important Microlog buttons and keys Figure 1 5 GX Series Microlog Buttons and Keys 4 function buttons alpha numeric keypad shift button 2 enter fire buttons arrow buttons power button SKF Microlog GX Series 1 13 User Manual ...

Page 24: ...soft reboot where all memory and resources are freed up all ROUTEs are closed and you are returned to the Home screen Enter Fire Buttons The two enter fire buttons are located on either side of the LCD display In any screen press one of the enter fire buttons to select the highlighted option or to progress through data collection screens Function Buttons The bottom of the main screen displays up t...

Page 25: ...sh to change With the desired field highlighted use the right left arrow buttons to open close the field displaying its available settings Then use the up down arrow buttons to highlight the field s new setting and press Enter In setup screens when not in an input field the 0 up arrow shift button jumps the highlight to the screen s first setting Figure 1 7 The Setup Screen SKF Microlog GX Series ...

Page 26: ...right arrow button to select the highlighted ROUTE A progress dialog displays as the Microlog loads the ROUTE into memory Branching from the active Route hierarchy item are SET Machine and POINT hierarchy items Use the arrow key procedures described above to navigate these additional hierarchy items and their sub items Machine and POINT hierarchy level items are mandatory for all ptitude Analyst d...

Page 27: ...ntry capability 0 Shift Button On the numeric keypad the 0 up arrow button also acts as a shift button that has multiple uses depending on the current Microlog operation In a setup screen numeric input field this button acts as a zero 0 button In setup screens when not in an input field this button jumps the highlight to the screen s first setting In all other displays when applicable this button ...

Page 28: ... bmp file is saved to the SD card and a confirmation dialog displays Note the file name assigned to the bitmap for further use You may also select to save the image to the Microlog s internal memory by selecting Internal The bitmap image is saved in the InternalDisk folder It may then be copied to a host PC using ActiveSync To print your saved Microlog screen bitmap Press the back of the SD card t...

Page 29: ...occur possibly resulting in a fire Install and Charge the Microlog Battery Prior to using the Microlog for the first time place the Lithium Ion battery pack CMAC 5031 in the Microlog and charge the Lithium Ion battery for at least 24 hours to ensure the battery is fully charged The Microlog s battery charges when the Microlog is connected to its AC power adapter battery charger You can operate the...

Page 30: ...ttery in the battery compartment and slide to the right to fit into place Replace the battery cover and press down firmly on the cover while re securing the latches WARNING To minimize the risk of serious injury or damage Do not expose the battery pack to temperatures in excess of 140 F 60 C Do not disassemble incinerate or short circuit the battery pack Danger of explosion if battery is incorrect...

Page 31: ...number to return the battery to SKF for recycling You may obtain an RA number from the SKF website at www skf com cm Use the following recommendations to prolong the life of your battery If a GX unit is temporarily not in use and therefore not being regularly charged it is important that it is recharged at least every 25 to 30 days to prevent damage to the cells If the GX battery pack is left outs...

Page 32: ...nnector and your host computer s USB port connector On the host computer enable ActiveSync for USB connection Do not set up a partnership When connection between the Microlog and ActiveSync is established ActiveSync displays Connected ActiveSync communication with the GX requires specific drivers to be installed on the host PC Refer to the Microsoft ActiveSync Communications section later in this ...

Page 33: ...log Cables USB Host CH 4 Headphone Provides USB keyboard support input capabilities for a CH4 signal input channel and headphone support Headphone use requires accessory cable CMAC 5078 In future firmware versions the USB Host Channel 4 connector will connect additional USB peripherals e g printer and mouse USB Device Power Trigger To charge your Microlog s batteries connect the supplied Microlog ...

Page 34: ...er prompt will display when you attempt data collection for the first POINT in a ROUTE If you press OK the prompt will appear at the beginning of each POINT If you select OK to All the prompt will not appear again until another ROUTE is selected from the Route Manager External input signals can be taken from buffered outputs like those on permanently mounted rack systems process signals or from a ...

Page 35: ...e Centre To download a free version of Microsoft ActiveSync XP or Mobile Device Centre Win 7 and for details on how to use them contact the Microsoft Corporation via their website at www microsoft com Run the installation program and follow the on screen instructions Once installed you must configure ActiveSync or Mobile Device Centre to communicate through the USB port To do so select the File me...

Page 36: ...nections Figure 1 13 Status Area On Win XP you will be prompted by a popup Just select Next to complete the driver installation Figure 1 14 Found New Hardware Wizard When the following message appears select Continue Anyway 1 26 SKF Microlog GX Series User Manual ...

Page 37: ...matted prior to use IMPORTANT The SD card should not be disconnected in hazardous areas it must be connected disconnected in safe areas only The Microlog GX is only certified for use with the following SD card Sandisk Secure Digital Card SDSDx yyy SD Card Memory Advantages SD cards provide greater memory flexibility for ROUTE storage than the internal memory SD cards are flexible and mobile which ...

Page 38: ...ions To perform a soft reset With the Microlog ON simultaneously hold down the 2 7 8 and 9 keys on the Microlog keypad for approximately 1 second The Microlog application reboots and the LCD screen loads the SKF title screen then the main screen To hard reset your Microlog With the Microlog OFF unscrew the battery cover on the back of the unit Using a 1 16th inch pin or a straightened paper clip p...

Page 39: ...A 75 SL Z2 Microlog in a Zone 2 restricted area Input sources Acceleration velocity and displacement from hand held or installed vibration sensors or monitoring systems AC DC sensors Pressure sensors Temperature sensors Keyboard entry Measurements read from indicators or installed instruments entered in engineering units Universal tachometer Visual inspections Added to measurement as coded notes S...

Page 40: ... CHR headphones USB Device power trigger Seven pin Fischer trigger in trigger tachometer power supply USB COMMS charger Input signal range 25 V maximum Data processing and storage Microprocessor Marvell 806 MHz PXA320 Internal storage 128 MB capable of storing approximately 4 000 spectra SD card SD memory card up to 16 GB Measurement Range Route measurements DC to 80 kHz Analyzer measurements DC t...

Page 41: ...monic expand LCD screen Color 1 4 VGA 320 x 240 pixels 54 x 72 mm viewable Case High impact ABS with IP 65 dust and splash rating Weight 715 g 1 6 lb Size height x width Narrowest point 186 x 93 mm 7 4 x 3 7 in Widest point 186 x 134 mm 7 4 x 5 4 in Drop test 2 m 6 6 ft to MIL STD 810 specifications Environmental Hazardous locations CSA Class I Division 2 Groups A B C D special conditions per inst...

Page 42: ...ons USB communication Host software The SKF Microlog GX series communicates with SKF ptitude Analyst software for ROUTE measurement data collection and analysis and also to SKF s Analysis and Reporting Manager software for analysis of Non ROUTE data 1 32 SKF Microlog GX Series User Manual ...

Page 43: ...o access the Setup screen From the main screen use the left right up and or down arrows to select the Setup option or select the main screen s Setup function button Press an Enter button The Setup screen displays Figure 2 1 The Setup Screen Shift key active indicator Indicates to use the shift key zero up arrow to view additional function buttons SKF Microlog GX Series 2 1 User Manual ...

Page 44: ...GB memory Storage on SD cards is subject to available Microlog RAM You may or may not be able to utilize all of the memory on the card Timeout 5 min 10 min 15 min 20 min or Off Select the inactivity time period after which the Microlog shuts down to conserve battery life or disable this feature Default Units English or Metric Determines the system s units of measurement For example select English ...

Page 45: ...ot applicable to the ROUTE module Determines if the measurement acquires and displays the shaft rotational speed as measured by a connected tacho and the speed units of measurement Inactive The device will not acquire a shaft speed measurement for most measurement types For phase orbit order balancing and RUCD measurements the device can still acquire a shaft speed measurement if a trigger input i...

Page 46: ...the filter frequency parameter is entered from pre defined options i e from a drop down list or as numeric input i e typed into a numeric entry field Stepwise Filter frequency parameter is selected from pre defined options Free Entry Filter frequency parameter is typed into a numeric entry field Allows you to set a more precise filter parameter Trigger User or Automatic Specify whether the trigger...

Page 47: ...te and time from the appropriate areas Use the right and left arrow buttons to scroll between fields Use the up and down arrow buttons or the numeric keypad to adjust the setting in each field Press an Enter button to accept your Date Time changes Memory Performs an operation on the active memory selected in the Route Memory option Options are select cmd A placeholder leave this option selected if...

Page 48: ...y CH1 and CH2 for two channel POINTs and CH1 CH2 and CH3 for Triax POINTs A Bias check results screen displays This screen shows the voltage s for each channel along with a red green indication green if the bias voltage is between 2 V and 18 V which is regarded as normal and red if it is outside this range This can be useful to troubleshoot a potential cable or accelerometer problem Automatic Auto...

Page 49: ...s stored in the Microlog From the Route Mgr screen press the Config function button The Instrument Configuration screen displays Figure 2 2 The Instrument Configuration Screen Instrument Configuration Screen Settings Function Buttons Help Press the Help function button to quickly view on line help for Microlog data collection BackSpace Press the BkSp function button to delete entered numeric text ...

Page 50: ... averaged measurements until Enter is pressed Fast averaging is enabled Auto Advance On Off Determines how resulting spectra display during ROUTE data collection Options are On Quickly and automatically advance through ROUTE data collection displaying each spectral measurement result for a designated Dither Time Off Manually advance through ROUTE data collection displaying each spectral measuremen...

Page 51: ...including any FAM or spectral band information allowing the operator to inspect and verify that the data is correct First Displays the first MPA POINT in a spectrum Last Displays the last MPA POINT in a spectrum All Displays all MPA POINTs in a spectrum None Does not display a spectrum Trigger Manual or Visual Available only if the Setup screen s Trigger field is set to User Determines how the tri...

Page 52: ... After specifying changes to Instrument Configuration screen settings press the Apply function button to store your new settings in the Microlog and return to the Route Mgr screen Sensor Setup The Sensor Setup module provides a master list of preconfigured sensors The default sensor list is configured at the SKF factory and contains SKF sensors used for most machinery monitoring needs These defaul...

Page 53: ...ors Highlight a user configured sensor then press Delete to delete the sensor from the list Edit Not applicable to SKF default sensors Highlight a user configured sensor then press Edit to display the Modify Setup screen allowing you to alter the sensor s configuration Back Press to return to the Main Menu screen Help Press the Help function button to quickly view on line context sensitive help To...

Page 54: ...will identify the sensor in the sensor list Sensor Family Vibration or Process Specify whether the sensor measures Vibration data or plant Process data i e temperature pressure etc Sensor Units From the drop down list select the measurement units to use for the sensor s measurements This determines the type of measurement the sensor takes Displayed measurement units are determined by the Sensor Fa...

Page 55: ...configuration but the configuration is not editable Reference the previous Add Sensor section for descriptions of sensor parameter settings After viewing the sensor s configuration press the Cancel button to return to the Setup Sensor screen Troubleshooting Memory Operations If your GX Series Microlog is not functioning properly you may need to try a memory operation from the Config screen or Setu...

Page 56: ...e Introduction chapter for more information on hard resets Ensure that the device is plugged into the battery charger line power If your problem is not resolved upload your data if available and perform a Memory Initialize operation to initialize your GX Series Microlog 2 14 SKF Microlog GX Series User Manual ...

Page 57: ...hat the user write process data and dynamic data in separate ROUTEs to reduce frequent ROUTE ICP setting changes What is a ROUTE A ROUTE is a list of measurement POINTs arranged in sequence for the most efficient data collection The advantage of ROUTE data collection is that measurements can be sequenced for the most efficient data collection regardless of their location in your measurement databa...

Page 58: ...ies Microlog for details In the software select the Transfer menu s Microlog Analyzer option to open the Microlog Analyzer dialog On the Communication tab select USB from the Communication type drop down list When the connection between ptitude Analyst and the Microlog is established the Microlog displays a generic communications indicator on its screen and the blue LED lights up Important Do not ...

Page 59: ...rator and press the OK function button You are placed in the Route Mgr screen with a list of available ROUTEs displayed The Route Manager The Route Mgr screen displays all ROUTEs that have been downloaded to the Microlog from ptitude Analyst Use the up down arrows to select a ROUTE in the list Press an Enter or right arrow button to open the highlighted ROUTE s hierarchy Function buttons on the Ro...

Page 60: ...sequentially collect data for every measurement POINT in your ROUTE Before describing how to begin ROUTE data collection let s learn how to navigate the ROUTE hierarchy list How to Navigate the ROUTE Hierarchy List Figure 3 1 Example of a ROUTE Hierarchy List with Access to Analyzer Module active ROUTE SET Machine POINTs initiate Analyzer mode Review data for selected POINT active POINT s info are...

Page 61: ...on The Route Mgr screen displays a list of all ROUTEs stored in the selected Microlog memory With the ROUTE list displayed use the up down arrows to highlight the name of the ROUTE you wish to make active then Use the right arrow button to select the highlighted ROUTE A progress dialog appears as the Microlog loads the ROUTE into memory and the specified ROUTE s hierarchy displays in the ROUTE lis...

Page 62: ...archy item Review Available only when the hierarchy pointer is on a POINT with stored data Opens the Review Data screen where you can review past measurement data for the selected POINT Analyzer Available when the Nonroute setting on the Setup screen is Use Analyzer Module Accesses Analyzer module where you can collect measurement data for POINTs not previously downloaded to the Microlog from your...

Page 63: ...signated Dither Time Off Manually advance through ROUTE data collection displaying each spectral measurement result until the fire key is pressed to stop the measurement and Continue is pressed to move to the next POINT in the hierarchy Dither Time Time in seconds for which spectral results are to be displayed before Auto Advance moves to the next POINT in the hierarchy How to Begin Route Data Col...

Page 64: ...n up arrows to highlight the desired Machine in the list and press the right arrow to display its measurement POINTs Use the up and down arrows to move the pointer to the measurement POINT you wish to collect and press Enter to begin data collection The POINT s data collection screen displays 3 8 SKF Microlog GX Series User Manual ...

Page 65: ...ected for the POINT depending on your ROUTE configuration settings you may be prompted to Append Overwrite or Discard the measurement Append moves the last measurement that was saved to an historical data file and saves this measurement as the current measurement Overwrite saves this measurement without retaining the previous data Discard cancels this measurement The ROUTE hierarchy screen updates...

Page 66: ...connector from the CH connectors ensure the red dots are aligned grasp the sensor near the sensor tip and pull gently do not twist At the Last point of route message press an Enter button to return to the ROUTE mode hierarchy list screen Press the Back function button to return to the Route Mgr where you can initiate data collection for the next ROUTE Viewing Dynamic Measurement Data Viewing Spect...

Page 67: ...pper left corner Cursor position amplitude Use the left right arrow buttons to move the spectrum s cursor The cursor position and amplitude display in the upper right corner Percent Changed Bar The bar to the right of the spectrum provides information about the overall value of the measurement in comparison to alert and danger alarms yellow and red arrows respectively and to the previous measureme...

Page 68: ...t there is either no previous reading or the previous reading was 0 Function Buttons Spectral display function buttons include 1x RPM Press the 1x RPM function button to select the running speed line and select the speed for the measurement FFT Show must be enabled on the ROUTE hierarchy screen Retake Press to retake measurement Notes Press the Notes function button to access the Microlog s Notes ...

Page 69: ...moved independently View Provides additional view options relevant to the displayed data type For a single spectrum display options are FFT Default View Displays the POINT s FFT spectrum and the percent change bar Beneath the spectrum an info area displays the machine name from which the POINT branches and the POINT s ID Description and alarm status Point Info No FFT spectrum displays instead the ...

Page 70: ...ependently The default is Simple off Peak Cursor P key In a spectral display press the P alphanumeric key to quickly jump the cursor to the next highest peak to the right of the cursor Display Expansion key This function graphically expands or compresses the frequency domain display range horizontally around the cursor position to use the full dynamic range of the Microlog It reveals characteristi...

Page 71: ...Analyst host software the FFT spectrum is displayed by default However if you download a Time only POINT the time waveform displays Use the View function button to determine how to View FFT and Time data options are FFT and Time Default View Point Info FFT and Time No Overall FFT Only FFT Only No Overall Time Only SKF Microlog GX Series 3 15 User Manual ...

Page 72: ...respectively and to the previous measurement green arrow The current measurement value is represented by the colored bar which displays red if the POINT is in alarm yellow if it is in alert and green if there is no alarm If the measurement amplitude extends beyond the display an overall overflow indicator appears at the top of the bar as a small gray arrow The bar also displays the percentage of c...

Page 73: ...1 time CH2 FFT and CH2 time Three channel This POINT type is collected with a Triax Accelerometer Sensor which simultaneously collects three measurements for the sensor location one for each axis monitored by the triax accelerometer sensor Triax POINTs show three spectra one for each axis Although Triax POINTs are referred to as three channel data is only collected on CH1 The measurement results h...

Page 74: ...h3 FFT No Overall For multi channel measurements the cursor operates simultaneously on all traces even when hidden This is also true for Full Scale adjustments using the up down arrow buttons amplitude axis and display expand adjustments using the keys frequency time axis Viewing Orbit Data Orbit POINTs display the shaft s most recent orbit data for the two input channels CH1 and CH2 This can be u...

Page 75: ...e pressure flow pH etc Process measurement POINTs are configured in your ptitude Analyst host software and downloaded in the same manner as dynamic measurement POINTs Process Measurement Pickup Entry Process measurements collected from a pickup such as temperature display on the process measurement data screen To access the process measurement data screen Use the left right up and down arrow butto...

Page 76: ...utomatically collected prior to pressing the Manual function button is disregarded Edit After manual data entry press Edit to change the previous entry Retake Press to retake measurement Notes Press the Note function button to access the Microlog s Notes screen where you may view or add coded notes for the current POINT For more information reference the Coded Notes section later in this chapter B...

Page 77: ...ar or Bksp backspace buttons to erase entered text After correctly entering the measurement s reading press an Enter button The entered value displays on the bar indicator A new function button becomes available Edit and the measurement s alarm setpoints display as arrows If the Configuration screen s Auto Advance setting is set to On pressing Enter stores the measurement To enter notes use the No...

Page 78: ...x coded notes can be selected for the same measurement POINT in this fashion If necessary press the Enter button again to de select the coded note To manually enter a new note select the Text function button A text entry screen displays where you can type a note using the Microlog s keypad Figure 3 13 The Coded Notes Text Entry Screen To input letters repeatedly press the number key representing t...

Page 79: ...T Refer to Appendix D of this manual for important restrictions when using the CMXA 75 SL Z2 Microlog in a Zone 2 restricted area IMPORTANT The speed reference POINT Speed POINT Id must be collected by the Microlog prior to collecting its speed tagged dynamic data POINTs Set up your ptitude Analyst ROUTE or database hierarchy to facilitate data collection of speed POINTs prior to data collection o...

Page 80: ...orarily Attached Pickup Refer to Appendix D of this manual for important restrictions when using the CMXA 75 SL Z2 Microlog in a Zone 2 restricted area If a magnetic or permanently mounted sensor is not used the pickup should be placed in contact with the machine before you initiate a measurement with an Enter button If the vibration probe is placed in contact with the machine after the measuremen...

Page 81: ...re aligned grasp the sensor near the sensor tip and pull gently do not twist Hints for Efficient Data Collection Input Range The GX Series Microlog reports input signals too large for the display with an Input Overrange banner on the plot If a signal overload is indicated the full scale amplitude increases to prevent amplitude errors and data is collected Bias Check Within the ROUTE hierarchy pres...

Page 82: ...percase A indicates an overall alarm A lowercase a indicates a peak alarm Band alarms are displayed with a subscript number indicating the specific band number in alarm When alarm levels are exceeded spectral band alarms are displayed and saved for reviewing in Review mode The host software recalculates the spectral bands from the uploaded spectral data and the original spectral band setpoints Mul...

Page 83: ...iptions If more than 12 POINTs are defined the Microlog collects data for the first 12 MPA POINTs and the remaining MPA POINTS are ignored MPA Group Data Collection To begin MPA Group Data Collection Using the arrow buttons select the desired MPA machine from the ROUTE list s Machine level Highlight an MPA POINT and press an Enter button Data collection begins at the first MPA POINT regardless of ...

Page 84: ...llowing you to perform field analysis and to determine if measurement results are adequate or if measurements need to be re collected How to Review Dynamic Measurement Data To review stored Microlog single channel spectra From the Route Mgr screen use the up down arrow buttons to highlight the ROUTE containing the POINT whose data you would like to review and press the right arrow to open the ROUT...

Page 85: ... review screen includes an option to Delete the stored measurement Refer to the ROUTE Data Collection section s Viewing Dynamic Measurement Data section for more information on spectral display analysis features If you would like to delete the stored measurement press the Delete function button A confirmation message appears Press Yes to remove the measurement or No to retain it After reviewing th...

Page 86: ...it display The Review screen s orbit display operations are similar to Route mode operations except the Retake and Notes function buttons are unavailable and the review screen includes an option to Delete the stored measurement Refer to the ROUTE Data Collection section s Viewing Dynamic Measurement Data section for more information on orbit display analysis features If you would like to delete th...

Page 87: ...llows you to review data for each MPA POINT in an MPA group When reviewing these types of data you are able to cycle through each related measurement in the Review screen To review multi measurement data In the ROUTE hierarchy use the left right up and down arrows to highlight the POINT you would like to review and press the Review function button The first measurement displays Figure 3 17 An MPA ...

Page 88: ...and Later function buttons which allow you to scroll through the measurement records Figure 3 18 Earlier Later Function Buttons The spectrum for the current measurement is blue Spectra for historical measurements are magenta When storing multiple data records for a POINT historical measurements are no longer considered current When viewing individual spectral displays for a POINT with historical d...

Page 89: ...fault View and press an Enter button Press the Apply function button to return to the Review Data screen in waterfall mode Figure 3 19 Historical Data Waterfall View The traces display in chronological order with the most recent measurement in the front You may use the Earlier and Later function buttons to scroll through the measurements The selected measurement s spectrum is bolded and informatio...

Page 90: ...functions are similar to process measurement data collection screens except the Manual and Notes function buttons are unavailable and the review screen includes an option to Delete the stored measurement Refer to chapter s How to Collect Process Measurements section for more information If you would like to delete the stored process measurement press the Delete function button A confirmation messa...

Page 91: ...t computer and viewed with SKF s Analysis and Reporting Manager ARM software Your customized Analyzer measurement setups can also be stored in the Microlog and quickly recalled for future use The Analyzer module is intended for steady state machinery analysis Use the Microlog s Data Recorder module for analysis of machinery that is changing in speed The CMXA 75 SL Z2 Microlog has restrictions on t...

Page 92: ...ur specific machinery monitoring needs If you do alter a measurement s setup you have the option to save your new setup so that you can easily reapply it to future measurements Standard vibration measurements include Acceleration Velocity gE enveloped acceleration Displacement Measurements are also available for specific vibration monitoring applications including Bump Test Shaft Orbit Motor Curre...

Page 93: ...rease graphic display contrast Cont Press the Cont function button to increase graphic display contrast How to Collect Standard Vibration Measurements The standard vibration measurements all work similarly in how they are applied We ll use the acceleration measurement to example their use Collecting Measurements Using the Default Measurement Setup Standard vibration measurements may be quickly app...

Page 94: ...Average button to begin the averaging process The measurement will average according to its preset No Averages setting after which the measurement results will freeze on the display unless the measurement s Averaging Type setting is set to Exponential or Peak Hold instead of RMS in which case the averaging process continues until you press the Stop function button The Average function button s col...

Page 95: ...easurement results View options for Analyzer measurements include FFT for CH1 default Power Cepstrum for CH1 A Power Cepstrum is the result of taking the inverse Fourier transform of the logarithm of the spectrum of a signal A Power Cepstrum converts the power spectrum values and converts them to decibels then performs a FFT on the shape to produce another spectrum With a Power Cepstrum both negat...

Page 96: ...ample Table of Peaks Display To change to a different view Press the View function button the Analyzer View Options screen displays the View field Press the right arrow to display the View options drop down list Figure 4 4 Selecting a View Option 4 6 SKF Microlog GX Series User Manual ...

Page 97: ...ion For phase readings move the cursor between peak amplitudes to observe the phase difference between the peak amplitude components of the roving sensor to the reference sensor If you wish to return to the measurement s setup screen exit Back to the Analyzer main menu and then select the Recall icon to recall the previous measurement s setup screen Save If desired press the Save function button t...

Page 98: ...t all the standard vibration measurements i e Acceleration Velocity gE Displacement New utilize the same setup fields The New measurement icon allows you to set up a new measurement that is initially based on the standard Acceleration measurement s default settings To change the measurement s settings and then take the measurement From the Analyzer screen use the arrow keys to highlight the Accele...

Page 99: ...rement Setup Fields If you wish to alter a standard vibration measurement s default settings enter appropriate setup information in the following fields Num Channels Choose from CH1 CH1 CH2 CH1 CH2 CH3 or CH1 CH2 CH3 CH4 A channel is a single point of monitoring including the sensor and the hardware needed to condition the input signal and to compare the input signal to pre determined setpoints Fo...

Page 100: ...to Spectrum If View Signal is set to Spectrum and Phase invalid gE data occurs X axis units Hz or CPM Specify frequency units for graphic displays Note that the specified X axis units setting determines frequency units for subsequent setup fields Filter gE Band As determined by the Y axis units setting the drop down list displays two types of filter settings high pass filter settings and enveloper...

Page 101: ...Microlog continuously averages readings to minimize the noise level Press the Stop function button to pause the acquisition process then press Start to continue acquisition Peak Hold Peak Hold holds the highest value received at each spectral line during the averaging time This method of averaging is very useful when the signal contains a great deal of amplitude variation and the primary objective...

Page 102: ...mize the maximum nearest side lobe giving it a height of about one fifth that of the Hanning window Flattop A dynamic signal analyzer window function that provides the best amplitude accuracy for measuring discrete frequency components Useful for calibration or machine vibration measurements using displacement probes in fluid film bearings Uniform A dynamic signal analyzer window function with uni...

Page 103: ...e Waveform Measurement Display Screen Function button options for completing viewing and saving the measurement s results operate as previously described in this chapter s Using the Default Measurement Setup section Reference this previous section for details SKF Microlog GX Series 4 13 User Manual ...

Page 104: ...ng the measurement setup only i e for easy future reuse of the same measurement setup Consider doing this with customized measurement setups you wish to reapply in the future Saved measurement setups do not display a check mark in the file s check box Tip Give your saved measurement setups a descriptive name for easy future selection e g PUMP 123 ENV2 ENV BAND1 etc If you press the Save function b...

Page 105: ...keypad to enter a descriptive filename then press OK Spectral results are stored and you are returned to the Analyzer screen Tip with the date timestamp displayed press the right left arrow button to move the cursor to the end beginning of the timestamp and type the tested machine s ID This naming convention identifies both the machine and the date timestamp of the test Analyzer measurement spectr...

Page 106: ...easurement setups Use arrow buttons to select a saved measurement or saved measurement setup and press the Open function button The selected measurement measurement setup displays When viewing saved measurement results Use cursor functions to analyze the measurement or use the Start Stop Average View and Save function buttons as previously described to retake the measurement using its original set...

Page 107: ... the SKF GX Series Microlog for details Using Windows Explorer copy the stored spectrum files csv files from the GX s Mobile Device Internal Disk Analyser folder to an appropriate folder on the host computer Backing Up Spectral Data to an SD card IMPORTANT The SD card should not be disconnected in hazardous areas it must be connected disconnected in safe areas only For hazardous areas you must use...

Page 108: ...deleted and you remain in the Analyzer Load Setup screen To delete all files folders From the Analyzer Load Setup screen use up down arrow buttons to select the all option The Delete All screen displays Figure 4 11 The Delete All Screen Files Deletes all saved files both measurement results and measurement settings files You are prompted to confirm the deletion Folders Deletes all folders and thei...

Page 109: ...annel viewed simultaneously or viewed independently Spectrum Cross Channel Phase Spectra plus cross channel phase angle phase of input CH1 relative to input CH2 for each input channel viewed simultaneously Both spectra are stored and relative phase is displayed on FFT and as a table of magnitude phase pairs with up to 8 orders Orbit Unfiltered orbit or the time waveform for each input channel view...

Page 110: ...2 For a 3 channel measurement display when using a tri axial sensor connect the sensor cable to CH1 For a 3 channel measurement when using separate sensors connect a single sensor to CH1 displays as the top trace connect the CMAC 5079 cable sold separately to CH2 connect the sensor for channel 2 to connector A and the sensor for channel 3 to connector B For a 4 channel measurement connect a CMAC 5...

Page 111: ...ngs to apply to your multi channel measurement e g Num Channels CH1 CH2 Figure 4 13 The New Measurement Setup Screen Reduced View The New measurement setup initially uses the acceleration measurement s default settings The setup screen initially displays a reduced list of measurement parameters those that are more frequently changed by analysts prior to performing the measurement The complete para...

Page 112: ...um Time Spectrum Phase Spectrum Cross Channel Phase Configure other measurement parameters as described in this chapter s Analyzer Measurement Setup Fields section Save If desired from the measurement setup screen you may press the Save function button to save the measurement setup for easy reuse in the future Reference the previous How to Save View and Delete Analyzer Measurement Results section ...

Page 113: ... cursor moves are applied to both traces whether displayed or hidden Reference the Multi Channel Cursor Display Expand and Full Scale Adjustments section later in this chapter for more information View menu options for two channel displays are FFT for CH1 2 Power Cepstrum for CH1 2 Power Spectrum for CH1 2 FFT for CH1 FFT for CH2 FFT Power Cepstrum for CH1 FFT Power Spectrum for CH1 FFT Power Ceps...

Page 114: ...isplays Figure 4 15 A Two Channel Time Waveform Display Screen In a two channel time waveform display the upper trace displays the first channel the lower trace displays channel 2 View menu options are Time for CH1 2 Time for CH1 Time for CH2 4 24 SKF Microlog GX Series User Manual ...

Page 115: ...m Time display the initial two traces display the spectrum and time waveform for channel one View menu options are FFT Time for CH1 FFT Time for CH2 FFT Power Cepstrum for CH1 FFT Power Spectrum for CH1 FFT Power Cepstrum for CH2 FFT Power Spectrum for CH2 Time Power Cepstrum for CH2 Time Power Cepstrum for CH2 Table of peaks for CH1 2 SKF Microlog GX Series 4 25 User Manual ...

Page 116: ...m Phase display the initial two traces display the FFT and phase angles for channels one and two View menu options are FFT for CH1 2 Power Cepstrum for CH1 2 Power Spectrum for CH1 2 FFT for CH1 FFT for CH2 FFT Power Cepstrum for CH1 FFT Power Spectrum for CH1 FFT Power Cepstrum for CH2 FFT Power Spectrum for CH2 Table of peaks for CH1 2 4 26 SKF Microlog GX Series User Manual ...

Page 117: ...relative phase Spectra for both input channels are stored and the relative phase between the two channels is displayed on the spectrum or as a table of magnitude phase pairs of up to 8 orders of running speed In a two channel Spectrum Cross Channel Phase display the initial two traces display the FFT and phase of input CH1 relative to input CH2 View menu options are FFT for CH1 2 Power Cepstrum fo...

Page 118: ...hree channels simultaneously each channel independently or combinations of each plot type on a specific channel and the Table of peaks for Channels 1 2 and 3 When finished collecting and viewing your multi channel measurement data press an Enter button to store your data and return to the Analyzer main screen Multi Channel Cursor Display Expand and Full Scale Adjustments For multi channel measurem...

Page 119: ...machines such as large centrifugal compressors primary and secondary steam turbines and large gearboxes do not have standby systems available and rarely have spare rotors available Machinery that uses pressure fed sleeve bearings is normally both critical to plant operations and very expensive to repair It is therefore essential that these rotors are effectively monitored protected and maintained ...

Page 120: ...cribed in the Using the Default Measurement Setup section Reference this previous section for details Orbit View Options View Use the View function button to determine how to view the displayed orbit measurement results View options for orbit measurements include Orbit raw Orbit 1X Orbit 2X Orbit 3X Time for CH 1 2 Time 1X Time 2X Time 3X Time 4X Time for CH 1 Time for CH 2 4 30 SKF Microlog GX Se...

Page 121: ... the arrow keys to highlight the Orbit icon and press the Setup function button or the Enter Fire key The measurement s setup screen displays Figure 4 22 The Orbit Default Setup Screen Expanded View The setup screen initially displays a reduced list of measurement parameters those that are more frequently changed by analysts prior to performing the measurement SKF Microlog GX Series 4 31 User Manu...

Page 122: ...e for two channel measurements From the drop down list specify the format in which to display the measured signal Options are Spectrum Time Spectrum Time Spectrum Phase Spectrum Cross Channel Phase Orbit default For orbit displays select the Orbit option Save If desired from the measurement setup screen you may press the Save function button to save the measurement setup for easy reuse in the futu...

Page 123: ...ansmitted by rotating machines often excite natural resonances in attached structures Whenever such structural resonances appear vibration responses are amplified and can result in fatigue failures Structural resonances can also mask the cause of a machine s vibration making it difficult to implement corrective machine maintenance Bump tests identify a structure s resonant modes and provide a main...

Page 124: ...pectral peaks Move the spectral cursor to identify natural frequencies Figure 4 24 A Bump Test Display After a Hammer Hit Average Stop Start and Save function button options operate as previously described in this chapter s Using the Default Measurement Setup section Reference this previous section for details 4 34 SKF Microlog GX Series User Manual ...

Page 125: ...ter Fire key The measurement s setup screen displays Figure 4 25 The Bump Test Default Setup Screen Expanded View The setup screen initially displays a reduced list of measurement parameters those that are more frequently changed by analysts prior to performing the measurement The complete parameter list may be viewed using the setup screen s Expand function button To alter the measurement s setup...

Page 126: ...option acquires the signal from an SKF CMAC 5208 current clamp and produces a very high definition spectrum on its display The analyst can then view the spectrum to differentiate between the motor slip frequency and the electrical frequency and observe the sidebands Once these are measured the operator needs to determine by calculation whether there is an indication of high resistance or broken ro...

Page 127: ...ion button to determine how to view the displayed motor current test measurement results View options for motor current measurements include FFT for CH1 Power Cepstrum for CH1 Power Spectrum for CH1 FFT Power Cepstrum for CH1 FFT Power Spectrum for CH1 Table of peaks for CH1 To Change the Motor Current Measurement s Settings From the Analyzer screen use the arrow keys to highlight the Motor Curren...

Page 128: ...ields Motor Current measurement setup fields operate as previously described in the Analyzer Measurement Setup Fields section Reference this previous section for details Save If desired from the measurement setup screen you may press the Save function button to save the measurement setup for easy reuse in the future Reference this chapter s section on How to Save View and Delete Analyzer Measureme...

Page 129: ...ancing in separate sections Measurement Trigger Requirements Machine balancing requires a 1 X trigger signal The trigger signal is normally obtained from the TTL output of one of four triggers Buffered outputs Laser tachometer Reflective systems SKF StrobeLite Single Plane Balancing Overview Regardless of whether you are performing a single or two plane balancing procedure all balancing procedures...

Page 130: ...uence coefficient and permanent correction weight amount and placement To allow for accurate balancing computations the trial weight should pass the 30 30 rule The trial weight should A Increase or decrease the 1X vibration amplitude by at least 30 or B Change the phase angle by at least 30 degrees or C A combination of A and B 5 Attach the Permanent Correction Weight Stop Stop the machine remove ...

Page 131: ...ter button The Balancing menu displays Figure 5 1 The Balancing Menu Screen Balancing menu options are Recall Recalls the setup screen for the last balancing measurement that was taken whether it was saved or not 1 Plane Initiates a one plane balancing job using default settings 2 Plane Initiates a 2 plane balancing job using default settings 1 2 Prognosis Starts with a dynamic 2 plane balancing p...

Page 132: ...een Press the Shift button 0 up arrow to access alternate function buttons Review Displays the Balance Review Data screen where you may review previously saved Balancing measurement results and saved measurement setups Cont Press the Cont function button to decrease graphic display contrast Cont Press the Cont function button to increase graphic display contrast The Balance Setup Screen After sett...

Page 133: ...educe the list back to only those parameters more frequently changed by analysts Default Returns parameter list settings back to their SKF factory defaults Balance Setup Screen Fields Enter appropriate single plane balancing setup information in the following fields Plane Setup Single Plane A CH1 Two Plane A CH1 B CH2 or Two Plane A B CH1 for single plane balancing jobs select the Single Plane A C...

Page 134: ...tects an over range it automatically selects the next higher range until it does not over range ICP Power On or Off Not editable if a preconfigured sensor is selected in the Sensor field When the Variable sensor is selected select to turn ICP power Off or On for the sensor Display Units Specify the unit of measurement for the select sensor type The options available in the list vary depending on t...

Page 135: ...h Number of Components field Specifies that weights may be placed only at designated positions e g rotors having a specific weight hole pattern or with a specific number of fan blades etc Fixed Weight Works with the subsequent Fixed Weight field Specifies that you only have a specific weight value with which to work Num Components Applies to Correction Type Component weight position measurements o...

Page 136: ...ng it up to its nominal steady running speed At the Balance Setup screen press the Start function button or an Enter Fire button The Balancing Summary screen displays Figure 5 3 The Initial Balancing Summary Screen balancing plane channel with visual display current balancing run i e initial run IR also known as reference run prompt area indicating next step in balancing procedure The Balancing Su...

Page 137: ... logged in tabular format on the Balancing Summary screen You may then use the Balancing Summary screen to move backward or forward in the balancing job as required and to save and resume the balancing job if desired To proceed with the balancing job with the IR run highlighted press the Goto function button to go to the initial run data screen or press an Enter Fire button as prompted in the prom...

Page 138: ...esults continuously update on the screen This allows you to determine how stable the measurement conditions are prior to recording the measurement Polar Press the Polar function button to display a polar vector version of the initial run data instead of the bar chart version This polar vector display provides a more powerful analysis tool to visually gauge your balancing job s progress 5 10 SKF Mi...

Page 139: ...by observing the continuous measurement result updates you determine that measurement conditions are somewhat unstable you should press the Average button to average stabilize the measurement results The measurement will continuously average The Average function button s color changes to blue while averaging is occurring As averaging occurs the cursor s movements stabilize as a result of the avera...

Page 140: ...ton to record the measurement as described above It is recommended that you save the initial run so that you do not have to repeat it Then you can update the saved file with subsequent runs If you do not wish to save the initial run data at this time and instead wish to proceed with the balancing job follow the on screen prompt and press an Enter Fire key to proceed to enter Trial Weight data To s...

Page 141: ...ng job Figure 5 7 A Balancing Summary Screen with Initial Run IR Data Save Press the save function button to display the Balance Save Setup screen Refer to Chapter 4 The Analyzer Module s section on How to Save View and Delete Analyzer Measurement Results for details on how to save balancing setups Goto Use the up down arrow keys to highlight the balancing job item you wish to go to in this case T...

Page 142: ...al weight Reference the How to Estimate Trial Weights section below for detail Trial weights are typically attached at zero degrees the trigger reference Unless you wish the Microlog to estimate a trial weight the Radius entry is not necessary so long as you position the trial correction and trim weights at the same radius You can enter a negative number if the trial weight has been removed instea...

Page 143: ...s plane in the Weight Units specified on the Balance Setup screen Use total rotor mass for single plane and 50 of mass for 2 plane Press the OK function button The Trial Weight field updates to display the estimated trial weight Figure 5 9 An Estimated Trial Weight Screen Perform the Trial Run With the trial weight securely attached to the machine start the machine and bring it back up to the same...

Page 144: ...ws vibration magnitude and phase readings with the trial weight attached The polar version shows how the trial weight affected the heavy spot s location blue arrow For accurate balancing efforts these readings should satisfy the 30 30 rule from the reference run the trial weight causes a 30 change in magnitude or a 30 degree change in phase or both 5 16 SKF Microlog GX Series User Manual ...

Page 145: ...o continue with the current settings With the 30 30 rule satisfied the Microlog uses differences between the reference run readings and trial run readings to compute the influence coefficient which it uses to compute the permanent correction weight solution Performing Multiple Trial Runs optional If desired performing multiple trial runs allows the analyst to see if the machine being balanced beha...

Page 146: ...ifferent trial weight angle or radius Stop the machine and remove the old trial weight and on the Trial Weight screen enter the new trial weight angle or radius Then start the machine and press OK or an Enter Fire button to proceed with a new trial run You may repeat the above procedure until you determine the trial weight angle or radius you wish to use 5 18 SKF Microlog GX Series User Manual ...

Page 147: ...e Trial Run screen press an Enter Fire button to proceed Before computing the correction weight solution you are prompted to indicate whether the trial weight is to remain attached or be removed Trial weights are normally temporary and removed before one final correction weight is attached However sometimes the trial weight must be permanently attached for safety purposes and is therefore left on ...

Page 148: ...emoved Prompt Typically select Yes as you typically plan to remove the temporary trial weight or select No if you plan to leave the trial weight attached The Correction Weight screen displays Add the Correction Weight Figure 5 15 The Correction Weight Screen 5 20 SKF Microlog GX Series User Manual ...

Page 149: ...ion Polar or Component allows you to change the Correction Type setting if required e g if you were using Correction Type Polar but now discover that you cannot place the weights where necessary you can change to Correction Type Component If you change from Correction Type Polar to Component you will be prompted to enter the number of components after which the Actual Correction dialog will indica...

Page 150: ...ng for the correction run and then press the dialog s OK function button The Microlog displays the residual unbalance you will have when you use these settings If desired press the Calc button to return to the initial calculated Correction Weight screen Figure 5 17 A Residual Unbalance Message 5 22 SKF Microlog GX Series User Manual ...

Page 151: ...e amount of residual unbalance is within specifications for the machine If the amount of residual imbalance is within specifications you can end the balance job if not you should proceed with a trim run To end the balance job From the Correction Run screen after you have Stopped data collection press the shift zero up arrow Save function button The Balance Save Setup screen displays Refer to Chapt...

Page 152: ...etup menu options to configure balancing measurement parameters for the balancing run sequence 2 Perform the Reference Runs Planes 1 and 2 Spin Start the machine and perform a reference run on each balancing plane The reference runs provide a starting place for balancing computations They record the machine s initial imbalance 1X vibration magnitude and phase angle on each balancing plane Later in...

Page 153: ...al Weight to Plane 2 Stop Stop the machine remove the trial weight from Plane 1 and attach it to Plane 2 6A Perform Trial Run on Plane 1 Spin With the trial weight on Plane 2 perform a Trial Run on Plane 1 6B Perform Trial Run on Plane 2 Spin With the trial weight on Plane 2 perform a Trial Run on Plane 2 7 Attach the Permanent Correction Weights Stop Stop the machine remove the trial weight from ...

Page 154: ...l trim runs may be performed 10B Perform a Trim Run on Plane 2 Spin Perform a trim run on Plane 2 to verify it is balanced within tolerances If not additional trim runs may be performed How to Set Up a 2 Plane Procedure Figure 5 20 The 2 Plane Balance Setup Screen Reduced View Specific differences exist between single and 2 plane balancing measurement field settings Setup options specific to 2 pla...

Page 155: ...p on the device Setup screen must be set to Individual and you must select Component for both Plane A Corr Type and Plane B Corr Type Enter the appropriate number of components for each plane as necessary and then enter the Plane B Offset How to Perform a Dynamic 2 Plane Procedure After setting up your balance measuring equipment and setting the Microlog s balancing measurement parameters you are ...

Page 156: ...itially appears empty with only the Initial Run IR item highlighted as no balancing runs have yet been performed To proceed with the balancing job with the IR run highlighted press the Goto function button to go to the initial run data screen or press an Enter Fire button as prompted in the prompt area The Initial Run screen displays At first there is no data on the Initial Run screen Take this op...

Page 157: ...are prior to recording the measurement Polar Press the Polar function button to display a polar vector version of the initial run data instead of the bar chart version This polar vector display provides a more powerful analysis tool to visually gauge your balancing job s progress In a 2 plane procedure only one plane s polar plot displays at a time Use the right left arrow keys to display the othe...

Page 158: ...function button to view the run data in bar chart format From here you have two options to record the measurement you may use either the Average function button or the Stop function button Both are described in the preceding How to Perform a Single Plane Procedure section Press either the Average or Stop function button to record the measurement It is recommended that you save the initial run so t...

Page 159: ...n Stop the machine On the Microlog enter the Trial Weight Angle and Radius for the trial weight you are attaching to Plane A The Rotor Mass field is used if you wish to have the Microlog estimate the trial weight Reference the How to Estimate Trial Weights section below for detail Trial weights are typically attached at zero degrees the trigger reference Unless you wish the Microlog to estimate a ...

Page 160: ... Trial Run screen shows vibration magnitude and phase readings with the trial weight attached The polar version shows how the trial weight affected the heavy spot s location blue arrow Plane A s trial weight also affects plane B If desired use the left right arrow keys to view the polar plot for the other plane so that you can observe how the trial weight affected it From the Plane A s Trial Run s...

Page 161: ...en Stop the machine On the Microlog enter the Trial Weight Angle and Radius for the trial weight you are attaching to Plane B On the machine carefully attach the precise weight at the precise angle and radius specified Balancing results depend greatly on the precision of your measurements and actions SKF Microlog GX Series 5 33 User Manual ...

Page 162: ...rial Run Screen Polar Version Plane B s trial weight also affects plane A If desired use the left right arrow keys to view the polar plot for the other plane so that you can observe how the trial weight affected it From the Plane B s Trial Run screen after Stopping data collection press an Enter Fire button to proceed to enter the correction weight Before doing so you are prompted whether the tria...

Page 163: ...eight options at the bottom Stop the machine remove the temporary trial weights if appropriate and securely attach the permanent correction weights at the precise angles and radii specified The Split Weight Add Remove Correction and Combine All fields and the Actual function button all operate as described in the previous How to Perform a Single Plane Procedure section In all Correction Weight fie...

Page 164: ... display a green arrow indicates how the correction weight affected the heavy spot s location Ideally at the end of the balancing job you wish the rotor s heavy spot to be as close as possible to the shaft centerline Plane A s correction weight also affects plane B If desired use the left right arrow keys to view the polar plot for the other plane so that you can observe how the correction weight ...

Page 165: ...lance job if not you should proceed with a trim run To end the balance job From the Correction Run screen after you have Stopped data collection press the shift zero up arrow Save function button The Balance Save Setup screen displays Refer to Chapter 4 The Analyzer Module s section on How to Save View and Delete Analyzer Measurement Results for details on how to save balancing jobs To proceed wit...

Page 166: ...is message that shows how much residual imbalance will remain if you proceed with a single plane balancing procedure It is then up to the analyst to determine if the residual unbalance is within specifications and if so whether to convert the 2 plane balancing procedure into a single plane balancing procedure from this point forward This could save the analyst considerable time and effort when a 2...

Page 167: ... the Balancing Summary screen initially appears empty with only the Initial Run IR item highlighted as no balancing runs have yet been performed To proceed with the balancing job with the IR run highlighted press the Goto function button to go to the initial run data screen or press an Enter Fire button as prompted in the prompt area The Initial Run screen displays At first there is no data on the...

Page 168: ...Table and the shifted Save function buttons all operate as previously described in the How to Perform a Dynamic 2 Plane Balancing Procedure section Press either the Average or Stop function button to record the measurement It is recommended that you save the initial run so that you do not have to repeat it Then you can update the saved file with subsequent runs To proceed with the balancing job fo...

Page 169: ...imate the trial weight Reference the How to Estimate Trial Weights section below for detail Trial weights are typically attached at zero degrees the trigger reference Unless you wish the Microlog to estimate a trial weight the Radius entry is not necessary so long as you position the trial correction and trim weights at the same radius You can enter a negative number if the trial weight has been r...

Page 170: ...un screen does not show data Press the Start button or an Enter Fire key to record the trial run Figure 5 35 Plane A s Trial Run Screen Plane A s Trial Run screen shows vibration magnitude and phase readings with the trial weight attached From the Plane A s Trial Run screen after Stopping data collection press an Enter Fire button as if you were going to proceed to enter Plane B s trial weight set...

Page 171: ...portant to note that the above prognosis message only displays if a single plane balancing procedure might be an option to bring the residual imbalance within specifications If the prognosis message does not display then the Microlog s calculations indicate that single plane balancing is not an option and you should continue with the dynamic 2 Plane balancing procedure 1 Plane If the amount of res...

Page 172: ...Select to Proceed with a 1 Plane Prognosis Now the Correction Weight screen displays the permanent Correction weight Angle and Radius balance solutions for Plane A at the top of the screen Plane B settings are marked N A and correction weight options at the bottom Stop the machine remove the temporary trial weights if appropriate and securely attach the permanent correction weights at the precise ...

Page 173: ...al imbalance is within specifications you can end the balance job if not you should proceed with a trim run To end the balance job From the Correction Run screen after you have Stopped data collection press the shift zero up arrow Save function button The Balance Save Setup screen displays Refer to Chapter 4 The Analyzer Module s section on How to Save View and Delete Analyzer Measurement Results ...

Page 174: ...gnosis In the above 1 2 Plane with Prognosis job s Summary table note that trial weight and correction weight data are missing for plane B however trial run and correction run data are still present for both planes A and B You can use the up down arrow keys to highlight a balancing run item and press the Goto function button to resume the balancing job at that point 5 46 SKF Microlog GX Series Use...

Page 175: ...ol knob on the strobe light indicates 0 Ensure the lock track rocker switch is set to INT Set the bandwidth rocker switch to the desired position narrow if you expect the 1X speed to be constant or wide if you expect the 1X to vary Important Ensure the strobe light battery is fully charged before you start balancing If the battery is close to being fully discharged you will not get accurate readin...

Page 176: ...press of the key will increment the number by one It is recommended that a level of 5 is set You may need to adjust this level during the balance procedure especially after attaching the correction weight as the 1X signal will be significantly lower When the strobe is tuned in Internal mode and then switched to LOCK mode the filter in the strobe tracks slight changes in speed If the speed changes ...

Page 177: ...se include For analysis of very low speed machinery Capturing run up run down data intermittent events and transient vibration signals from non steady state machinery With a problem machine that can t be run for any length of time without additional damage resulting you can record the vibration signal as wav data while you run the machine for a short time You can then shut down the machine to avoi...

Page 178: ... or not General Initiates a Recorder measurement using default settings New Provides another way to set up a new user defined Recorder measurement Review Initiates the Recorder Load Setup screen allowing you to review previously saved Recorder measurement data or saved Recorder measurement setups Function Buttons Function buttons at the bottom of the Recorder screen include Help Displays the Micro...

Page 179: ...urement s setup screen not start the measurement Figure 6 2 A Recorder Measurement Display in Preview Mode In Preview mode the Recorder Taking Data screen continuously updates to display a channel s live time waveform signal and overall vibration reading to allow you to view the validity of the measurement parameters Note that recording is not yet initiated For two channel measurements as prompted...

Page 180: ...rec time remaining pause recording During data recording the Recorder Taking Data screen s live time waveform freezes and the recording Time remaining counts down in the message area Pause If desired press the Pause function button to pause the recording While paused the Recorder Save Data screen converts back to Preview mode showing the live time waveform and the Pause button becomes a Resume but...

Page 181: ...s Review Data option Time waveform wav audio files may be transferred to SKF s Analysis and Reporting Manager software for post processing Procedures for saving measurement setups for saving measurement results for backing up measurements for viewing stored measurements and for deleting stored measurements are identical with the Analyzer module Reference Chapter 4 The Analyzer Module section on Ho...

Page 182: ...re 6 5 The General Measurement s Setup Screen Expanded View The setup screen initially displays a reduced list of measurement parameters those that are more frequently changed by analysts prior to performing the measurement The complete parameter list may be viewed using the setup screen s Expand function button To alter the measurement s setup and then perform the measurement Use the up down arro...

Page 183: ... the Sensor field When the Variable sensor is selected select the measurement units to use for the type of sensor being used Options include g in s mil V psi lbf A and mil Sensitivity Not editable if a preconfigured sensor is selected in the Sensor field When the Variable sensor is selected use the alphanumeric keypad to enter transducer sensitivity in millivolts mV per Engineering Unit EU ICP Pow...

Page 184: ... press the Save function button to save the measurement setup for easy reuse in the future Reference Chapter 4 The Analyzer Module section on Saving Analyzer Measurement Results for details on how to save your measurement setup After you are finished with your measurement setup changes press the Start function button to begin the measurement using the new settings The measurement is performed and ...

Page 185: ... a machine and records the resulting time waveform as a Microsoft Windows wav audio file The recorded time waveform wav file can then be analyzed and re analyzed as often as necessary Analysis results are presented in a variety of plot formats to best extract and display the data in the most meaningful way Available display formats include Bode plot Nyquist plot Waterfall plot Spectrogram Table On...

Page 186: ... processed through the plot settings and the plot displays note the longer the raw data wav file the longer the processing time required After the acquired data has been processed and the plot displays you have the option to change specific plot settings those that do not require reprocessing to quickly re display the plot with different parameters without having to reprocess the raw data To perfo...

Page 187: ...new user defined RUCD measurement Review Initiates the RUCD Load Setup screen allowing you to review previously saved RUCD measurement data or saved RUCD measurement setups Function Buttons Function buttons at the bottom of the RUCD screen include Help Displays the Microlog s context sensitive help screen Setup Displays the measurement setup screen for the highlighted measurement type i e Recall G...

Page 188: ... Select the appropriate preconfigured sensor from the setup screen s context sensitive sensor list Note that the specified sensor type determines available options and engineering units for subsequent setup fields The Variable sensor option allows you to configure settings for a sensor that is not on the sensor list Sensor Units Not editable if a preconfigured sensor is selected in the Sensor fiel...

Page 189: ...gear ratios etc Tip To acquire a suitable tachometer signal the tach signal should be approximately 1 5 volts peak to peak The adverse effect of excessively short tacho pulse widths can be addressed by increasing the Max No Orders setting to a higher value in order to increase the sampling rate Start Spd RPM Sets the speed at which the RUCD starts recording data Stop Spd RPM Sets the speed at whic...

Page 190: ...reset measurement start speed data collection is not occurring You may press the display s Start function button at any time to manually start data acquisition Acquiring Indicates the machine speed has reached the measurement start speed and data is being recorded During data acquisition the Start function button changes to a Stop function button Press this Stop function button to manually stop da...

Page 191: ...d Stop Speed or the specified Maximum Acquisition Time is reached or if the operator presses the Stop function button the resulting time waveform is recorded as a Microsoft Windows wav audio file and the Acquisition Completed summary screen displays acquisition information If errors occur during data acquisition they are noted on the Acquisition Completed summary screen Press the OK function butto...

Page 192: ...For analysis purposes setup options for how to best process and display the recorded data for each display format are specified by the user prior to data display Bode Plot Setup From the RUCD Display Select menu use arrow keys to highlight the Bode icon and press an Enter button The RUCD Bode Setup screen displays Figure 7 6 The Bode Setup Screen Setup fields include Channels If multiple channels ...

Page 193: ...nterval in seconds used when FFT spectra are calculated from the recording Display Units Accel g Accel m s 2 Vel mm s Vel ips Disp mils Disp µm If necessary allows integration of the recorded signal to specified measurement units for display purposes LF Cutoff Off or On If On applies a filter of 0 3 of an order to remove low frequency data from the overall vibration severity calculation Detection ...

Page 194: ...magnitude Q factor On the displayed Bode plot Left and right arrow buttons move the cursor Shift zero up arrow up and down arrow buttons sequence through displayed traces Use the up down arrow buttons to manually adjust the y axis graph scaling on the spectrum Up arrow button Decreases the Y axis graph scale setting by one half of its current setting Down arrow button Doubles the Y axis graph scal...

Page 195: ...specified by the user prior to data display Nyquist Plot Setup From the RUCD Display Select menu use arrow keys to highlight the Nyquist icon and press an Enter button The RUCD Nyquist Setup screen displays Figure 7 8 The Nyquist Setup Screen Settings for a Nyquist plot are identical to those for a Bode plot with the exception that the displays of overall severity and a logarithmic Y axis are not ...

Page 196: ...ample Nyquist Plot with Three Traces Displayed active trace cursor position magnitude phase speed On the displayed Nyquist plot Left and right arrow buttons move the cursor Shift zero up arrow up and down arrow buttons sequence through displayed traces Tip With a Nyquist plot displayed use the shift function button 0 up arrow to display Table and Bode function buttons that allow instant display of...

Page 197: ... and press an Enter button The RUCD Table Setup screen displays Figure 7 10 The Table Setup Screen Settings for a table display are identical to those for a Bode plot with the exception that the displays of overall severity and a logarithmic Y axis are not applicable these settings are absent from the setup screen Refer to the previous Bode Plot Display section for details on the remaining Table d...

Page 198: ...tons sequence through extracted data sets Magnitude and phase angle data are displayed for up to two orders of each extracted data set Tip With a table displayed use the shift function button 0 up arrow to display Nyquist and Bode function buttons that allow instant display of Nyquist and Bode plots using the same settings Table data is saved in csv format which can be opened in Microsoft Excel or...

Page 199: ...he Bode plot Start Spd Stop Spd RPM For the recorded data determines the start and stop speeds for Waterfall plot analysis Spacing RPM RPM Time RPM Time RPM Time Determines the type of interval used when FFT spectra are calculated from the recording Affects subsequent Speed Interval and Time Interval settings which update to allow corresponding settings RPM fixed speed change between spectra RPM p...

Page 200: ...or display purposes Lines Specify the FFT lines of resolution typically 400 lines Note that higher resolution settings cause longer delays before waterfall plot display X Axis Hz CPM or Orders Specify the plot s frequency x axis units Determines units for subsequent Freq Range and LF Cutoff settings Freq Range Hz Specify the plot s frequency x axis range LF Cutoff Hz From the drop down list specif...

Page 201: ...pacing Specify how to space the waterfall plot s spectra RPM spectra are spaced by speed increments Timestamp spectra are spaced by time increments in seconds Even Spacing spectra are spaced evenly from the first captured to the last captured Figure 7 14 Example of Z Axis Timestamp Even and RPM Spacing No Spectra Of the total available spectra specify the number of spectra to display in the waterf...

Page 202: ...specified number minus first and last spectrum spectra are as evenly distributed as possible through the set of spectra You may view the missing spectra by performing the Z axis zoom feature detailed later in this section Trace Offset 0 22 5 45 Specify the number of degrees to skew the waterfall plot Figure 7 16 Example Trace Offset Settings of 0 and 22 5 Trace Height Small Medium or Large Specify...

Page 203: ...f waterfall Figure 7 18 Example Disp Order Settings of Forward left and Reverse right Blanking 0 25 Removes a specified percentage from the noise floor of each spectrum Helps clarify the presence of machine orders or structural frequencies Figure 7 19 Example Blanking Settings of 0 2 and 5 After setting all Waterfall Disp Settings press the screen s Display function button to display the waterfall...

Page 204: ... captured return to Waterfall Setup screen to change options and process new waterfall spectra frequency and magnitude at cursor position on active spectrum initiate Display Setup screen for quick re adjustment of how spectra appear in the waterfall plot waterfall display status area 7 20 SKF Microlog GX Series User Manual ...

Page 205: ...ation Cursor Movement On the displayed waterfall plot Shift zero up arrow up and down arrow buttons sequence through displayed spectra The active spectrum displays in green The X and Y axes zero position move to be relative to the active spectrum Left and right arrow buttons move the cursor on the active spectrum Tip Press the P key 7 PQRS key to quickly jump the cursor to the next Peak to the rig...

Page 206: ... Area updates to indicate the number and position of spectra displayed Repeat the procedure to continue zooming in and after reaching the last zoom level to zoom back out The fewer spectra displayed the more zoom levels available If you cursor past the last spectrum in a zoomed display the Z axis pans to show the next set of traces at the same zoom level Figure 7 22 An Example of Z Axis Zoom with ...

Page 207: ...e RUCD Spectgm Setup screen displays Figure 7 23 The Spectrogram Setup Screen Settings for a spectrogram plot are identical to those for a waterfall plot Refer to the previous Waterfall Plot Display section for details on spectrogram plot settings Spectrogram Plot Display After setting Spectgm Setup options press the Display function button to process spectral data and display the Spectgm Disp Set...

Page 208: ...ng for the plot s Y axis Z Axis RPM Timestamp or Even Spacing Specify how to space the spectrogram plot s spectra RPM spectra are spaced by speed increments Timestamp spectra are spaced by time seconds Even Spacing spectra are spaced evenly from the first captured to the last captured Figure 7 25 Example of Z Axis Even Time and RPM Spacing left to right Blanking 0 25 Removes a specified percentage...

Page 209: ...r frequency and magnitude at cursor position on active spectrum spectrogram display status area allows instant display of a waterfall plot using the same settings Spectrogram Display Status Area Figure 7 28 Spectrogram Display Status Indicators lowest amplitude and associated color indication color amplitude indicator at cursor position on active trace highest amplitude and associated color indica...

Page 210: ...ickly jump the cursor to the highest Peak to the right If necessary press the Back function button to return to the RUCD Spectrogram Setup screen to change spectrogram analysis options and extract new spectral data for the waterfall display Saving RUCD Data Saving Reviewing and Deleting Measurements Procedures for saving measurement setups for saving measurement results for viewing stored measurem...

Page 211: ...ure will react to forces applied to it The FRF module can also be used to capture information about how a machine moves when it is running This information can be used in conjunction with Operation Deflection Shape ODS analysis software The FRF module includes features for ease of use including Simple selection of measurement type from a list of predefined options e g Mobility Stiffness Apparent M...

Page 212: ...ed to CH 1 Part under test Modally tuned hammer fitted with correct tip Connected to CH R CH 4 Foam support to allow free movement Test Apparatus Setup To set up the equipment for an FRF test you need an accelerometer a hammer SKF Part Number CMAC5056 GXHK 1 or CMAC5057 GXHK 2 the object whose FRF measurement you are collecting and a support for the object that allows free movement when the object...

Page 213: ...orrect mass and connect it to Channel 1 of the Microlog The accelerometer is used to measure the response to the hammer input of the FRF The accelerometer mass should be low in relation to the test piece that is less than 10 Connect the accelerometer to one of the sides of the object you are going to measure FRF Module Setup Some settings are pre set to simplify user setup Pre set measurement para...

Page 214: ...flection Shape ODS analysis software New Provides another way to set up a new user defined FRF measurement Review Initiates the FRF Load Setup screen allowing you to review previously saved FRF measurement data or saved FRF measurement setups Function Buttons Function buttons at the bottom of the FRF screen include Help Displays the Microlog s context sensitive help screen Setup Displays the measu...

Page 215: ...ing fields Response Channel s CH1 Force CH4 CH2 Force CH1 CH1 CH2 Force CH4 or CH1 CH2 CH3 Force CH4 Specify the input channel s for the FRF measurement Excitation Method Set to Hammer for FRF acquisition and modal analysis or set to Continuous for ODS analysis If you are performing ODS analysis refer to the instructions that accompanied your ODS software for additional information on Microlog set...

Page 216: ... sec N if desired H Sens Enter the sensitivity of the hammer in mV N or mV lbf H ICP Power On or Off Select to turn ICP power Off or On for the hammer Hammer Range Sets hammer input range manually to selected fixed range or to be set automatically Measurement Sets FRF display type Available measurement display types are Mobility Apparent Mass Accelerance Impedance Stiffness and Compliance Meas Uni...

Page 217: ...ftware if this parameter is set to On then an additional Start Index field appears and prompts for the index s starting number For example if the Start Index is set to 1 then the FRF file is saved as 0001 by default and then the next file saved is saved as 0002 and so on After setting FRF setup fields if desired press the Save function button to name and save the current settings for future recall...

Page 218: ...ure 8 5 FRF Taking Data Mode Automatic Parameter Setup Hit Count number of hits count If you have been prompted to perform automatic parameter setup hit the object being tested with the hammer at the opposite side from where the accelerometer is attached When hitting the object try to make sure that you have one clean tap and 8 8 SKF Microlog GX Series User Manual ...

Page 219: ...ers the hit and increases the number of hits count displayed at the bottom of the screen Perform all three hammer strikes Once complete a message box appears showing the calculated values for the applicable setting s Figure 8 6 The Automatic Parameter Setup Results After the automatic parameter setup is complete you are ready to begin capturing the FRF data SKF Microlog GX Series 8 9 User Manual ...

Page 220: ...olog s red LED indicates an error e g input overrange during data acquisition The amber LED indicates the Microlog is initializing the measurement The green LED indicates the Microlog is collecting data in Hammer mode it is looking for a hit If the Accept Reject option in FRF Setup was set to Automatic each time a hammer hit is collected the Microlog automatically determines if the data is correct...

Page 221: ... the Taking Data screen updates to show the FRF magnitude phase traces The text box at the bottom of the screen indicates how many hits were taken Figure 8 9 The Taking Data Screen Final FRF The FRF Taking Data screen shows frequency magnitude phase and Q factor where appropriate at the cursor position The FRF measurement can be seen on the SKF Microlog GX Series 8 11 User Manual ...

Page 222: ...ecked for calibration and integrity by carrying out a test on a known mass for example a calibration weight or steel bar of a measured value Use a calibration weight of 1 kg or any other known mass Set up Field Calibration Figure 8 10 Example of set up for Field Calibration Fit correct tip to modally tuned hammer Connect hammer to CH R CH 4 Select accelerometer of correct mass and connect to CH 1 ...

Page 223: ... plus the weight of the accelerometer M calibrated mass accelerometer mass e g 1 kg 10 5 g 1 0105 kg Saving FRF Data Saving Reviewing and Deleting Measurements Procedures for saving measurement setups for saving measurement results for viewing stored measurements and for deleting stored measurements are similar between modules Reference Chapter 4 The Analyzer Module section on How to Save View and...

Page 224: ......

Page 225: ...etween as delivered and as received vibration levels The Microlog GX is intended for use by Installation Engineers Mechanics Commissioning Engineers Maintenance Engineers Fitters Inspection Engineers Servicing Personnel Noise Vibration Specialists Conformance test settings are specified in test template files that are transferred to the Microlog GX A variety of pre configured test templates are av...

Page 226: ...your host computer to the Microlog GX for conformance testing use To transfer test template files to the Microlog GX These instructions assume you have installed Microsoft ActiveSync the supplied ActiveSync drivers for the GX and connected ActiveSync to your Microlog GX through your host computer Refer to the Microsoft ActiveSync Communications section in Chapter 1 Introduction to the SKF GX Serie...

Page 227: ... files created with CC Setup software to the Custom Templates folder On the Microlog GX copied test template folders branching from the Mobile Device Internal Disk ConfCheck folder display in icon form This organization method allows you to easily select the appropriate test template for your Microlog GX conformance testing Note that custom icons can be associated with top level template folders C...

Page 228: ...ed test template settings to better employ your machinery vibration conformance tests In addition you may use the CC Setup software to set up custom templates specific to your machinery conformance survey needs To install the Conformance Check Setup Generator application simply run the installer file for example ConfCheck SetupGenerator v1 20RC6_SKF msi and follow the on screen instructions To set...

Page 229: ...nu options or toolbar buttons to Open an existing test template file for modification or to create a New test template Select the File menu s New option or click the New Ctrl N toolbar button to open a new test template Tabs display the new test template s configuration parameters Figure 9 5 The CC Setup Application s Setup Tabs SKF Microlog GX Series 9 5 User Manual ...

Page 230: ... vibration sensor used the number of test measurement locations and the sensor placement orientation s for each measurement location Note that the type of sensor specified accel vel disp etc determines the type of FFT spectrum collected acceleration velocity displacement etc Measurement Transducer Sub tab Figure 9 6 Measurement Transducer Configuration Tab Measurement Units Select the desired meas...

Page 231: ...easurement Locations Sub tab Figure 9 7 Measurement Transducer Configuration Tab No Locations Specifies the number of measurement locations on the tested machine Typically each bearing is a test location Directions Default options are Horizontal Vertical and Axial This specifies at which sensor orientation s to collect data for each measurement location Create up to 32 custom directions by simply ...

Page 232: ... type for Acceleration Velocity and Displacement measurements Measurement Measurement Control Sub tab Figure 9 9 Measurement Measurement Control Tab Operator ID required Enable if entering a unique operator ID is required before taking measurements This allows you to associate a set of measurement results with a specific operator Results to CSV Enable to save a results report in CSV format along w...

Page 233: ...e specified graphic must be in bitmap format Recommended graphic size is 240 X 180 pixels at 72 DPI Figure 9 10 Example of a Specified Machine Picture Use the Load button to specify the test template s machinery graphic Use the Clear button to remove any picture from the current setup By default the picture is saved along with the results in the CCR file Uncheck the Include in Results box if the p...

Page 234: ...RMS averaging Peak Hold Not a true averaging type but allows the spectral peak values to be extracted across the acquired number of FFTs Window Type Specify the FFT window to apply Min Freq Range Specify the minimum frequency range to apply to all measurements By default the GX searches across all defined measurement bands see Grade Bands setup and finds the maximum frequency used This in effect d...

Page 235: ... units as specified on the Measurement tab or any derived integrated units Save Options Use this drop down list to specify when to save spectra to CSV The drop down list contains the list of grades as specified on the Grade Labels tab and effectively specifies which grade and above will cause the FFT to be saved to CSV For example if grades with labels A through D have been defined with A being th...

Page 236: ...ors are automatically set Test grades apply to all of the test template s measurements Individual test grade settings vibration level setpoints are specified in the Grade Boundaries tab Default Show Select the default view on the GX unit Grades will show the grade labels by default in the results on the GX whereas Values will cause vibration levels to be shown Grade Labels Click a colored bar to c...

Page 237: ...ements bands to be measured from the captured spectrum typically only one or two for most conformance tests A table below this field automatically displays a setup row for each band On the GX all measurements bands are simultaneously calculated and compared to test grade levels at each sensor location orientation Preset Bands This drop down list allows preset octave bands to be set up automaticall...

Page 238: ...the measurement type Beg Freq Centre Enter the frequency band s beginning centre frequency in Hz CPM depending on Frequency Mode and Band Definition Together the beginning centre and end span frequency settings define the frequency band being measured End Freq Span Enter the frequency band s end span frequency in Hz CPM Detection The overall vibration reading for each band is calculated using the ...

Page 239: ... for the specified location Orientation Tabs Options are the labels specified on the Measurement Locations tab Select the sensor orientation tab whose grade levels you are specifying The table displays settings for the selected orientation Grade Level Table For the specified sensor location orientation displays grade level settings for each measurement band s grade ratings Click the cell whose set...

Page 240: ...ive The file is issued a ccs filename extension How to Perform a Conformance Survey After transferring your test templates to the Microlog GX you are ready to perform your before and after conformance tests Performing a Conformance Survey To perform a conformance test As specified in the test template s measurement settings connect the appropriate sensor to the Microlog GX s CH1 connector At the M...

Page 241: ... entered the Operator ID screen will be shown At this point the user must either select one of the operator IDs in the list or create a new one using the New button Once an appropriate test template has been selected the Measurement Results screen displays the template s measurements and you are ready to begin your conformance testing The example below tests displacement velocity and acceleration ...

Page 242: ...being tested press the Graphic function button A graphic displays the machine s measurement locations Note that the Graphic button only appears if the template includes a picture Figure 9 20 A Machine Graphic Indicating Measurement Locations Press the Table function button to return to the Measurement Results screen 9 18 SKF Microlog GX Series User Manual ...

Page 243: ...splays test results for the current measurement position and automatically sequences to the next position Figure 9 21 Example Conformance Test Results Move the sensor to the next measurement position and press Enter again Repeat for all the machine s test positions Use up down arrow buttons to locate a specific test position Press the Skip function button to skip a test location orientation if loc...

Page 244: ...en measurement grades and measurement values Figure 9 23 Example Showing Measurement Values Shift Col Col Function buttons Our example shows three measurements bands graded for each test position The Microlog GX can calculate up to 64 measurements for each position If more than three bands are tested hold down the Shift key zero 9 20 SKF Microlog GX Series User Manual ...

Page 245: ...mplate settings Tip in addition to overall readings conformance check spectra are also stored on the GX if enabled in the template see the setup generator application s FFT Control tab but cannot be reviewed using the Conformance Check module Spectral data is stored in comma separated value format csv and stored under the Microlog GX s Analyser folder in a ConfCheck folder on the internal disk Mob...

Page 246: ...ursor to the end beginning of the timestamp and type the tested machine s ID This naming convention identifies both the machine and the date timestamp of the test Saving Conformance Check Data Saving Reviewing and Deleting Measurements Procedures for saving measurement setups for saving measurement results for viewing stored measurements and for deleting stored measurements are similar between mod...

Page 247: ...a host computer with the CC Setup Generator software to modify the standardized test template settings to more accurately apply to your machinery vibration conformance surveys In addition you may use the Setup software to set up custom test templates specific to your machinery conformance survey needs The Spindle Assessment kit has been developed in conjunction with the SKF Machine Tool Precision ...

Page 248: ...from the host computer to the Microlog s Internal Disk drive using the Spindle Test Installer Start Programs SKF Microlog Machine Tools Spindle Test Installer This will install both the Spindle Test Module and any Template files onto the unit It should be noted that the unit should come with these files pre installed and that re installing them may take several minutes How to Perform a Survey Afte...

Page 249: ... buttons to highlight the Spindle Test icon and press an Enter button to select The Spindle Test title screen momentarily displays then the Spindle Test screen displays available test template folder icons Figure 10 2 Test Template Folder Icons Test template folders SKF Microlog GX Series 10 3 User Manual ...

Page 250: ...hlight the appropriate test template then press the Open function button to open the template Once an appropriate test template has been selected the Measurement Results screen displays the template s measurements and you are ready to begin your conformance testing Figure 10 3 The Measurement Results Screen To determine measurement locations on the machinery being tested press the Graphic function...

Page 251: ...en Safely secure the sensor to the machine at the proper location orientation and press an Enter key to begin testing The screen momentarily displays a message indicating a measurement in progress then displays test results for the current measurement position and automatically sequences to the next position Figure 10 5 Example Test Results SKF Microlog GX Series 10 5 User Manual ...

Page 252: ...w Real life spindle assessment requires a thorough understanding of machinery vibration balancing and spindle testing techniques This manual s Spindle Test Module chapter simply overviews the Microlog s spindle assessment capabilities and introduces the spindle assessment process Imbalance Test Overview To perform an imbalance test Connect the accelerometer to the Microlog input marked CH 1 Instal...

Page 253: ...balance test setup screens enter spindle specific operating data Figure 10 7 Imbalance Test Setup Screens Use the imbalance test s pre set vibration measurement to determine vibration amplitudes at test speed 1X RPM Figure 10 8 Preset Vibration Measurements If the imbalance value exceeds limits proceed with balancing using the Microlog s Balancing module SKF Microlog GX Series 10 7 User Manual ...

Page 254: ...ter button After determining resonance frequency select the Microlog s Spindle module and then select the module s Resonant Frequency test and enter the resonance frequency Re start spindle and increase the speed to approximately 80 of maximum speed or typical operating speed Be sure to avoid any resonance domains In Mechanical Condition test setup screens enter spindle specific operating data Fig...

Page 255: ...ntil maximum speed is reached Power the Microlog on From the main menu use the arrow buttons to highlight the RUCD icon and press an Enter button This is to determine any resonance frequencies After determining resonance frequency select the Microlog s Spindle module and then select the module s Resonant Frequency test and enter the resonance frequency Re start spindle and increase the speed to ap...

Page 256: ...pindle Execute the preset enveloped acceleration vibration measurement s to determine bearing condition and evaluate vibration values against SKF vibration acceptance standard Figure 10 12 Execute Preset Enveloped Acceleration Vibration Measurements 10 10 SKF Microlog GX Series User Manual ...

Page 257: ... scratches exist on tool nose surfaces polish with a lapping film 30µ 12µ alt 5µ to erase high peaks Afterwards clean with liquid Power the Microlog on and select the Spindle module s Nose Run Out test In Nose Run Out test setup screens enter the tool holder type and select the appropriate conformance setup Figure 10 14 Nose Run Out Test Setup Screens SKF Microlog GX Series 10 11 User Manual ...

Page 258: ...nds Figure 10 15 Indicator Position Slowly rotate the shaft manually and read the total range value Key in the result Figure 10 16 Enter Run Out Range Value HSK tapers after completing the radial measuring follow up with an axial measure of contact face and evaluate against the acceptance standard 10 12 SKF Microlog GX Series User Manual ...

Page 259: ...orm a Clamp Force Test To perform a clamp force test Visually inspect shaft taper and fingers for wear and determine if fingers are missing and or lack lubrication Power the Microlog on and select the Spindle module s Clamp Force test Enter the tool holder type ISO or HSK and size SKF Microlog GX Series 10 13 User Manual ...

Page 260: ... Force Test Setup Screens Mount the correct adapter and knob stud on the pull force gauge and measure the clamp force Repeat five times and calculate the average value Key in the result Figure 10 20 Enter the Average Value 10 14 SKF Microlog GX Series User Manual ...

Page 261: ... clamp force value and evaluate against pull force acceptance standard Figure 10 21 Clamp Force Test Results If inadequate result identify the root cause e g finger defects inadequate grease broken or weak washer springs SKF Microlog GX Series 10 15 User Manual ...

Page 262: ...tance test Power the Microlog on and select the Spindle module s EM test In test setup screens enter tool holder type and select the appropriate conformance setup Figure 10 22 EM Test Setup Screens HSK ISO HSK ISO Figure 10 23 EM Test for HSK and ISO 10 16 SKF Microlog GX Series User Manual ...

Page 263: ...tract the tool holder extruder to end position and measure with a depth micrometer against the shaft face Figure 10 24 Measure with a Depth Micrometer Key in the result Figure 10 25 Enter the EM Test Value SKF Microlog GX Series 10 17 User Manual ...

Page 264: ...standard Figure 10 26 EM Test Results Belt Tension test overview To perform a belt tension test Inspect belt for cracks wear scratches etc Power the Microlog on and select the Spindle module s Belt tension test Figure 10 27 Belt Tension Test Setup Screens 10 18 SKF Microlog GX Series User Manual ...

Page 265: ... Tension test setup screens to define belt type and pulley size Key in the result Figure 10 28 Enter the Result Determine value and evaluate against belt tension acceptance standard Figure 10 29 Belt Test Results SKF Microlog GX Series 10 19 User Manual ...

Page 266: ...e reflection tape on the shaft preferably on the inside of the tool taper Start up the spindle to programmed speed and monitor speed with tachometer Figure 10 30 Monitor the Speed with a Tachometer Power the Microlog on and select the Spindle module s Speed Accuracy test Enter the tachometer speed value Evaluate against speed acceptance standard 10 20 SKF Microlog GX Series User Manual ...

Page 267: ...esonant frequency test Install tool holder in the spindle nose Run the spindle slowly to work temperature by step wise increase speed Mount the vibration sensor on a suitable area close to the bearing Mount the tachometer and aim against the spindle Power the Microlog on and select the RUCD module SKF Microlog GX Series 10 21 User Manual ...

Page 268: ...entify any dominant resonance frequencies Figure 10 33 Resonance Frequency Test Results Determine the dominant resonance frequency Select the Spindle module s Resonant Frequency test and enter the determined resonant frequency evaluate against acceptance standard 10 22 SKF Microlog GX Series User Manual ...

Page 269: ... field beneath the Home screen displays ICP error channel s 1 This indicates the Microlog has detected an open circuit on the transducer input Check that the sensor is connected to the CH1 input that there is no sensor cable damage and that the specified sensor is connected Measurement has already been taken Continue Displays when an attempt is made to overwrite existing readings Not all measureme...

Page 270: ...inning of the timestamp and type the tested machine s ID This naming convention identifies both the machine and the date timestamp of the test How to View Stored Test Results Viewing stored spindle test results is easy From the Spindle Test Template folder selection screen select the View Stored Measurements icon The Stored Cases screen displays a list of all stored surveys Figure 10 34 The View S...

Page 271: ...ated at Start Programs SKF Microlog Machine Tools Results Import Tool With the Microlog connected via Active Sync the Results Import Tool will show available files for importing to the PC When a selection is made in the Results Import Tool s left hand window the associated ccr files are displayed in the right hand window Select any of the listed ccr files you wish upload and click Import You are p...

Page 272: ...iously stored on the card All specified survey files are copied to the SD card and a Backup Complete message displays Press the OK function button you return to the Stored Cases screen How to Delete Stored Surveys From the Stored Cases screen use up down arrow buttons to select a survey for deletion or select the all option to delete all surveys Press and hold the Shift key zero up arrow to displa...

Page 273: ...Monitor uses a high frequency microphone with a directional parabolic reflector The use of patented SKF enveloping technology applied acoustically allows the Idler Sound Monitor module to distinguish between good and faulty idler rollers even in high ambient noise environments It detects faulty rollers earlier and more reliably than for instance when a maintenance worker walks the length of the co...

Page 274: ... adapter plate assembly CMAC 5142 for mounting the microphone parabolic reflector to the Microlog Important It is imperative to use headphones when operating this module The microphone s parabolic reflector is directional and misdirecting the instrument can vastly alter measurement results Listening with the headphones as you collect data greatly improves your ability to lock onto the targeted idl...

Page 275: ...rliest indicator of impact type faults The greater the harmonic activity the more severe the bearing damage Each of these four measurements is preset with a single alarm threshold that is set at a level to indicate faulty idler condition for typical conveyor situations If any one and only one of the four measurements results in alarm the Idler Sound Monitor s indicator turns yellow to indicate a s...

Page 276: ...lete stored data files to make room for new survey data Reference the How to Deleted Stored Survey Data Files on the Microlog section at the end of this manual for details Figure 11 3 Example of Idler Measurement Data Displayed in Microsoft Excel The survey s settings display above the collected data The values that are stored are Data acquisition date time True peak value of the enveloped acousti...

Page 277: ... make sure he is aiming the parabolic reflector accurately The Microlog continuously performs the four acoustic measurements and displays the measurement results using both a traffic light indicator display and in the event of an alarm an audible tone to the headphones In the event of an alarm the operator marks the rollers appropriately either physically on the idler frame or digitally with the r...

Page 278: ...ophone inside the parabolic reflector Remove the microphone s BNC connector cover Connect the microphone to the connecting cable s CMAC 5093 BNC connector Unscrew the parabolic reflector from the parabolic reflector handle and set the case aside Gently separate the two halves of the parabolic reflector handle by applying outward pressure to the top of the handle and when the top halves separate sl...

Page 279: ...g the Idler Sound Monitor instrument shoulder mount and hand held Shoulder mount requires that you use the shoulder strap Hand held requires that you use the hand strap and install the back plate for mounting the microphone parabolic reflector to the Microlog Figure 11 6 Two Methods for Holding the Instrument Shoulder Mount and Hand Held Shoulder Mount Method If using the shoulder mount method sim...

Page 280: ...to provide a more secure fit when attaching the microphone parabolic reflector to the adapter plate below To attach the microphone parabolic reflector to the adapter plate It is easiest to first attach the head phone adapter cable to the Microlog then connect the parabolic reflector to the back of the Microlog In the center of the attached adapter plate there are two mounting studs for connecting ...

Page 281: ...affle Figure 11 9 Parabolic Reflector with Wind Baffle On windy days it may become necessary to fit the microphone parabolic reflector s wind baffle CMAC 5143 over the parabolic reflector to reduce wind noise Simply stretch the wind baffle s elastic band over the parabolic reflector until snug SKF Microlog GX Series 11 9 User Manual ...

Page 282: ...red sound In the CH 1 enveloped acoustic setting the operator hears the high frequency sounds that humans cannot normally hear To accomplish this the signal is filtered to remove normal audible background noise filter range 7 kHz 40 kHz and then the signal is frequency shifted so that humans can hear the high frequency industrial sounds associated with the early onset of mechanical faults Control ...

Page 283: ...a conveyor belt idler survey From the main screen use arrow keys to highlight the Idler Monitor option and press an Enter button The Idler Monitor menu displays Figure 11 12 The Idler Sound Monitor Main Menu Function Buttons Function buttons at the bottom of the screen include Help Displays the Microlog s context sensitive help screen Setup Displays the measurement setup screen for the highlighted...

Page 284: ...und Monitor measurement data or saved measurement setups From the Idler Monitor menu highlight the New icon and select the Setup button The New Idler Sound Monitor measurement setup screen displays Figure 11 13 The New Idler Monitor Measurement Screen Function Buttons Function buttons at the bottom of the screen include Help Access the Microlog s context sensitive help Save Saves the current setti...

Page 285: ...rence Enter the conveyor asset number serial number or tag number Belt Speed Enter the conveyor s belt speed Belt speed and idler roller diameter are used to calculate roller rotation speed and bearing fault frequencies Idler Diameter Enter the conveyor s idler roller diameter Idler roller diameter and belt speed are used to calculate roller rotation speed and bearing fault frequencies The next fo...

Page 286: ...and position the microphone parabolic reflector closer to the idler rollers In addition in very high ambient noise conditions users should place more emphasis on listening to comparing and judging idler roller sound emitting from the headphones Important idler roller noise is sometimes louder on one side of the conveyor belt than the other If this is the case for your conveyor perform your survey ...

Page 287: ...tes screen where you may view or add coded notes for the current location Alert Mute Press the Alert Mute function button to mute the audible alarm in order to analyse the idler further by listening to the signal without the alarm To continue the conveyor survey Press the Mark function button to digitally indicate in the recorded data when you started the survey an asterisk is placed in the data t...

Page 288: ...the operator simply walks on to the next set of idler rollers In the event of a Suspect or Bad indication the operator typically notates the idler rollers appropriately either physically on the idler frame or digitally with the data recorded in the Microlog s memory or both and then continues to walk and measure the remaining idler rollers A Low Signal Detected message in the prompt area indicates...

Page 289: ... note entered by user To digitally note a faulty idler From the traffic light indicator screen press the shift key zero up arrow and then the Notes function button All data acquisition is temporarily halted and a Free Text Note dialog displays on the screen Use the Microlog s keypad to enter text that identifies the faulty idler rollers typically a numeric entry and press OK Your note is stored wi...

Page 290: ...sis screen displays the four individual measurement results and their alarm status in live bar graph format Figure 11 17 An Example Analysis Display In the Analysis display live bar graphs display for each of the four acoustic measurements Each measurement s current value is displayed beneath its bar graph The scale of the bar graphs is from 0 to 200 of each measurement s alarm value with a green ...

Page 291: ...rvey Data Files How to Transfer and Review Survey Data Files on Your PC Survey data files are stored in comma separated value format csv in the Microlog s Mobile Device Internal Disk IdlerMonitor folder or if you are using an SD card for data storage in Mobile Device Storage Card IdlerMonitor These csv data files may be copied to the host computer and viewed with Microsoft Excel or other host appl...

Page 292: ...itor data files to free up Microlog or SD card memory To delete stored data files on the Microlog From the main menu select the Review menu option and press an Enter button The Idler Monitor Load Setup screen displays a list of filenames for all previously saved survey setups and all stored survey data files Filenames for survey setup files are identified by the name specified for the setup file w...

Page 293: ...n SD memory card into the proper slot at the bottom of the Microlog From the Idler Monitor Load Setup screen use up down arrow buttons to select a file for backup or select the all option to back up all data Press 0 up arrow Shift and the Backup function button A display prompts whether to clear the memory card prior to backup answer appropriately IMPORTANT a Yes response deletes all data previous...

Page 294: ...easurement alarm settings applies to your conveyor conditions Analyze the baseline measurement data Using Microsoft Excel or other host software for each of the four measurements determine if the default alarm thresholds are set too low too high or are accurate as is Determine more accurate measurement thresholds Based on your analysis determine new measurement alarm thresholds as necessary Alarm ...

Page 295: ...st measurement database The CMXA 75 SL Z2 Microlog has restrictions on the types of accessories that may be used with the instrument in ATEX Zone 2 areas in some cases limiting the types of POINTs that may be collected Refer to Appendix D of this manual for important restrictions when using the CMXA 75 SL Z2 Microlog in a Zone 2 restricted area Non ROUTE Mode Operations Overview In Non ROUTE mode ...

Page 296: ...r mode allowing you to set up a new Non ROUTE measurement for immediate data collection Reference the User Setup section later in this chapter for more information Back Press the Back button to exit the Nonroute mode and return to the main screen Shifted Function buttons include Help Press the Help function button to quickly view on line help for Microlog data collection Configure Initiates Config...

Page 297: ... set up to collect both FFT and time waveform data the Non ROUTE Same measurement is FFT only Measurement parameters are set to Overlap 50 Bin Zeroing On Opposite Also based upon the highlighted measurement in the Microlog s ROUTE mode Its setup is identical to the active measurement in the active ROUTE except it collects the Opposite data format For example if the active ROUTE POINT collects FFT ...

Page 298: ...el Time Performs the same standard type vibration Acceleration measurement but collects time waveform data Measurement parameters are set to Units Accel Gs Display Format Time High pass frequency 1 1 Hz Fmax 8 kHz Lines Samples 6400 Lines 16384 Samples Averages 4 time sync If a trigger is defined for the active ROUTE point if no trigger is detected only 1 average is taken Input Channel CH1 Overlap...

Page 299: ...but does not record a spectrum Detection type set to RMS To quickly perform one of the pre set measurements In the Non ROUTE screen use the arrow buttons to highlight the desired pre set measurement and press Enter The selected measurement s data display screen appears If you select the Orbit option a setup screen displays With the measurement s data screen displayed press an Enter button to save ...

Page 300: ...tion freezes the measurement when the orbit data stabilizes In Continuous mode the Microlog constantly analyzes and updates the measurement results until you press Enter to manually freeze the measurement Orbit Setup screen fields are Units Coupling and Sensitivity apply to both channels Units Derives the measurement type and units Note that the type of measurement acceleration acc to vel velocity...

Page 301: ...n screen Trigger Level setting is set to Automatic the Trigger Level setting reads Automatic and cannot be set To manually enter the RPM From the Orbit Setup screen use the up down arrow buttons to highlight the Trigger option and press the right arrow button A drop down list appears Use the up down arrow buttons to select Off and press an Enter button Finish making any other setting adjustments t...

Page 302: ...is complete the Enter RPM display appears Figure A 4 The Enter RPM Plot Display Screen cursor value Use the arrow buttons to navigate the cursor over the spectrum to indicate the 1X RPM 1X running speed Use the P key to quickly jump from peak to peak Press the OK function button when the cursor is located on the spectrum s 1X frequency Data collection begins Collecting and Displaying Orbit Data Af...

Page 303: ...e information Retake Press to retake measurement View Use the View function button to determine how to view orbit measurements View options for orbit POINTs are Orbit Default View Point Info Orbit View Time X Time Y 1x 2x 3x Notes Press the Notes function button to access the Microlog s Notes screen where you may view or add coded notes for the current POINT Reference the Coded Notes section in th...

Page 304: ...ily set up a new measurement with user specified measurement parameters The User mode s measurement configuration remains active until modified To set up a User defined Non ROUTE measurement From the main screen use the arrow buttons to highlight the Non ROUTE option and press an Enter button You are placed in Non ROUTE mode Press the User function button The User screen displays Figure A 6 The No...

Page 305: ...er to select the highlighted option When finished setting all your measurement parameters press an Enter button to initiate data collection User Defined Measurement Options Change Name Enables you to enter an identifying name for the new measurement POINT for reference in the Microlog s Review mode and when uploaded to your ptitude Analyst host software You may specify the Machine name POINT name ...

Page 306: ...put by the Microlog Input Channel Choose from CH1 CH2 CH3 CH1 CH2 CH2 CH3 or CH1 CH2 CH3 A channel is a single point of monitoring including the sensor and the hardware needed to condition the input signal and to compare the input signal to pre determined setpoints For measurements taken with a Triax sensor select CH1 CH2 CH3 For more details on multi channel measurements refer to How to Set Up Mu...

Page 307: ...y low frequency components The Microlog s High pass filter filters the time domain with a real analog filter which attenuates based on the selected value Choose one of the 7 discrete values When setting up a measurement other than an enveloped acceleration measurement The range for normal measurements is from approximately 200 CPM to 600 CPM or the equivalent in Hz With enveloped acceleration meas...

Page 308: ...ing across time Useful for measuring transients or mechanical response measurements and in tracking mode Averages Determines the number of average samples taken for the measurement Enter the number of FFT averages to be collected from 1 to 4096 Four to six averages are adequate and are normally used for machine monitoring The higher the number of averages the slower the data collection Overlap Ove...

Page 309: ...minus to determine whether the trigger occurs on a rising or descending signal triggers on an ascending signal triggers on a descending signal Trigger Level Enter a trigger level value in the text field and press an Enter button If the Configuration screen Trigger Level setting is set to Automatic the Trigger Level setting reads Automatic and cannot be set Bin Zeroing Works in conjunction with the...

Page 310: ...e or specify running speed from the spectral display For all multi channel measurements you may choose to display the trace for any of the monitored channels or for all channels simultaneously Multi Channel Measurement Options Overview Orbit CH1 time vs Ch2 time unfiltered or order filtered up to 8 orders plus DC gap measurement Multi Spectrum Spectra of all input channels captured and displayed s...

Page 311: ...to setting up your multi spectrum time measurement use the Configuration menu s Single Shot or Continuous option to specify the measurement s display action From the main screen use the left right up down arrow buttons to select the Non ROUTE option You are placed in Non ROUTE mode Press the User function button The Non ROUTE user defined measurement setup screen displays Use the up down arrow but...

Page 312: ...en Reference the Multi Channel Cursor Display Expand and Full Scale Adjustments section later in this chapter for more information Multi spectrum display screen functions are the same as ROUTE or Non ROUTE spectral display screen functions Function buttons operate the same as previously described View menu options for two channel displays are Two Chan FFT Default View POINT Info Two Chan FFT No Ov...

Page 313: ...e displays the first channel CH1 or CH3 the lower trace displays channel 2 Dual Time display screen functions are the same as ROUTE or Non ROUTE time waveform display screen functions View menu options are Two Chan FFT Default View POINT Info Two Chan FFT No Overall Ch1 FFT Default View Ch1 FFT No Overall Ch2 FFT Default View Ch2 FFT No Overall SKF Microlog GX Series A 19 User Manual ...

Page 314: ...the spectrum and time for channel one The second two traces display the spectrum and time for channel two View menu options are Two Chan FFT and Time Default View POINT Info Two Chan FFT and Time No Overall Ch1 FFT and Time No Overall Ch1 FFT Default View Ch1 FFT No Overall CH1 Time Only Ch2 FFT and Time No Overall Ch2 FFT Default View Ch2 FFT No Overall CH2 Time Only A 20 SKF Microlog GX Series U...

Page 315: ...s show three spectra one for each axis View menu options are Triax Default View POINT Info Triax No Overall Ch1 FFT Default View Ch1 FFT No Overall Ch2 FFT Default View Ch2 FFT No Overall Ch3 FFT Default View Ch3 FFT No Overall Triax Spectrum Time measurements include options to view the Default View spectrum FFT and Time or Time Only for each channel When finished collecting and viewing your mult...

Page 316: ...ow buttons to highlight the Display Format option and press the right arrow button A drop down list displays Use the up down arrow buttons to select Phase and press an Enter button Use the up down arrow buttons to highlight the Input Channel option and press the right arrow button A drop down list displays Use the up down arrow buttons to select either CH1 CH2 or CH2 CH3 and press an Enter button ...

Page 317: ...y enter the RPM value from the spectral display After autoranging and data acquisition is complete a spectral display appears Figure A 12 The Spec Spectral Display Screen cursor value Use the arrow buttons to navigate the cursor over the spectrum to indicate the 1X RPM 1X running speed Use the P key to quickly jump from peak to peak Press the OK function button when the cursor is located on the sp...

Page 318: ...scroll through the phase table values When you are finished collecting and viewing the cross channel phase measurement data press an Enter button to store your data and return to the Non ROUTE mode s main screen Multi Channel Cursor Display Expand and Full Scale Adjustments For multi channel measurements the cursor operates simultaneously on all traces even if one is hidden This is also true for F...

Page 319: ...an be manually entered or taken from a spectrum by positioning the cursor on the 1X spectral peak Reference the Orbit Operation Dual Spectrum Dual Time Operation or Cross Channel Phase Operation sections for more information on triggerless operation applications Orbits typically require a trigger else the display shows a random moving cursor around the trace and has no useful meaning Therefore the...

Page 320: ...he desired Non ROUTE measurement POINT and press the Review function button The Review Data screen launches Pressing an Enter button also displays the Review Data screen Review Data screen functions are identical to those in ROUTE and Non ROUTE mode Press an Enter button to return to the Non ROUTE Review screen To view the Non ROUTE measurement s Pt Info screen Press the Help function button to vi...

Page 321: ...upgrade for CMXA 75 Also requires Balancing and Run up Coast down modules and Spindle accessories sold separately see below CMXA MOD MTX SL SKF Microlog Idler Sound Monitor field upgrade for CMXA 75 Also requires Idler Sound Monitor accessories sold separately see below CMXA MOD ISM SL GX M to GX F field upgrade CMXA 75 GXM F SL GX R to GX M field upgrade Includes one additional cable acceleromete...

Page 322: ......

Page 323: ... C 1 Headphones Connected to GX Series Microlog To connect the headphones to the Microlog Connect the Headphone cable to the USB Host CH 4 Headphone connector on the Microlog Connect the headphones jack plug into the socket of the Headphone cable Headphone Control Using the Keypad The data collection screen s title bar indicates the monitored channel CH 1 to CH 4 and the headphone volume 0 to 10 o...

Page 324: ...Series Microlog Strobe light use requires accessory cables CMAC 5404 input cable and CMAC 5406 output cable Figure C 2 Strobe Light Connected to GX Series Microlog To connect the strobe light to the Microlog Connect the input cable to the USB Host CH 4 Headphone connector on the Microlog Connect the input cable s jack plug into the socket of the strobe light Connect the output cable into the USB D...

Page 325: ... sealing caps p n 012 10372 or 012 10776 6 The SD card shall not be disconnected in hazardous area It must be installed in safe area only 7 Only accelerometers listed in table 1 may be used with the instrument in a hazardous area Accessories Only the following accessories may be used with the instrument in the hazardous area Accelerometers Manufacturer Model SKF Badged Wilcoxon 762 33 CMSS762 CA 7...

Page 326: ...awing 090 22600 1 Rev B Connecting an accelerometer to the instrument An accelerometer can be connected to the rear panel connectors marked CH1 and CH2 The connection options are shown in the following diagram D 2 SKF Microlog GX Series User Manual ...

Page 327: ...Safety Instructions Instrument Installation Drawing 090 22600 1 Rev B Memory cards Manufacturer Model Sandisk Secure Digital Card SDSDx yyy SKF Microlog GX Series D 3 User Manual ...

Page 328: ...sonnel in accordance with the applicable codes of practice 6 Repair of this equipment shall be carried out by the manufacturer or in accordance with the applicable code of practice 7 The seals and casing of the equipment must be inspected regularly for damage or wear and tear If any damage is found then the manufacturer must be contacted 8 The certification of this equipment relies on the followin...

Page 329: ... than 2800g and must be mechanically protected against impacts 4J For Group II B applications the accelerometer must not be subject to acceleration greater than 4900g 13 The Wilcoxon type 797 35 accelerometer must not be subject to acceleration greater than 3200g 14 Do not change or replace the battery pack in the hazardous area 15 All unused connectors except Channels 1 and 2 must be fitted with ...

Page 330: ...n MTN 1100I BAS02ATEX1057X CMSS 2210 Optical speed phase sensors1 Manufacturer Model Certificate SKF Badged Compact instruments MiniVLSxxx N BAS02ATEX3259X CMAC 5030K Z2 Straps Part Number Description SKF Part Number STR 8 Hand Strap CMAC 5020 STR 9 Neck Strap CMAC 5113 1 Other Ex approved equipment may be used as long as they do not invalidate the entity parameters listed D 6 SKF Microlog GX Seri...

Page 331: ... analysis Baud Rate Adjustable serial communication transfer rate Measured in bits per second Bit Smallest unit of computer information storage Equivalent to a choice of a one or a zero Byte A unit of computer information storage usually equal to eight bits or one character Center Frequency For a bandpass filter the center of the transmission band Centerline Position The average location relative ...

Page 332: ...nsor A signal used in rotating machinery measurements generated by a sensor observing a once per revolution event Keyphasor is a Bently Nevada trade name Linear Averaging In a DSA averaging of time records that results in reduction of asynchronous components Lines Common term used to describe the filters of a DSA e g 400 line analyzer Low Pass Filter A filter whose transmission band extends from a...

Page 333: ... a particular forcing frequency A resonance is typically identified by a substantial amplitude increase and related phase shift RMS The square root of the sum of a set of squared instantaneous values ROUTE A measurement POINT collection sequence Run Up Run Down The monitoring of machinery conditions during a start up or shut down process Sensitivity The ratio of magnitude of an output to the magni...

Page 334: ......

Page 335: ...6 data display screens 1 16 hierarchy list screens 1 16 main screen 1 14 setup screens 1 15 attaching strap 1 29 audible tone 11 16 audio file 6 1 audio recording 7 1 7 7 average balancing 5 11 averages 4 11 A 14 averaging exponential 4 11 B backing up 10 25 backing up stored readings 4 17 balancing 1 5 5 1 2 plane setup 5 26 30 30 rule 5 16 correction type 5 7 estimating trial weight 5 15 manual ...

Page 336: ...2 data collection A 22 display screen A 23 measurement setup A 22 phase tables A 24 cursor multi channel 4 28 A 24 peak 3 14 two channel 3 18 cursor mode 3 13 D data transfer 3 2 data collection 3 25 cross channel phase A 22 A 23 MPA measurements 3 27 multi spectrum A 17 multi time waveform A 17 orbit A 8 process measurements 3 19 retaking measurements 3 25 route 3 4 skipping measurements 3 25 dat...

Page 337: ...ta entry display screen 3 21 non route mode A 2 orbit display screen A 9 overview 1 12 process display screen 3 20 route 3 6 route manager 3 3 spectral display screen 3 12 time waveform display screen 3 16 user screen A 10 G gE pre set measurement A 5 global measurement settings 2 7 grade bands 9 6 grade boundaries 9 6 grade labels 9 6 9 12 grades bands 9 12 boundaries 9 15 labels 9 12 levels 9 15...

Page 338: ... no 9 15 logarithmic 4 10 M machine picture 9 6 9 9 machine speed 2 8 main screen 1 9 manual entry balancing calculations 5 6 manual function button 3 21 mark button 11 15 markers harmonic 3 14 max rec time 6 7 7 5 8 7 maximum acq time 7 5 measurements acoustic 11 3 memory card 1 27 memory operations 2 5 delete all routes 2 5 initialize 2 5 troubleshooting 2 13 microlog 1 4 microphone 11 6 mobile ...

Page 339: ...reen A 6 orbit setup A 6 coupling A 6 ext trigger slope A 7 level A 7 sensitivity A 7 trigger A 7 units A 6 overall vibration 6 3 overlap 4 11 A 14 overload clearing 3 25 signal 3 25 P parabolic reflector 11 6 pause recording 6 4 peak cursor 3 14 phase 4 7 4 10 phase tables A 24 phase cross channel A 22 pickup 3 24 picture 9 18 10 4 point information A 26 polar 5 10 polar correction 5 7 post proce...

Page 340: ...ng time 7 2 setup 7 4 start stop speed 7 5 state 7 6 taking data mode 7 6 run up coast down 6 1 7 1 S same pre set measurement A 3 samples lines A 13 save meas results 4 14 meas setup 4 12 4 14 4 22 4 32 4 36 4 38 save button 11 14 saving meas 7 26 saving screens 1 18 saving settings 11 14 saving test results 9 21 10 23 saving test template 9 16 scroll columns 9 20 10 6 SD card 1 9 1 27 4 17 6 7 7...

Page 341: ...test template 9 1 10 1 copy 9 3 custom 9 2 10 1 folders icons 9 17 10 4 location 9 3 pre configured 9 1 10 1 saving 9 16 selection 9 17 10 4 setup 9 4 spindle 10 1 transfer 10 2 transfer to AX 9 2 text note 11 17 three channel review in route 3 31 time remaining 6 4 time setting 2 5 time waveform 6 1 time waveform data 3 14 time zone 2 5 title screen 1 14 10 2 tone 11 16 traffic light indicator 11...

Page 342: ...r A 13 input channel A 12 level A 15 lines samples A 13 overlap A 14 sensitivity A 13 type A 14 units A 12 window 4 12 A 14 user defined non route measurements A 10 V variable sensor type 4 9 velocity pre set measurement A 4 version number 1 14 10 2 vibration threshold 5 7 view 3 13 grid 3 13 options 3 13 view signal 4 10 volume control 11 10 W warning messages 9 21 10 23 waterfall plot 7 15 displ...

Reviews: